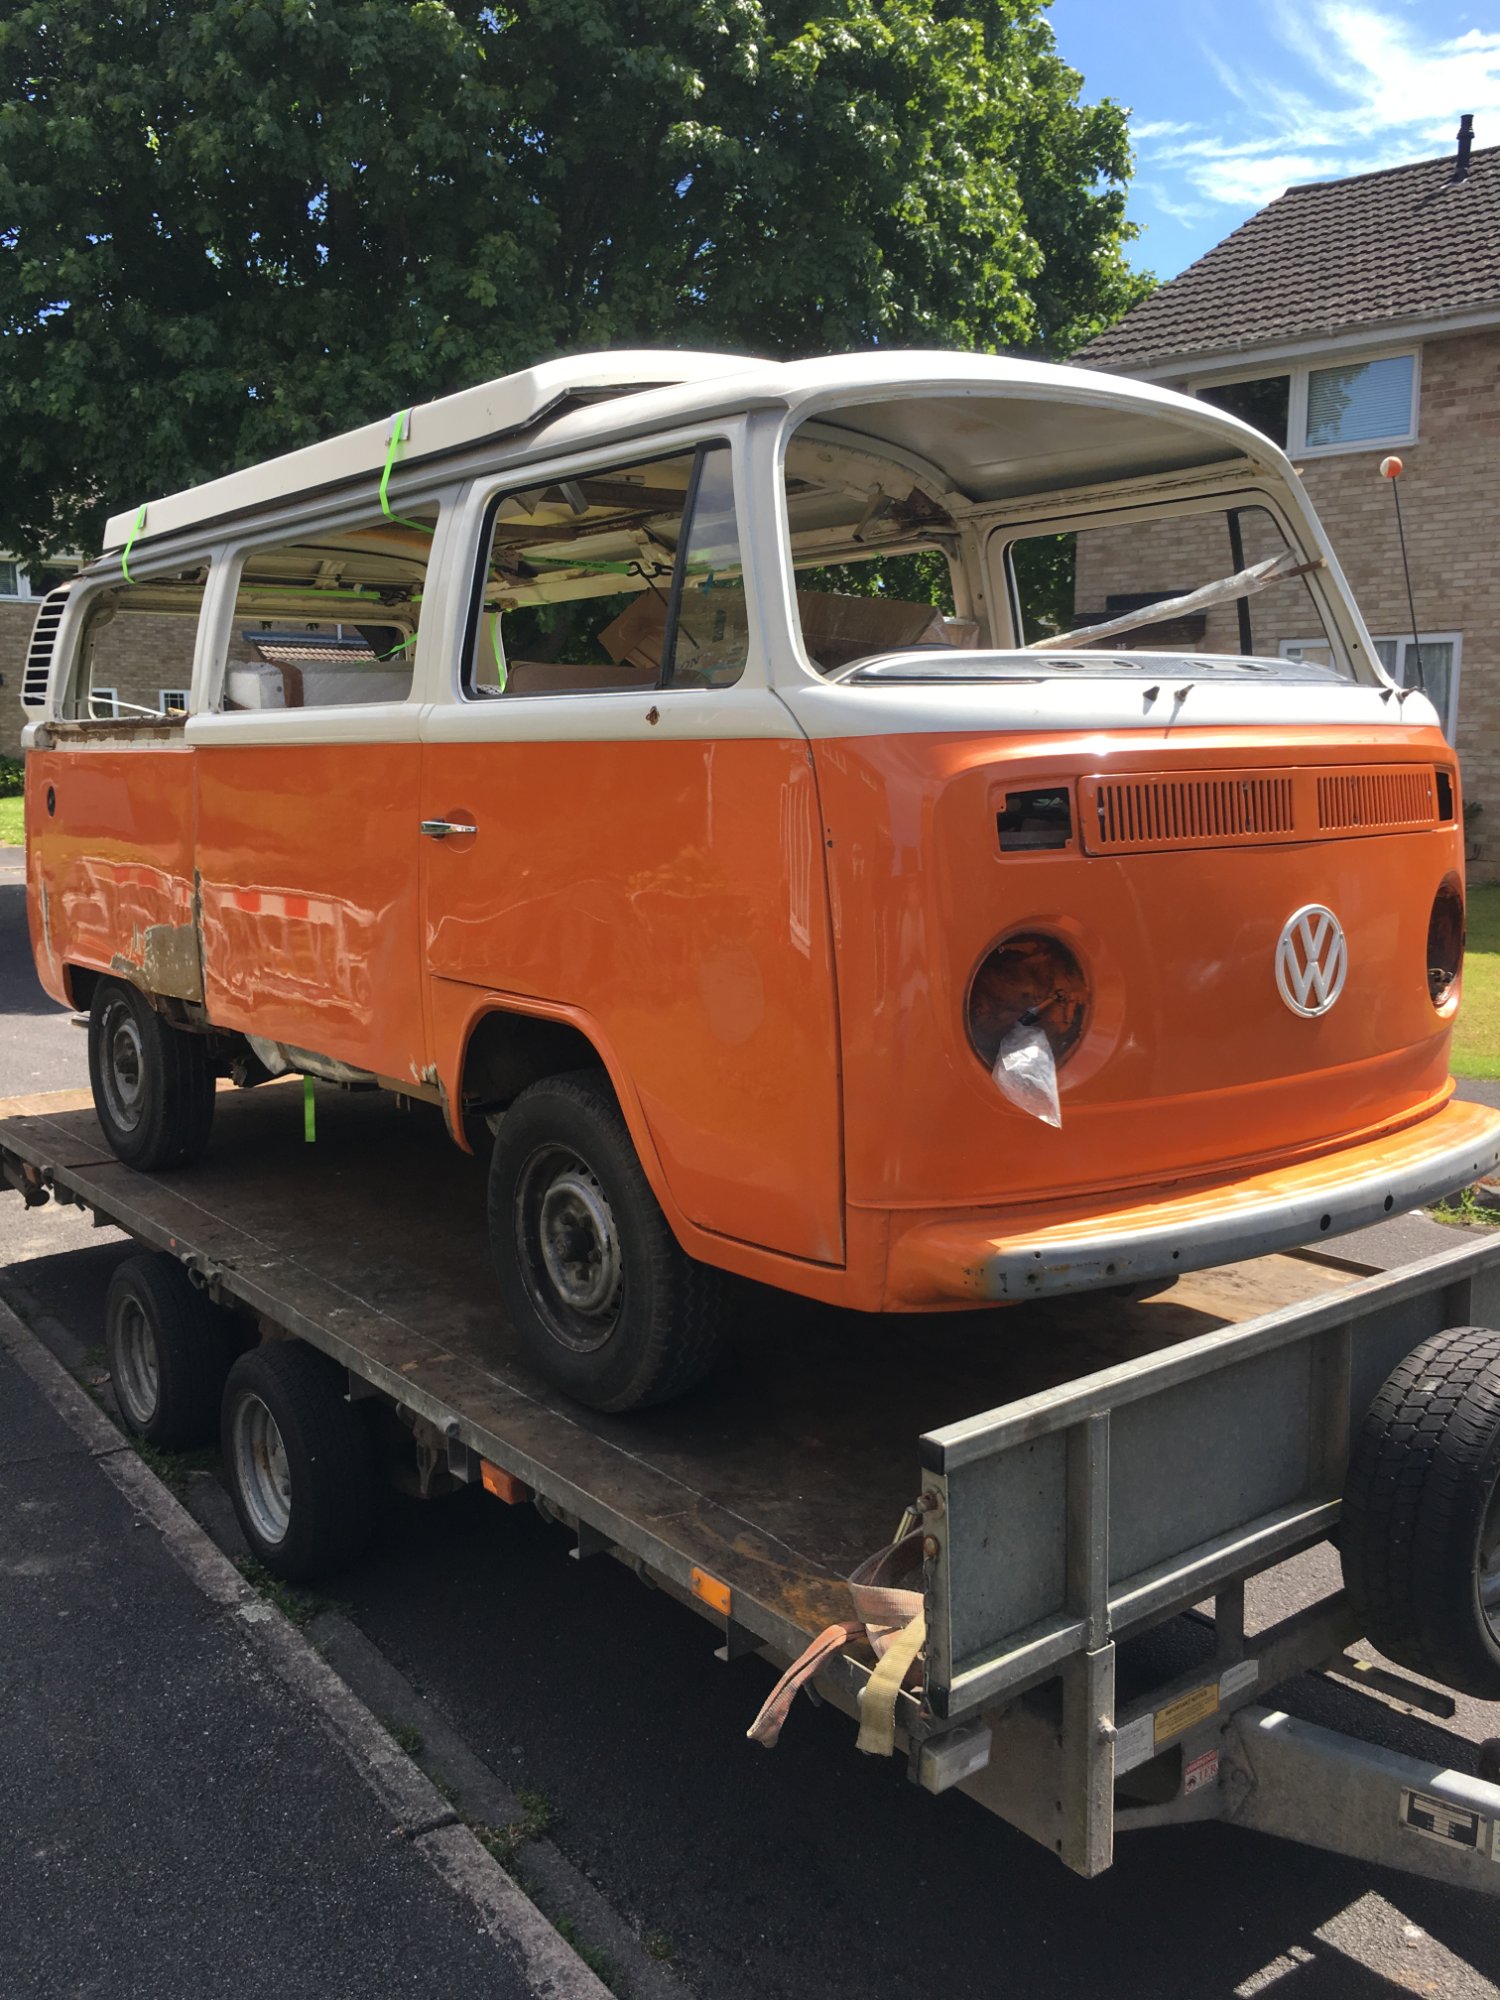
When I bought Jenny in 2017, I didn't ask "how long will this take?" I was too busy being overwhelmed by the rust, the scale of the project, and the sheer amount of work needed. But if I had asked, someone would have said "about 2 years" and I would have nodded, thinking I understood.
I didn't. Not really.
My timeline: 2021-2024 on the road (pre-engine rebuild), then engine rebuild 2024 through Autumn 2025, and she's been running ever since. The interior is an ongoing project and will never be finished—but that's part of the fun.
This guide breaks down exactly what happens in each restoration phase, how long it actually takes, and the decision points that will define your entire project.
The Real Math: Budget, Skills, Timeline
Before I dive into phases, here's the brutal truth: your budget determines your timeline more than anything else.
If you can afford to outsource the big jobs (rust removal, welding, painting), your timeline shrinks dramatically. If you're DIY-ing everything, it stretches. My restoration worked because I outsourced the structural work to a specialist restoration shop — the team who understood classic VWs and wouldn't cut corners. See the choosing a restoration shop guide for how to find the right people.
Could I have done it myself? Honestly, no — not without serious training on the welding front, and I didn't want to go down that route. Welding is a skilled trade. One bad weld on a structural component and you've compromised the entire vehicle's integrity. I'd rather have it done right and be safe on the road.
Here's something else important: I naively thought 6 months would be a sensible timeline when I started. It's not. The best restoration shops are busy — sometimes booked a year or longer in advance. That's a good sign (they're in demand, they do good work), but it means patience is part of the project. See the choosing a restoration shop guide for more.
But here's reality:
- Time is a luxury — I have family, work, and life. Fitting restoration around all that as DIY? Realistically 4-5 years minimum
- Tools cost money — quality welding equipment, sandblasting, spray systems: thousands of pounds
- Mistakes are expensive — bodge a repair, you're redoing it later. That's double cost
My advice: Know yourself. Are you patient? Skilled? Do you have a garage, tools, and 3-4 hours most evenings? Go DIY on what you can handle. Is your time precious? Can you afford to outsource? Do it. There's no shame—and it means you actually finish your project instead of it sitting half-done in the garage for a decade.
The VW community is incredibly helpful. Whether you're DIY-ing or outsourcing, forums like The Samba, Reddit's r/Volkswagen and r/vwbus, the VW T2 Forum, and local VW clubs have thousands of people willing to help. Ask questions. Learn constantly. Absorb knowledge from books, YouTube, blogs, and fellow enthusiasts. The community is so generous—take advantage of it.
Before You Start: Planning & Inspection (Weeks 1-4)
This phase is non-negotiable. Before spending a penny, you need to understand what you're actually restoring.
Budget allocation: £500-1,000 (inspection tools, initial assessment)
Timeline: 2-4 weeks
What to Do in This Phase:
- Read the books first. Buy How to Keep Your Volkswagen Alive by John Muir → (the bible), the Haynes Bay Window Restoration Manual →, and How to Restore Volkswagen Bus by Paxton →
- Get proper inspection tools. Screwdriver →, work light →, multimeter →
- Inspect every inch. Get underneath. Poke at rust. Don't guess—measure and document
- Create a scope document. What needs doing? Prioritize: safety-critical first (brakes, structural), then body, then cosmetics
- Get a pre-purchase inspection if buying. Pay £150-300 for a specialist to check for hidden problems. Saves thousands
This phase isn't glamorous, but it's where you decide if this project is even worth doing. My inspection revealed £8,000+ worth of hidden rust. If I'd done the planning properly, I'd have known that upfront and budgeted accordingly.
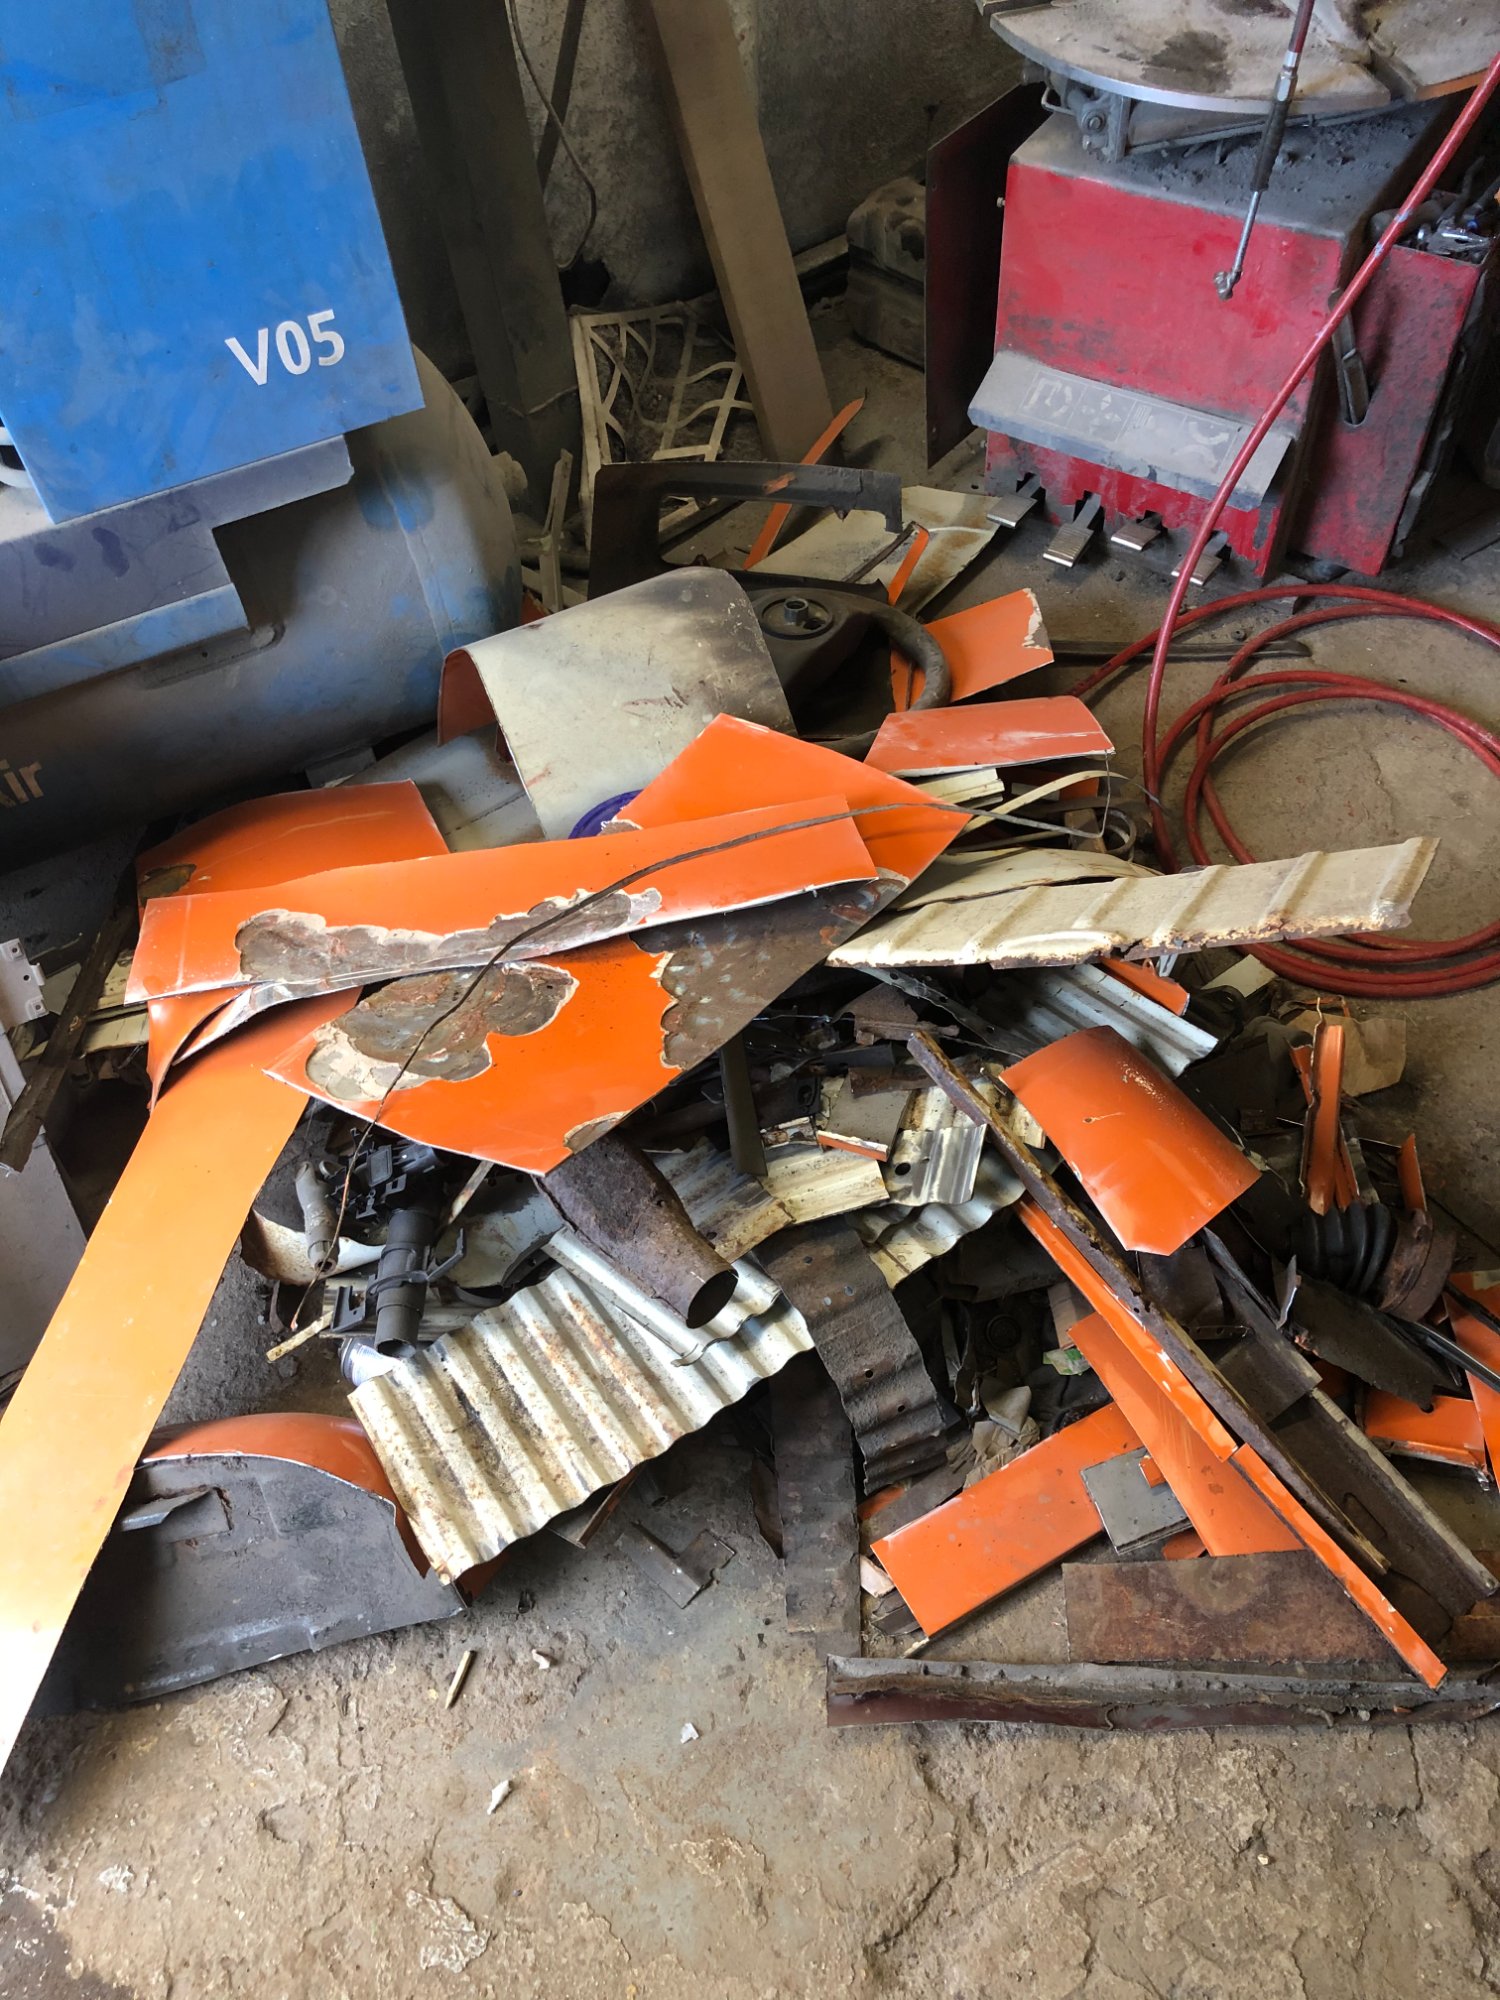
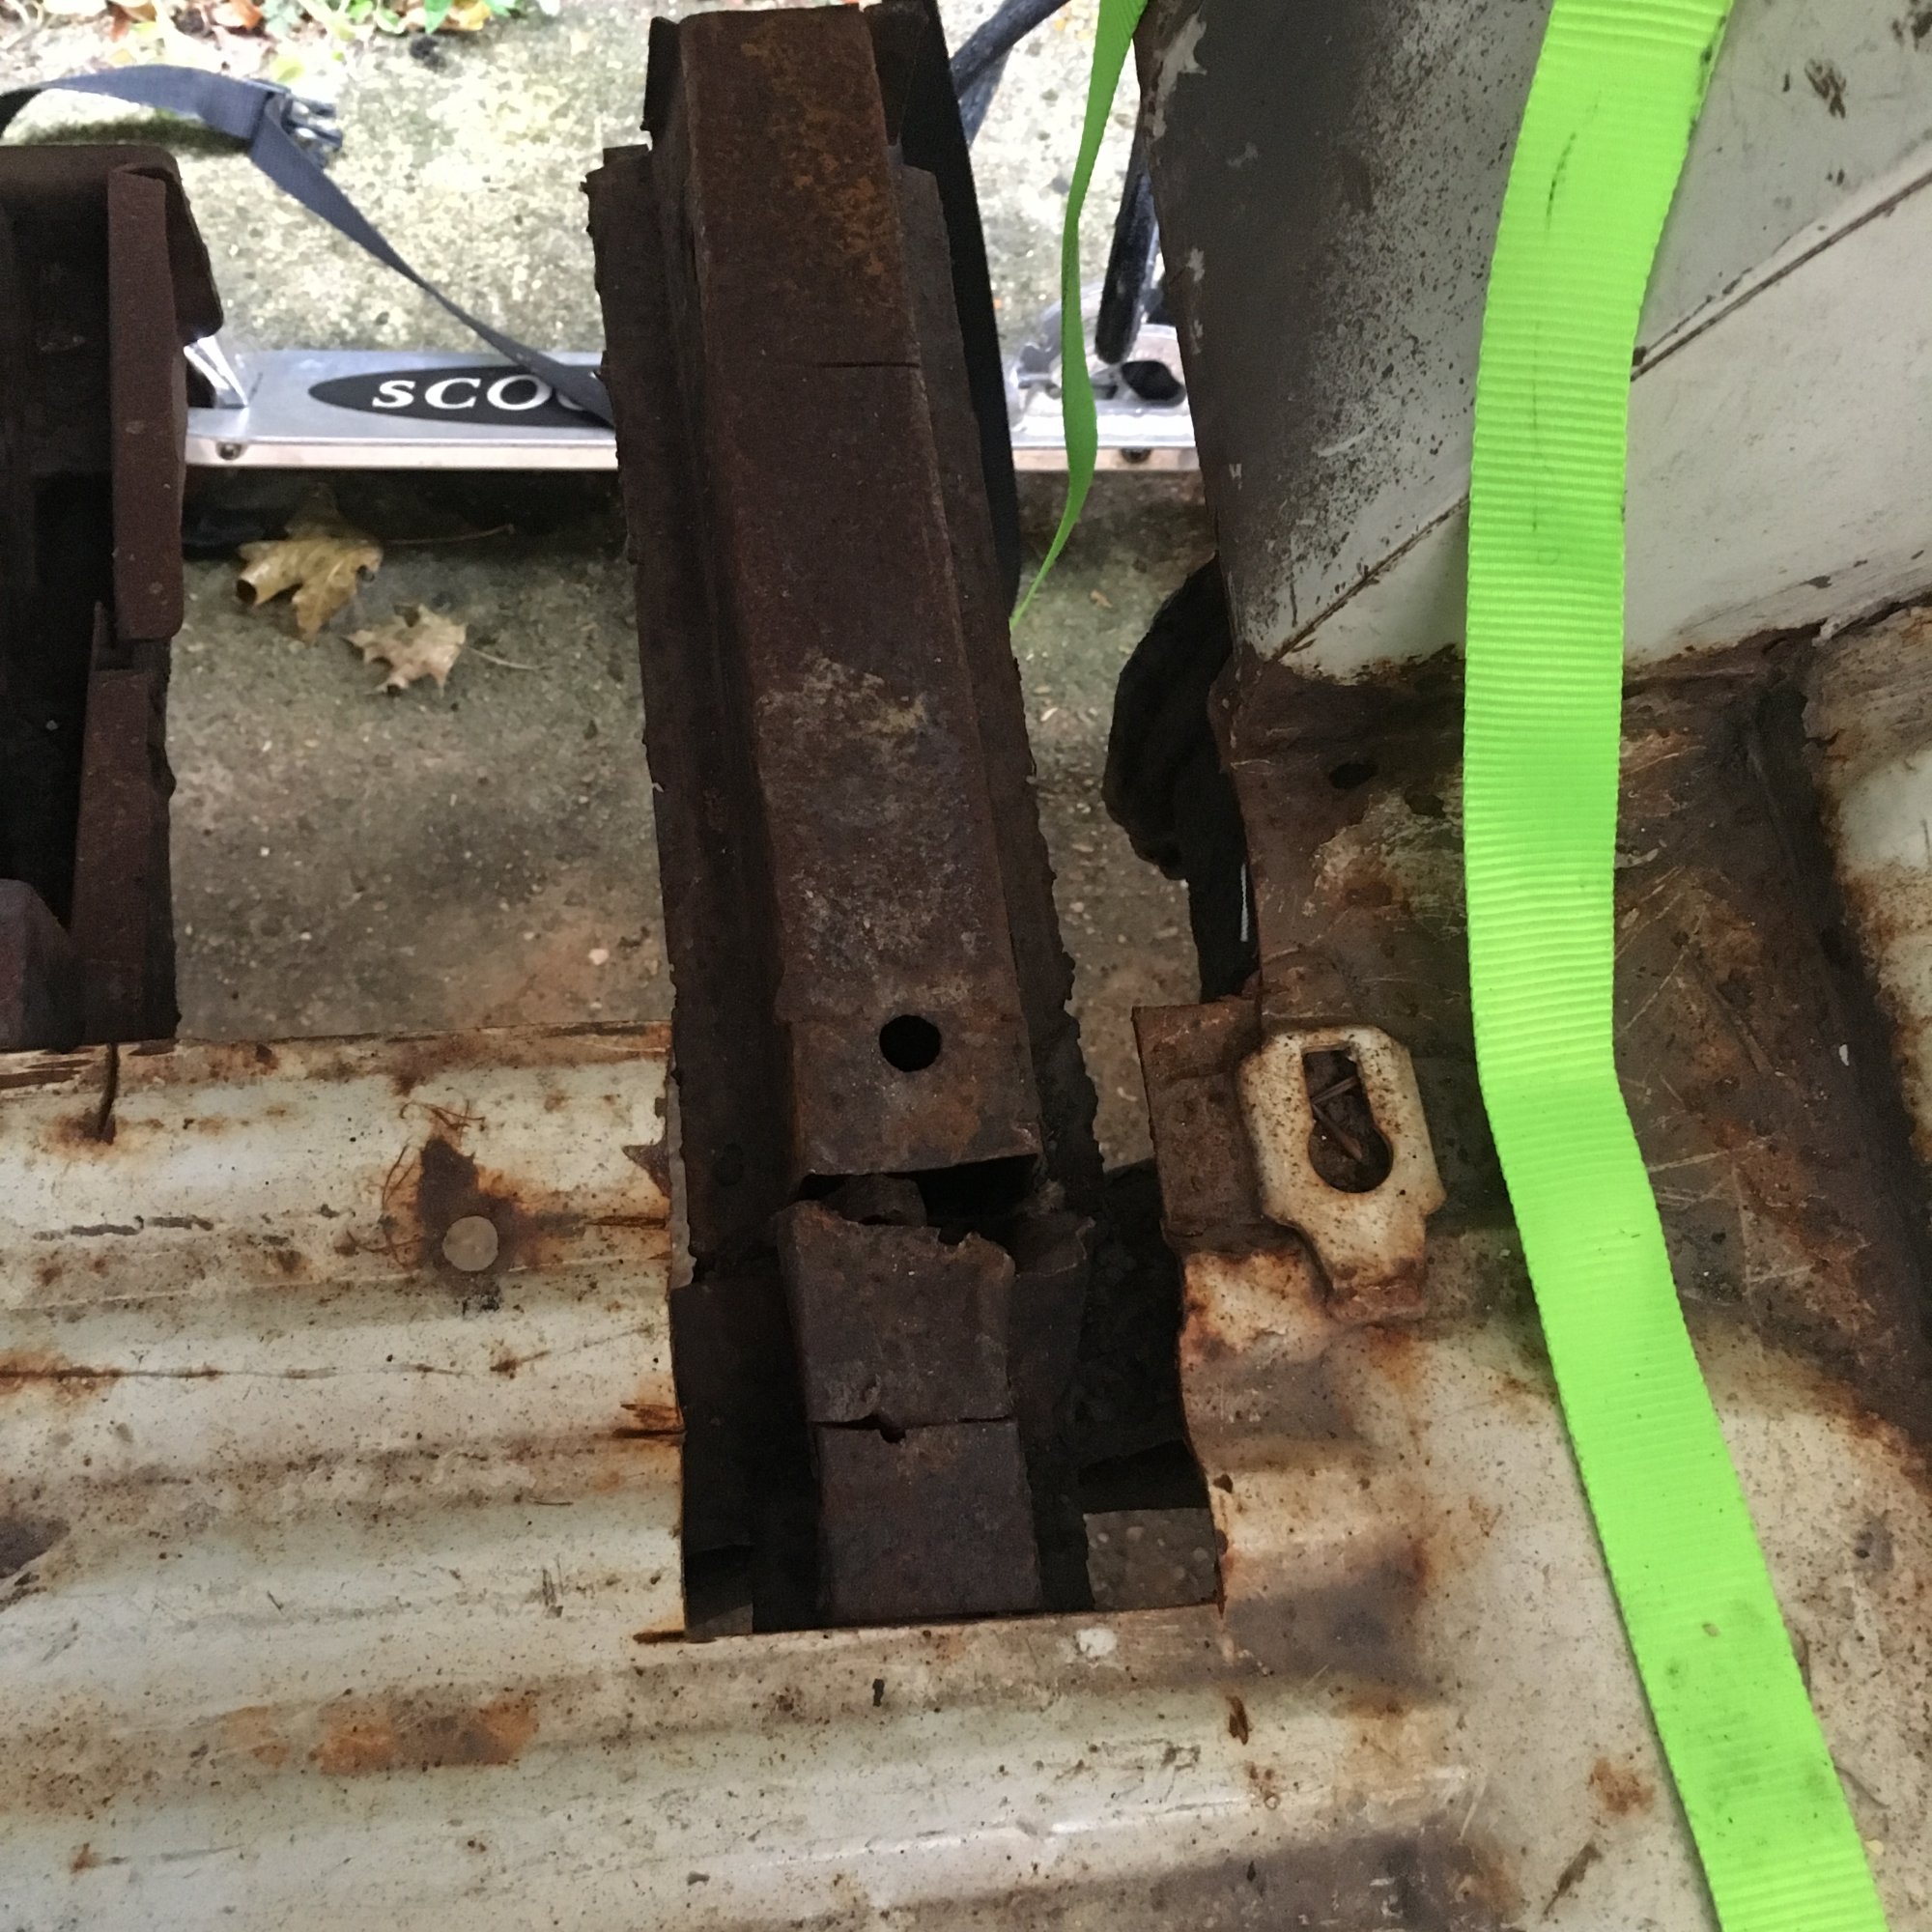
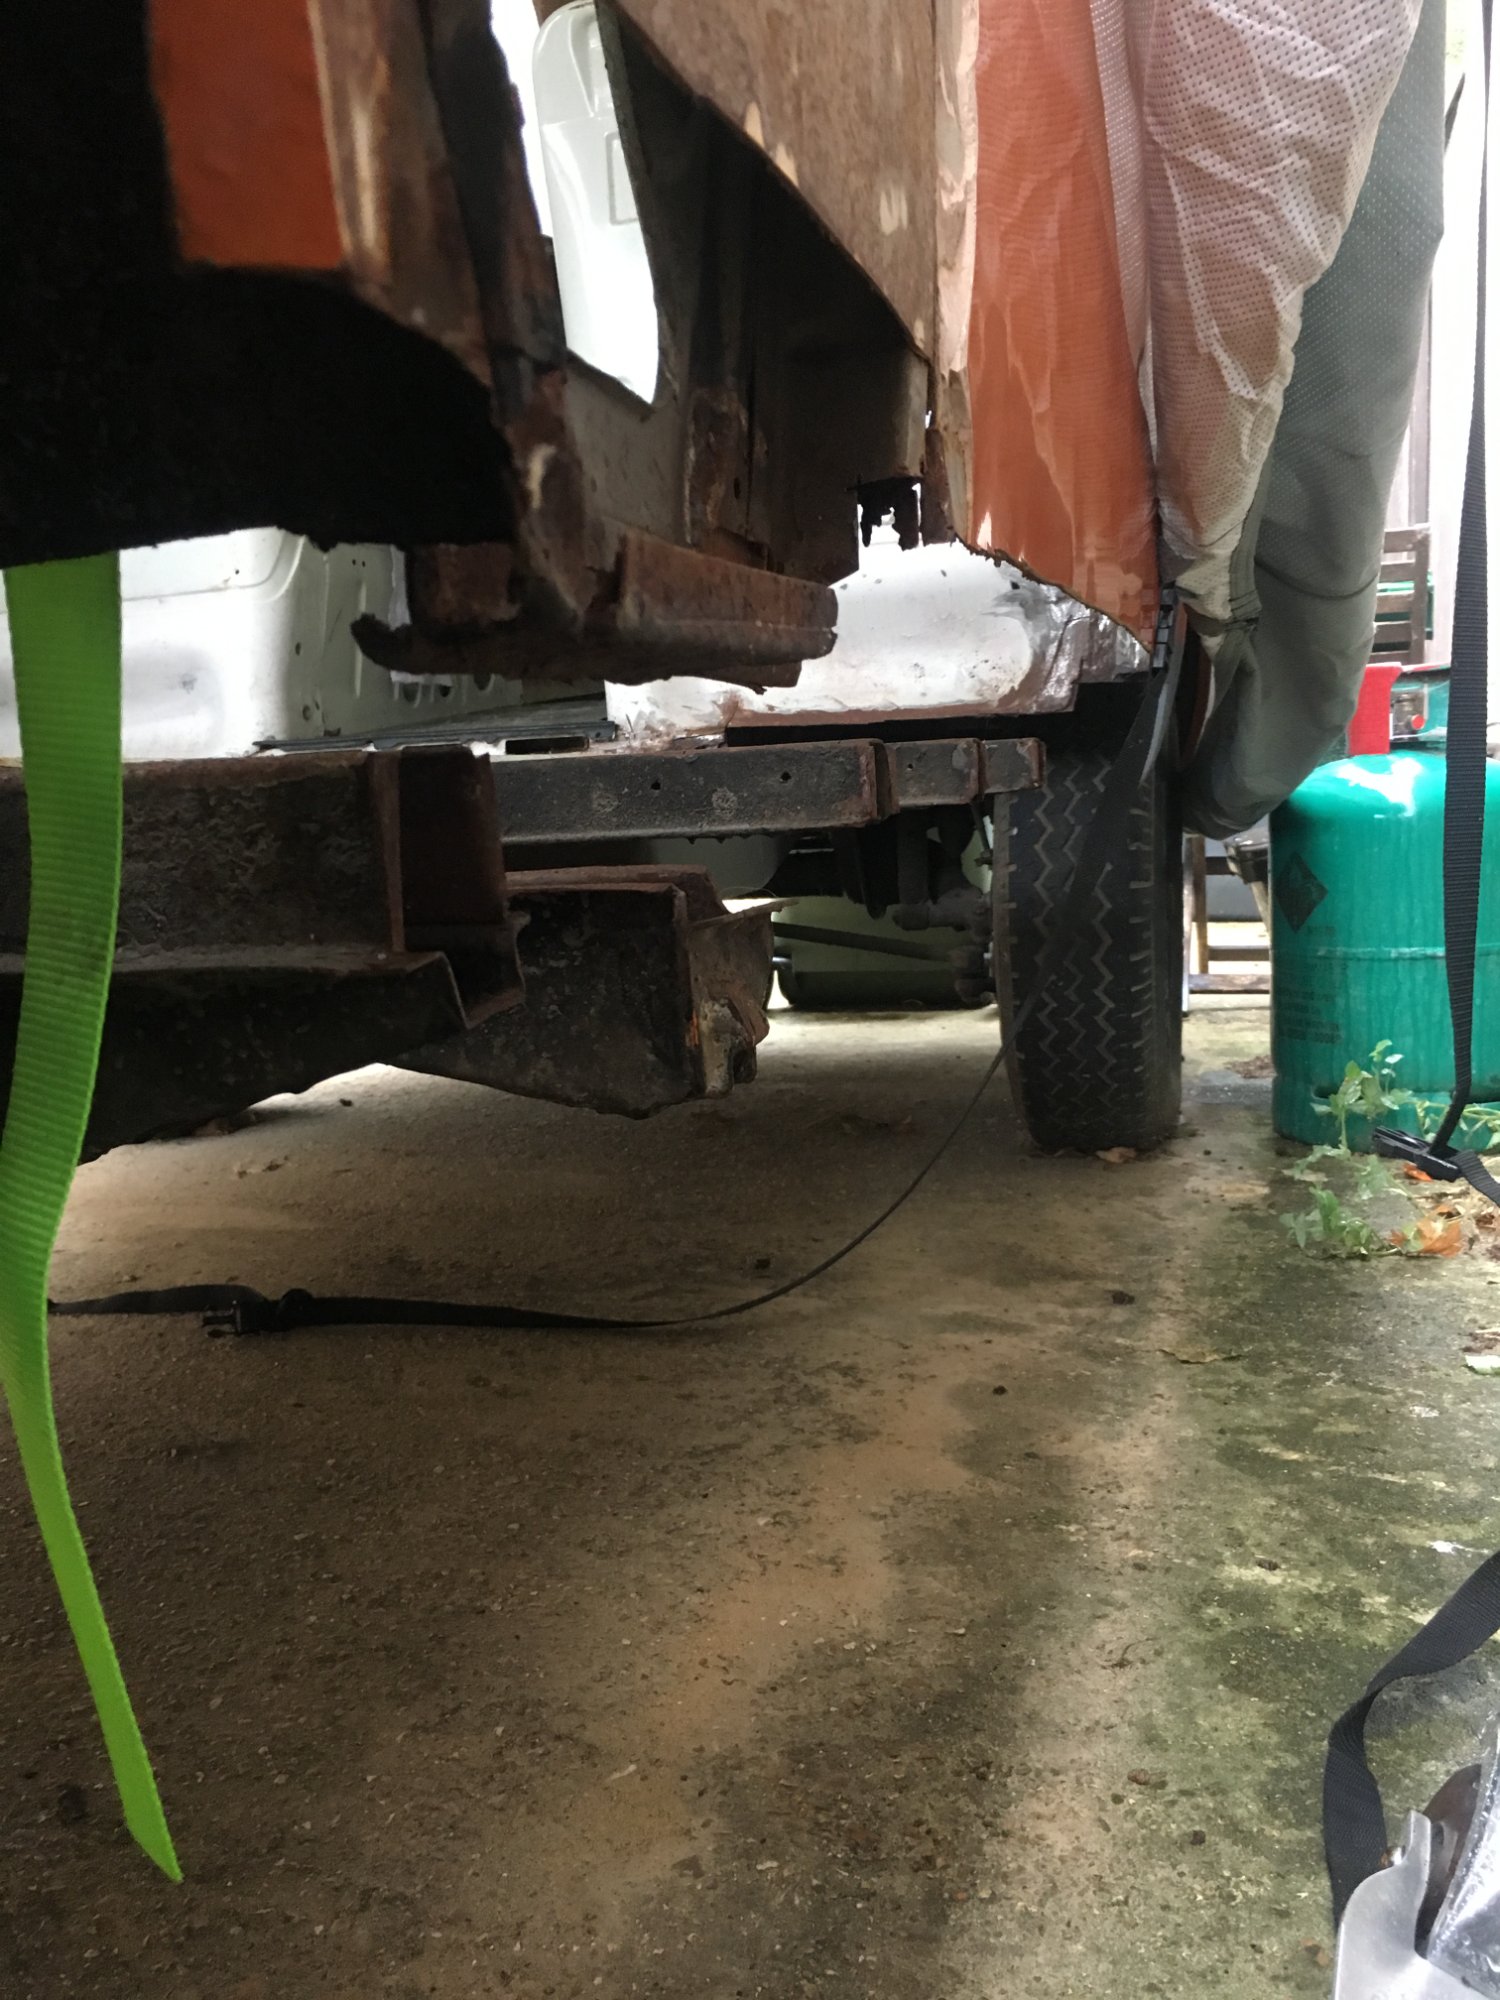
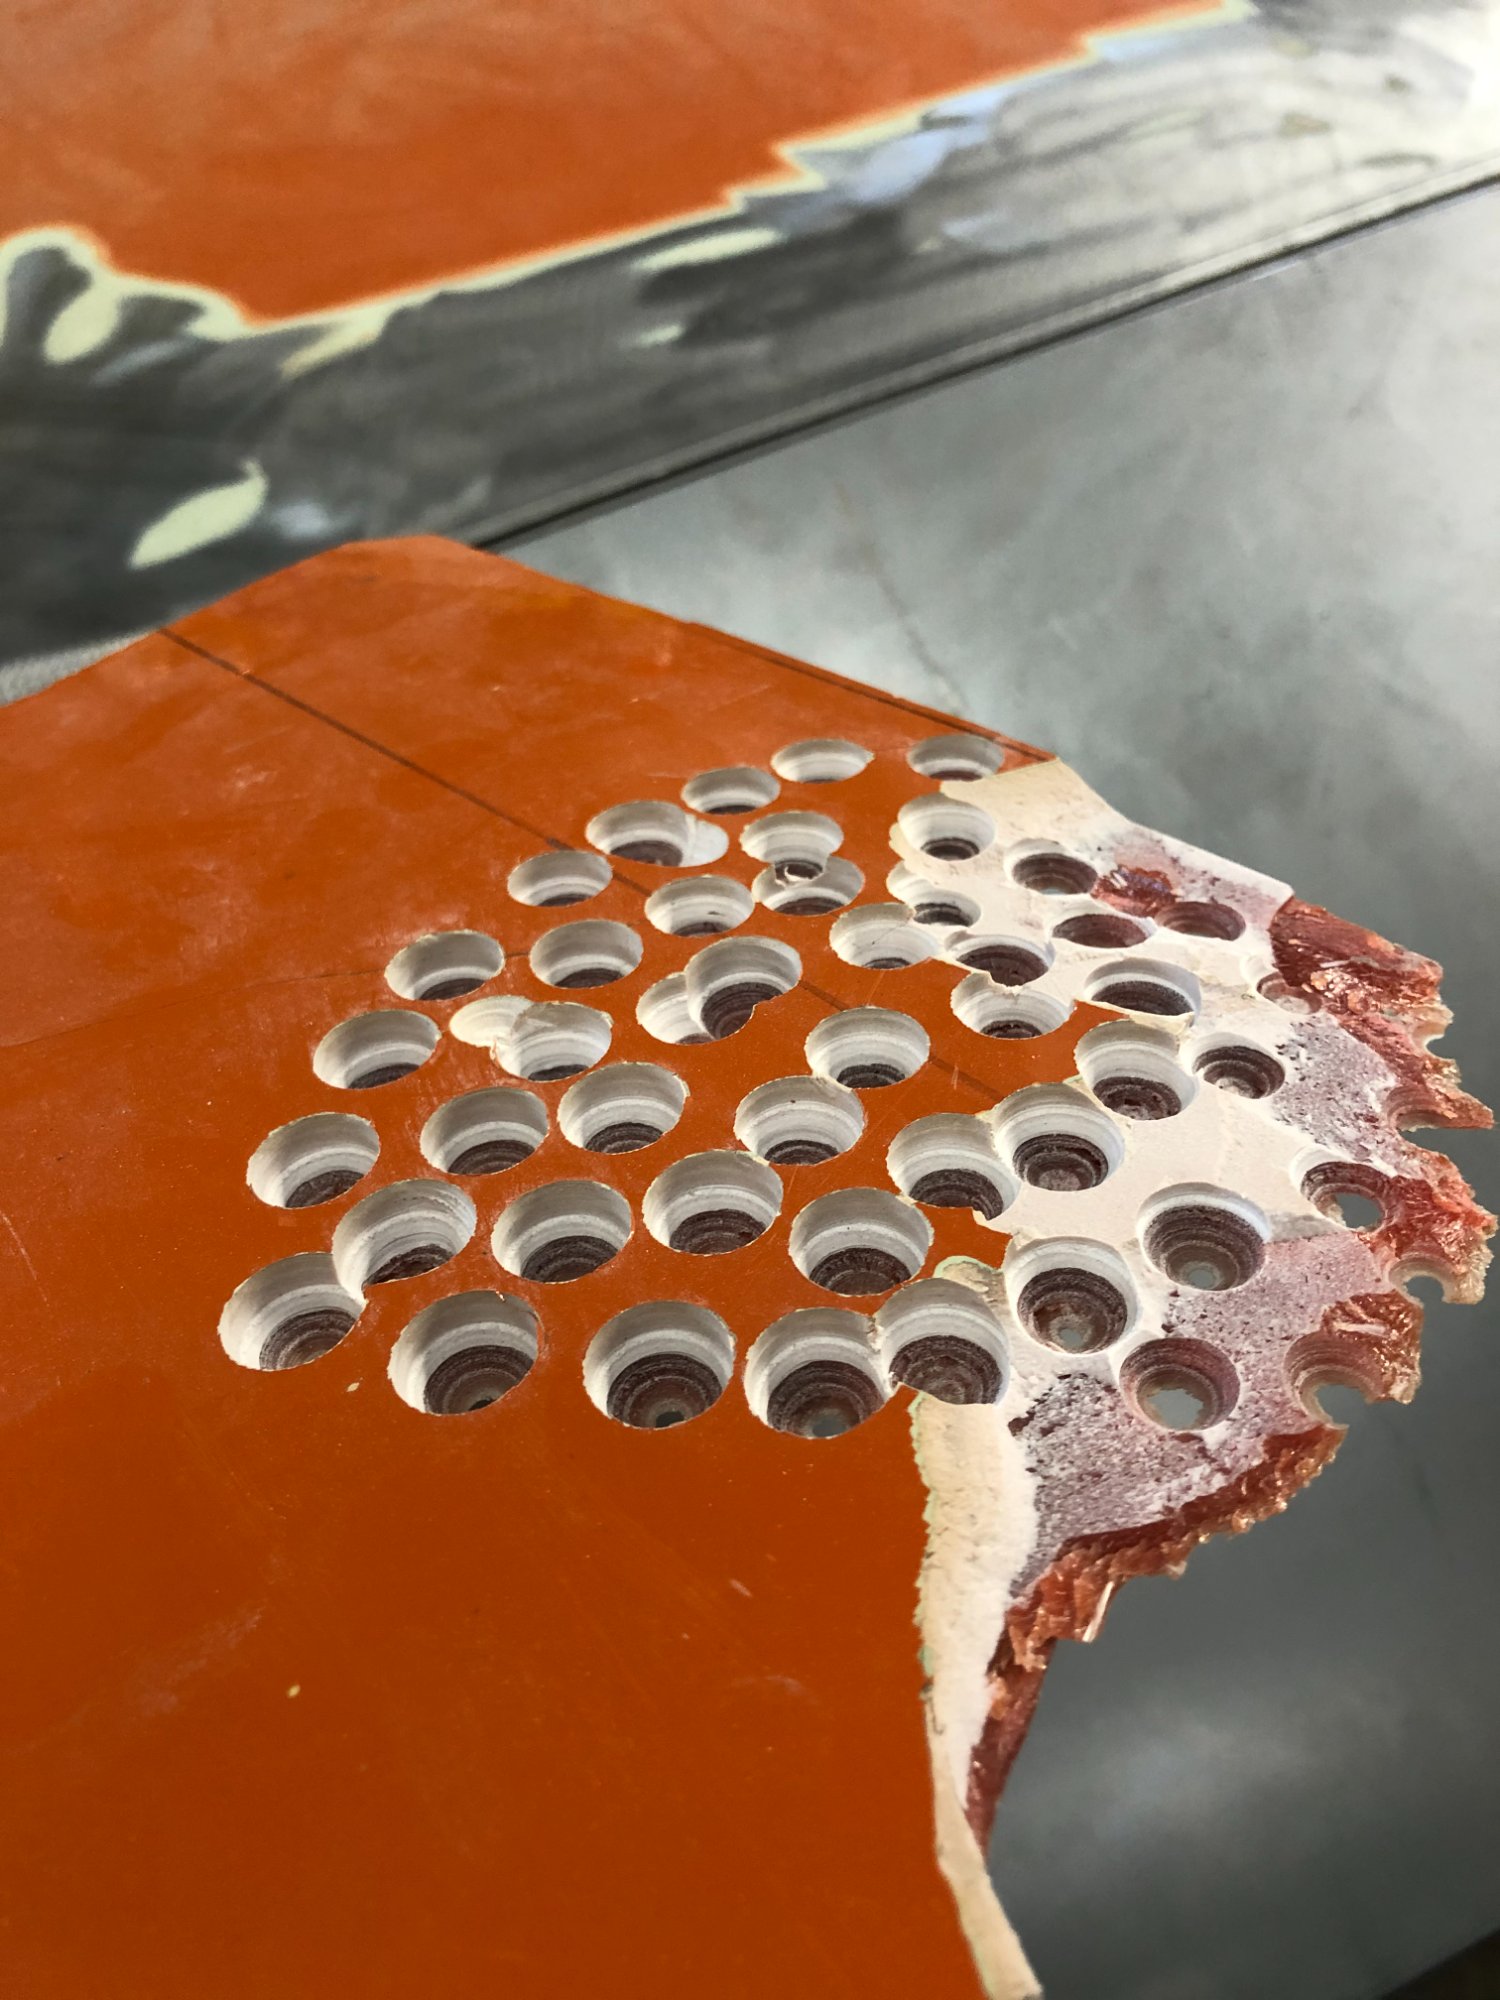
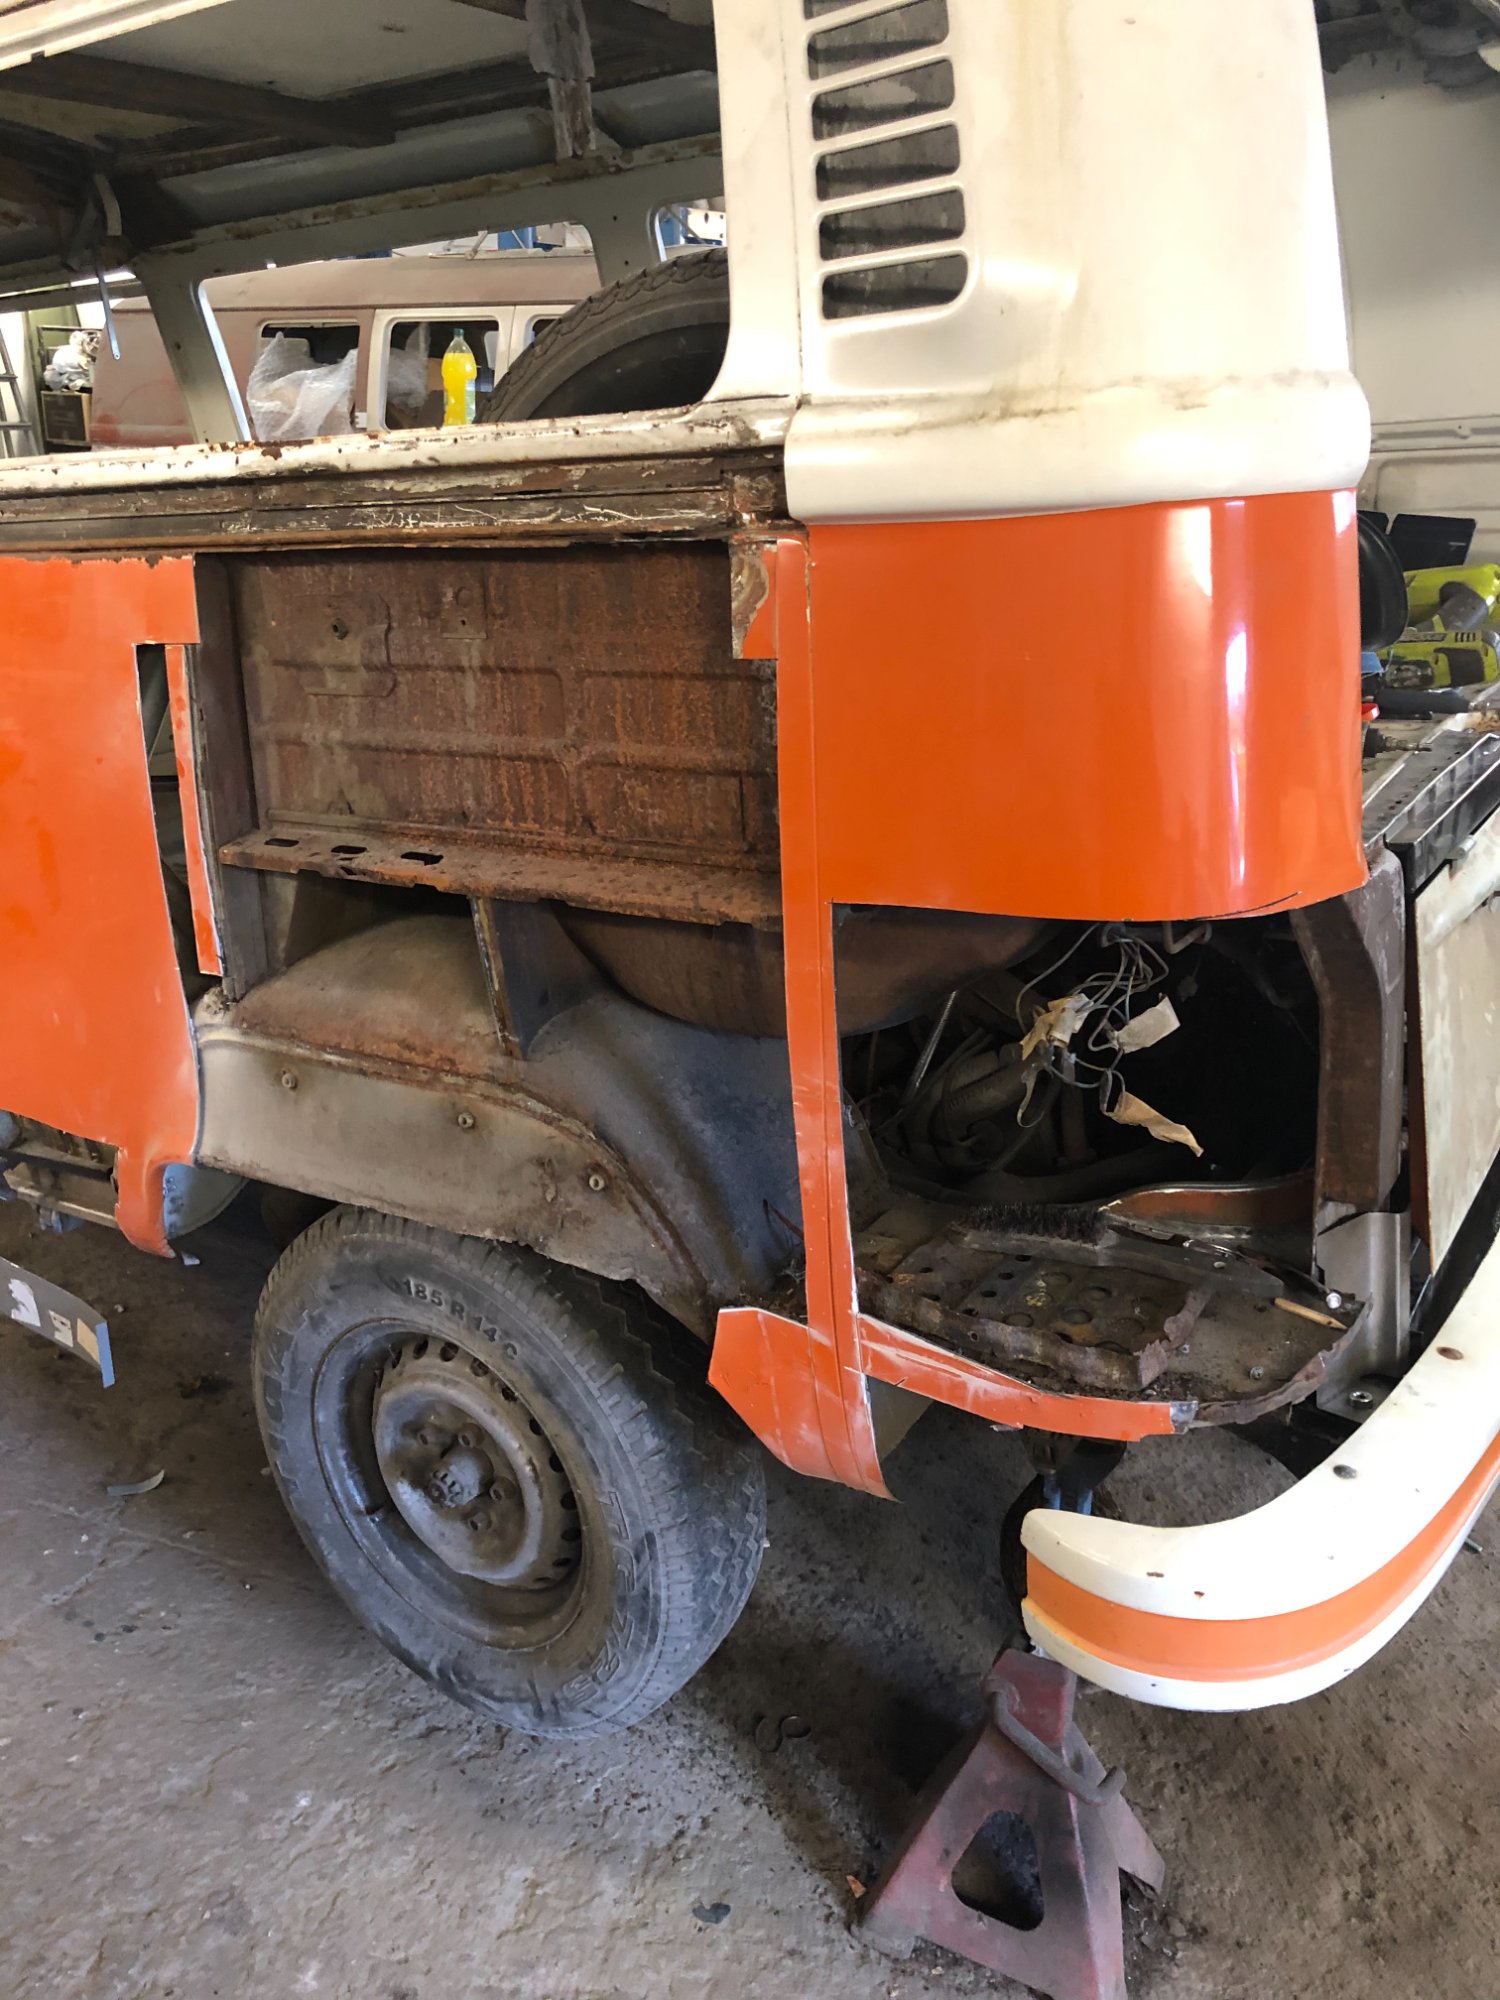
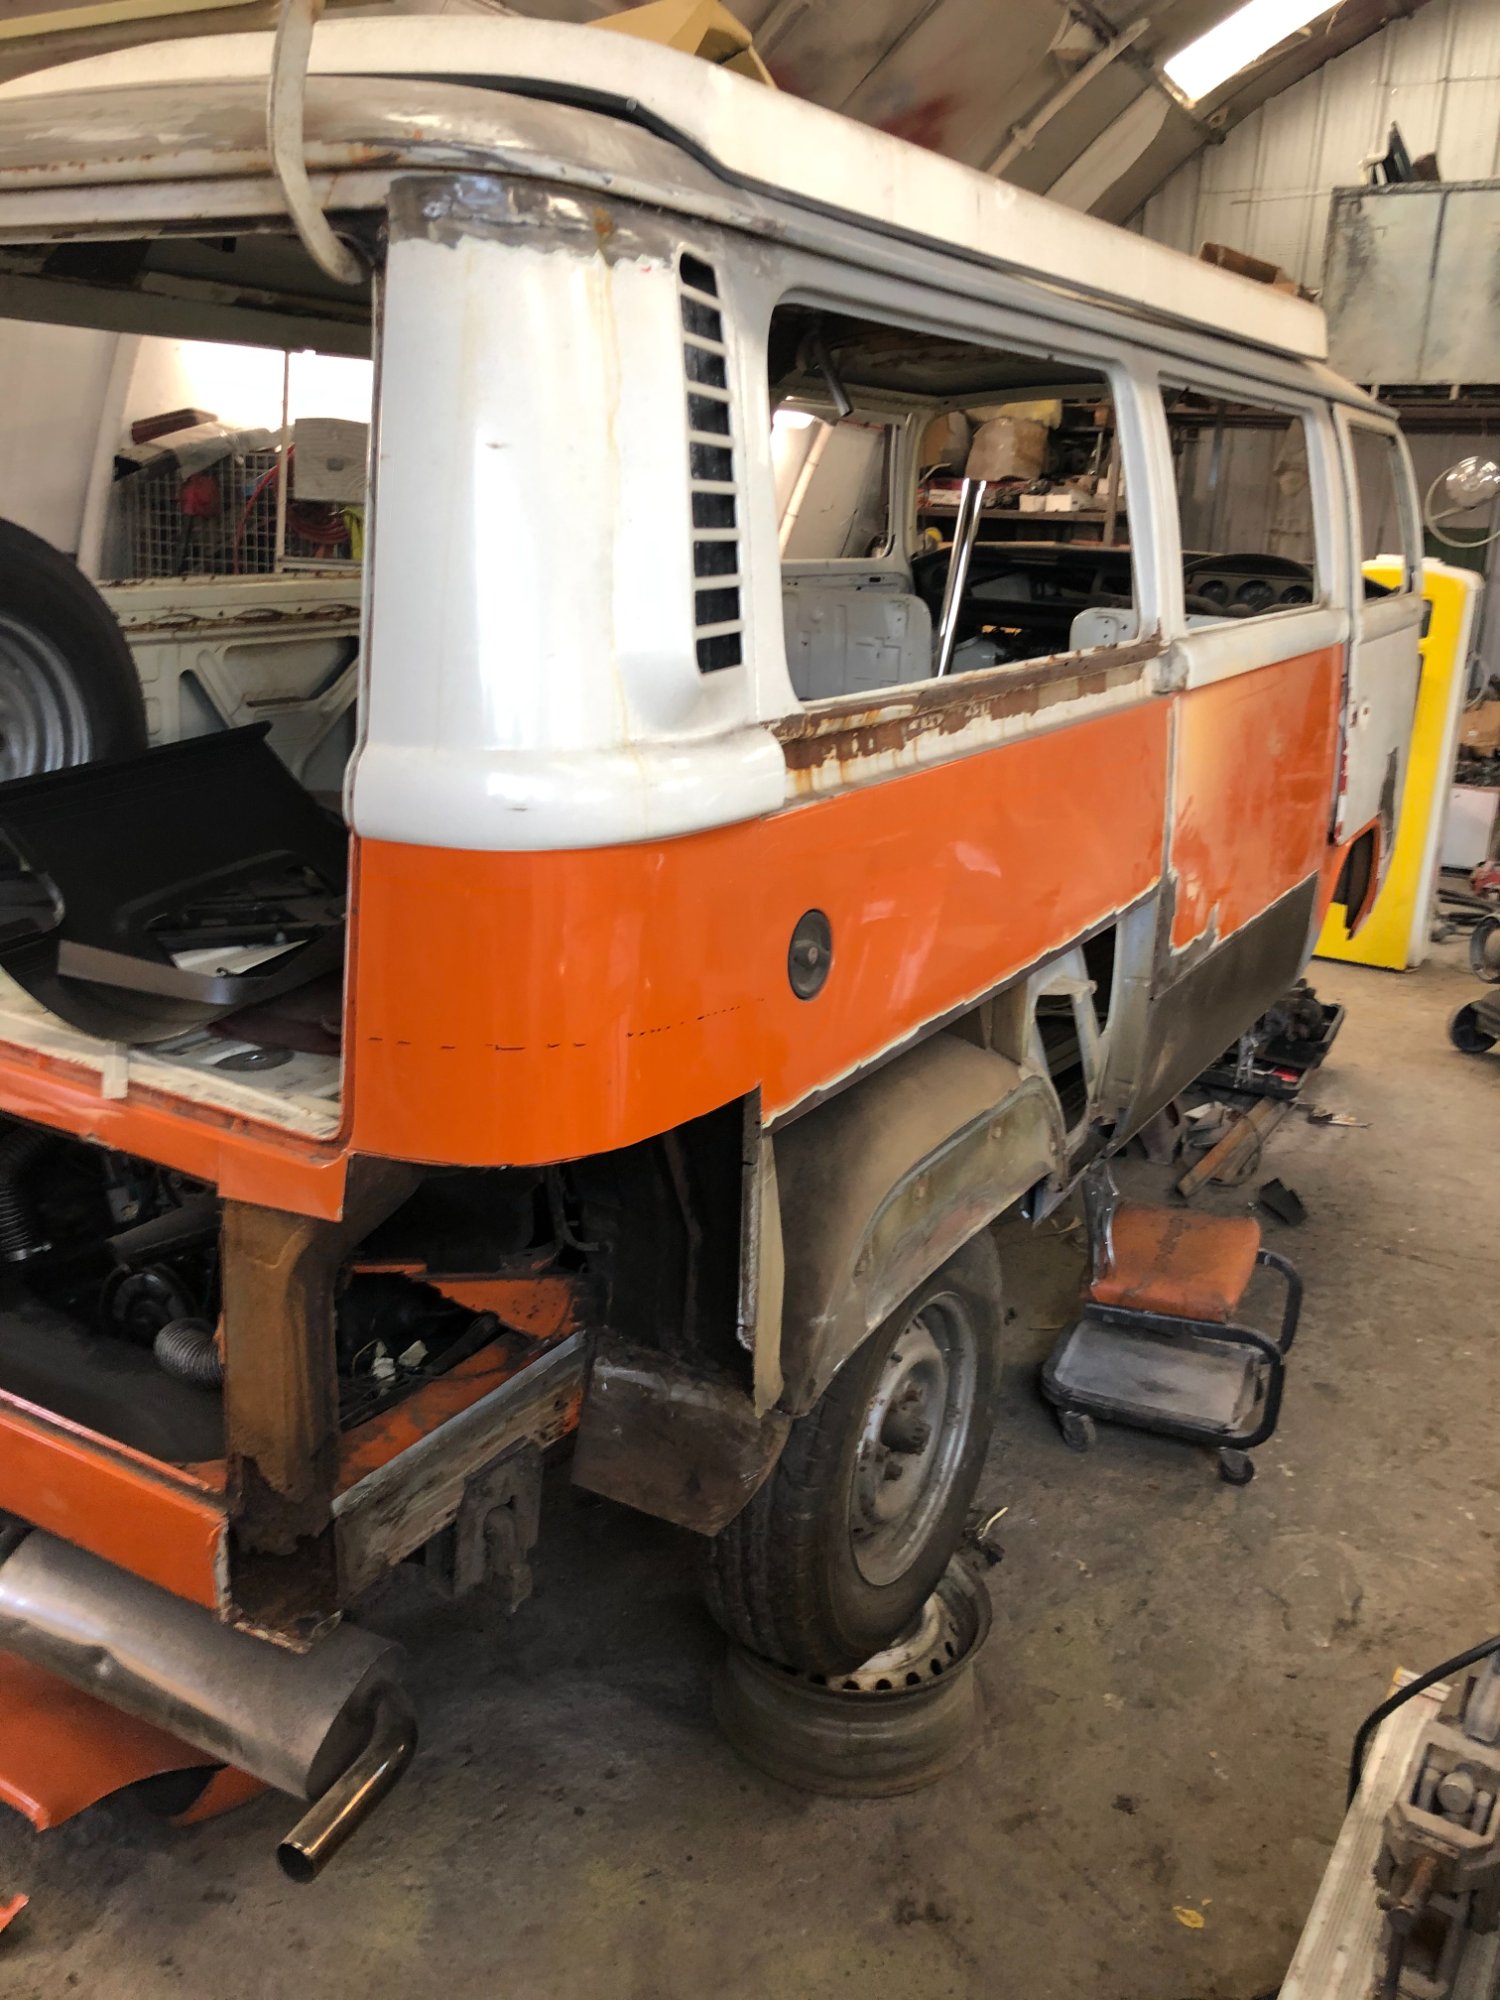
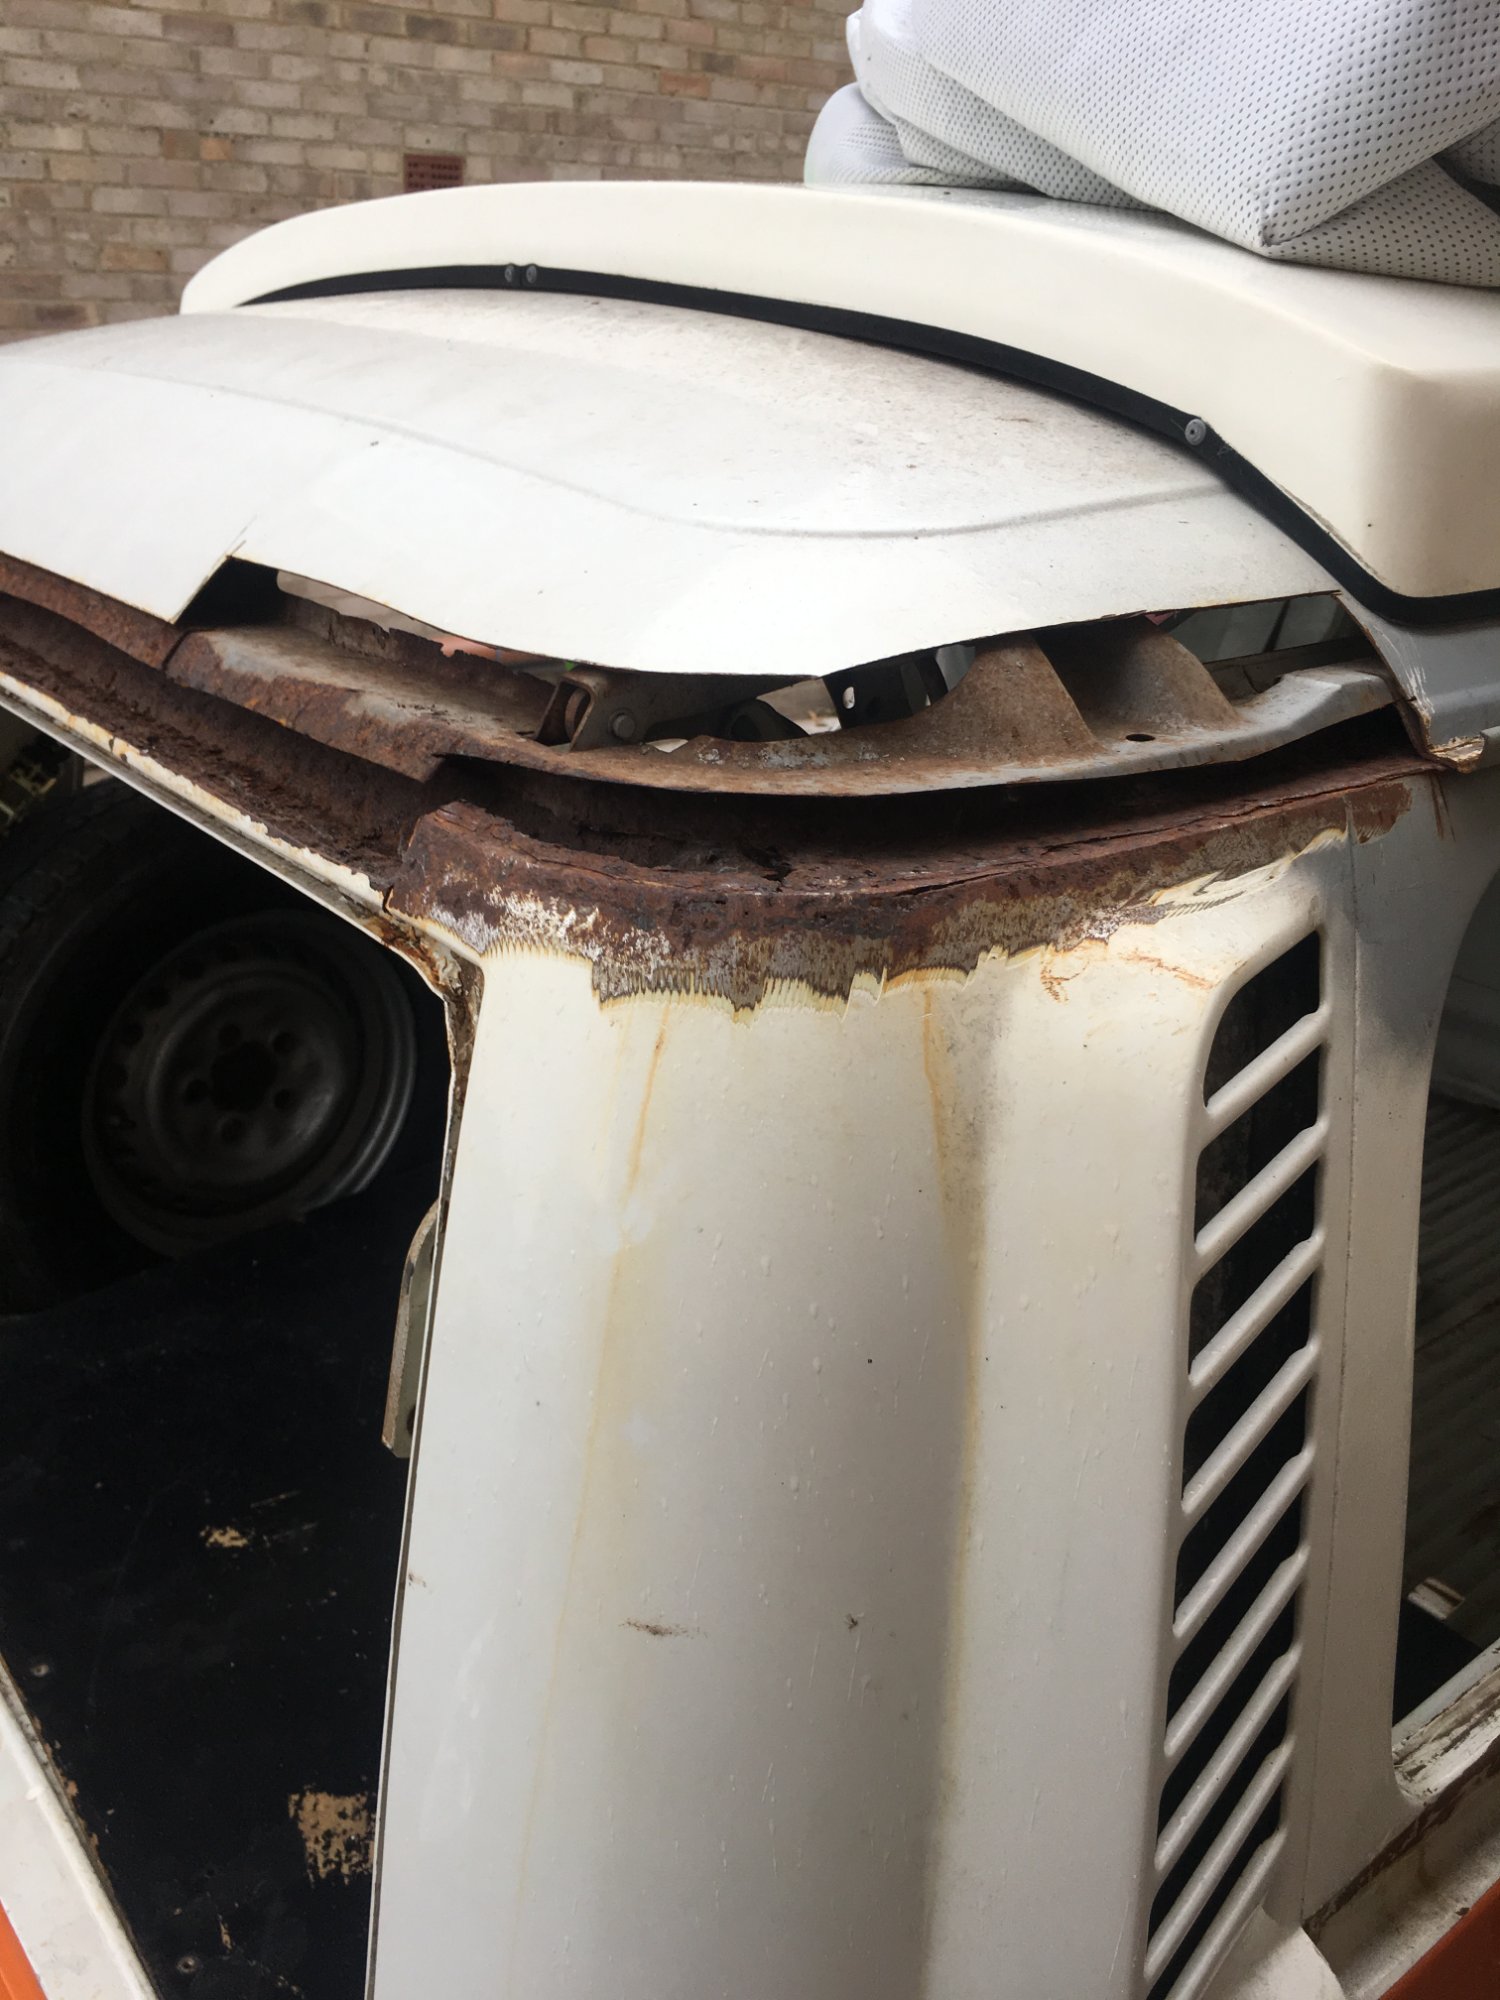
Phase 1: Rust Removal & Metal Diagnosis (Months 1-4)
This is the longest, messiest, most important phase. Every single rust problem you find here determines the scale of your entire project.
Budget allocation: £2,500-3,500 (if outsourced); £1,000-1,500 (DIY materials only)
Timeline: 4-8 weeks (outsourced); 3-6 months (DIY at weekends)
What Happens in Rust Removal:
- Strip everything — bumpers, trim, doors, seats, anything removable comes off
- Pressure wash and inspect — once it's stripped, hose it down and really look at the metal underneath. A pressure washer → makes this much easier
- Get under the van safely — a workshop creeper → and a solid pair of axle stands → are non-negotiable safety items
- Cut out rotten sections — sills (chassis rails), floor pans, wheel arches, door bottoms. Rust here is structural and must be fixed properly
- Assess what can be saved — some panels are worth fixing; some are cheaper to replace
- Document the damage — take photos. You'll need these for insurance and budget planning
DIY vs Outsource Decision:
DIY option: You can do surface rust removal with wire brushes →, sandpaper, and angle grinders →. But structural rust removal? That's welding. If you're not confident welding, this is where you outsource.
My choice: I outsourced the structural work. They cut out all the rot, welded in new metal panels, and left me with bare metal that was ready for the next phases. Expensive, but safe and done right.
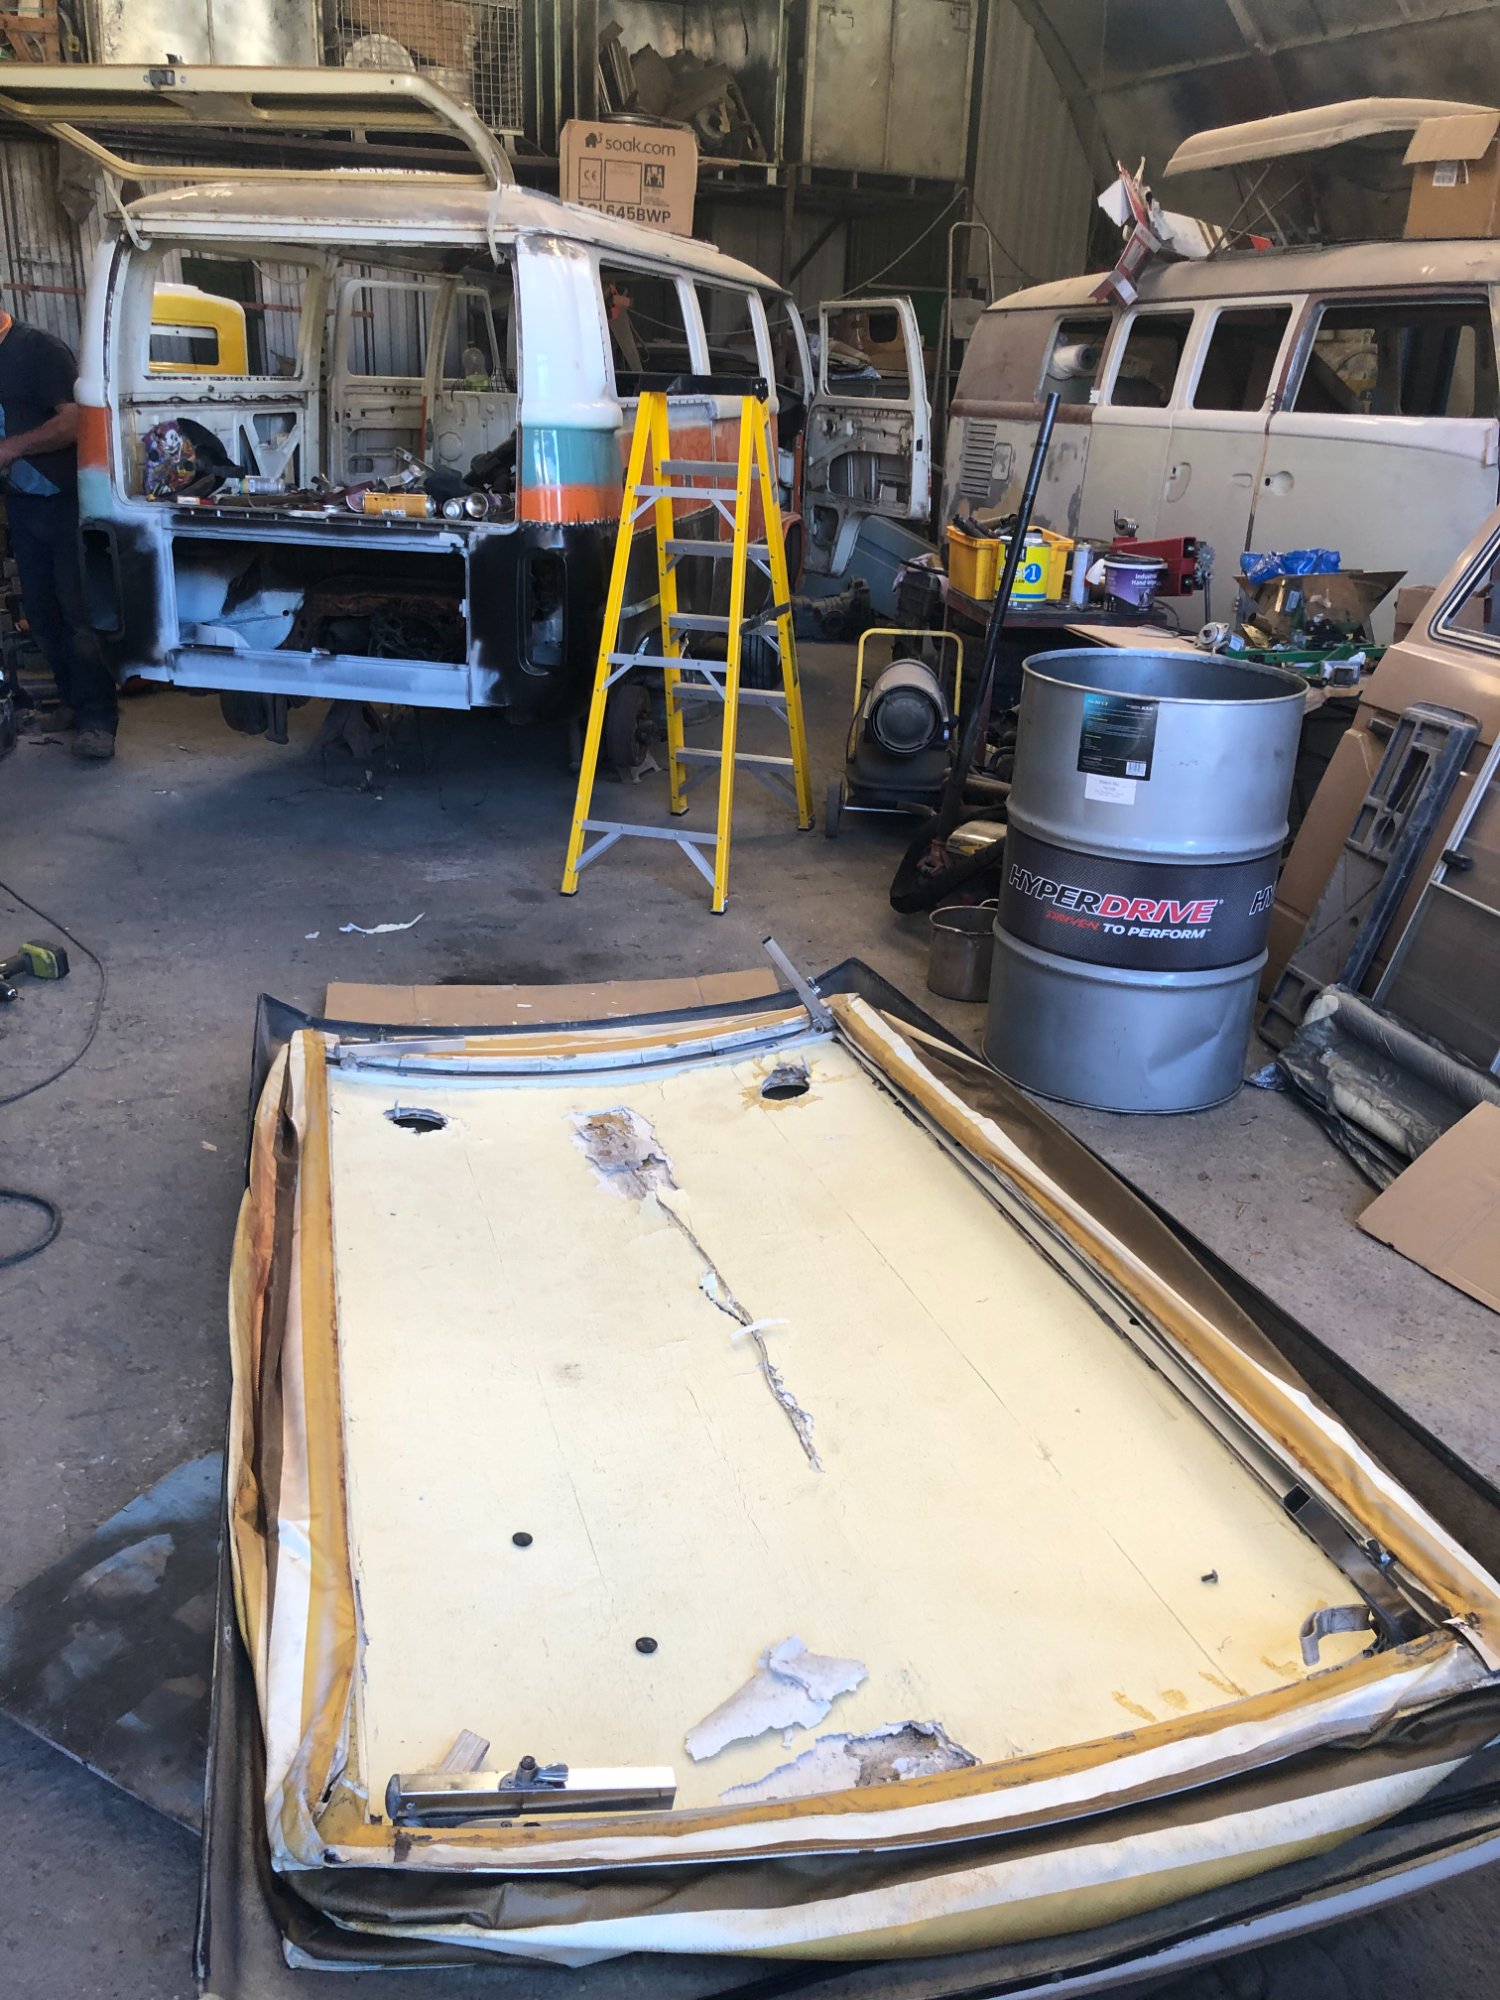
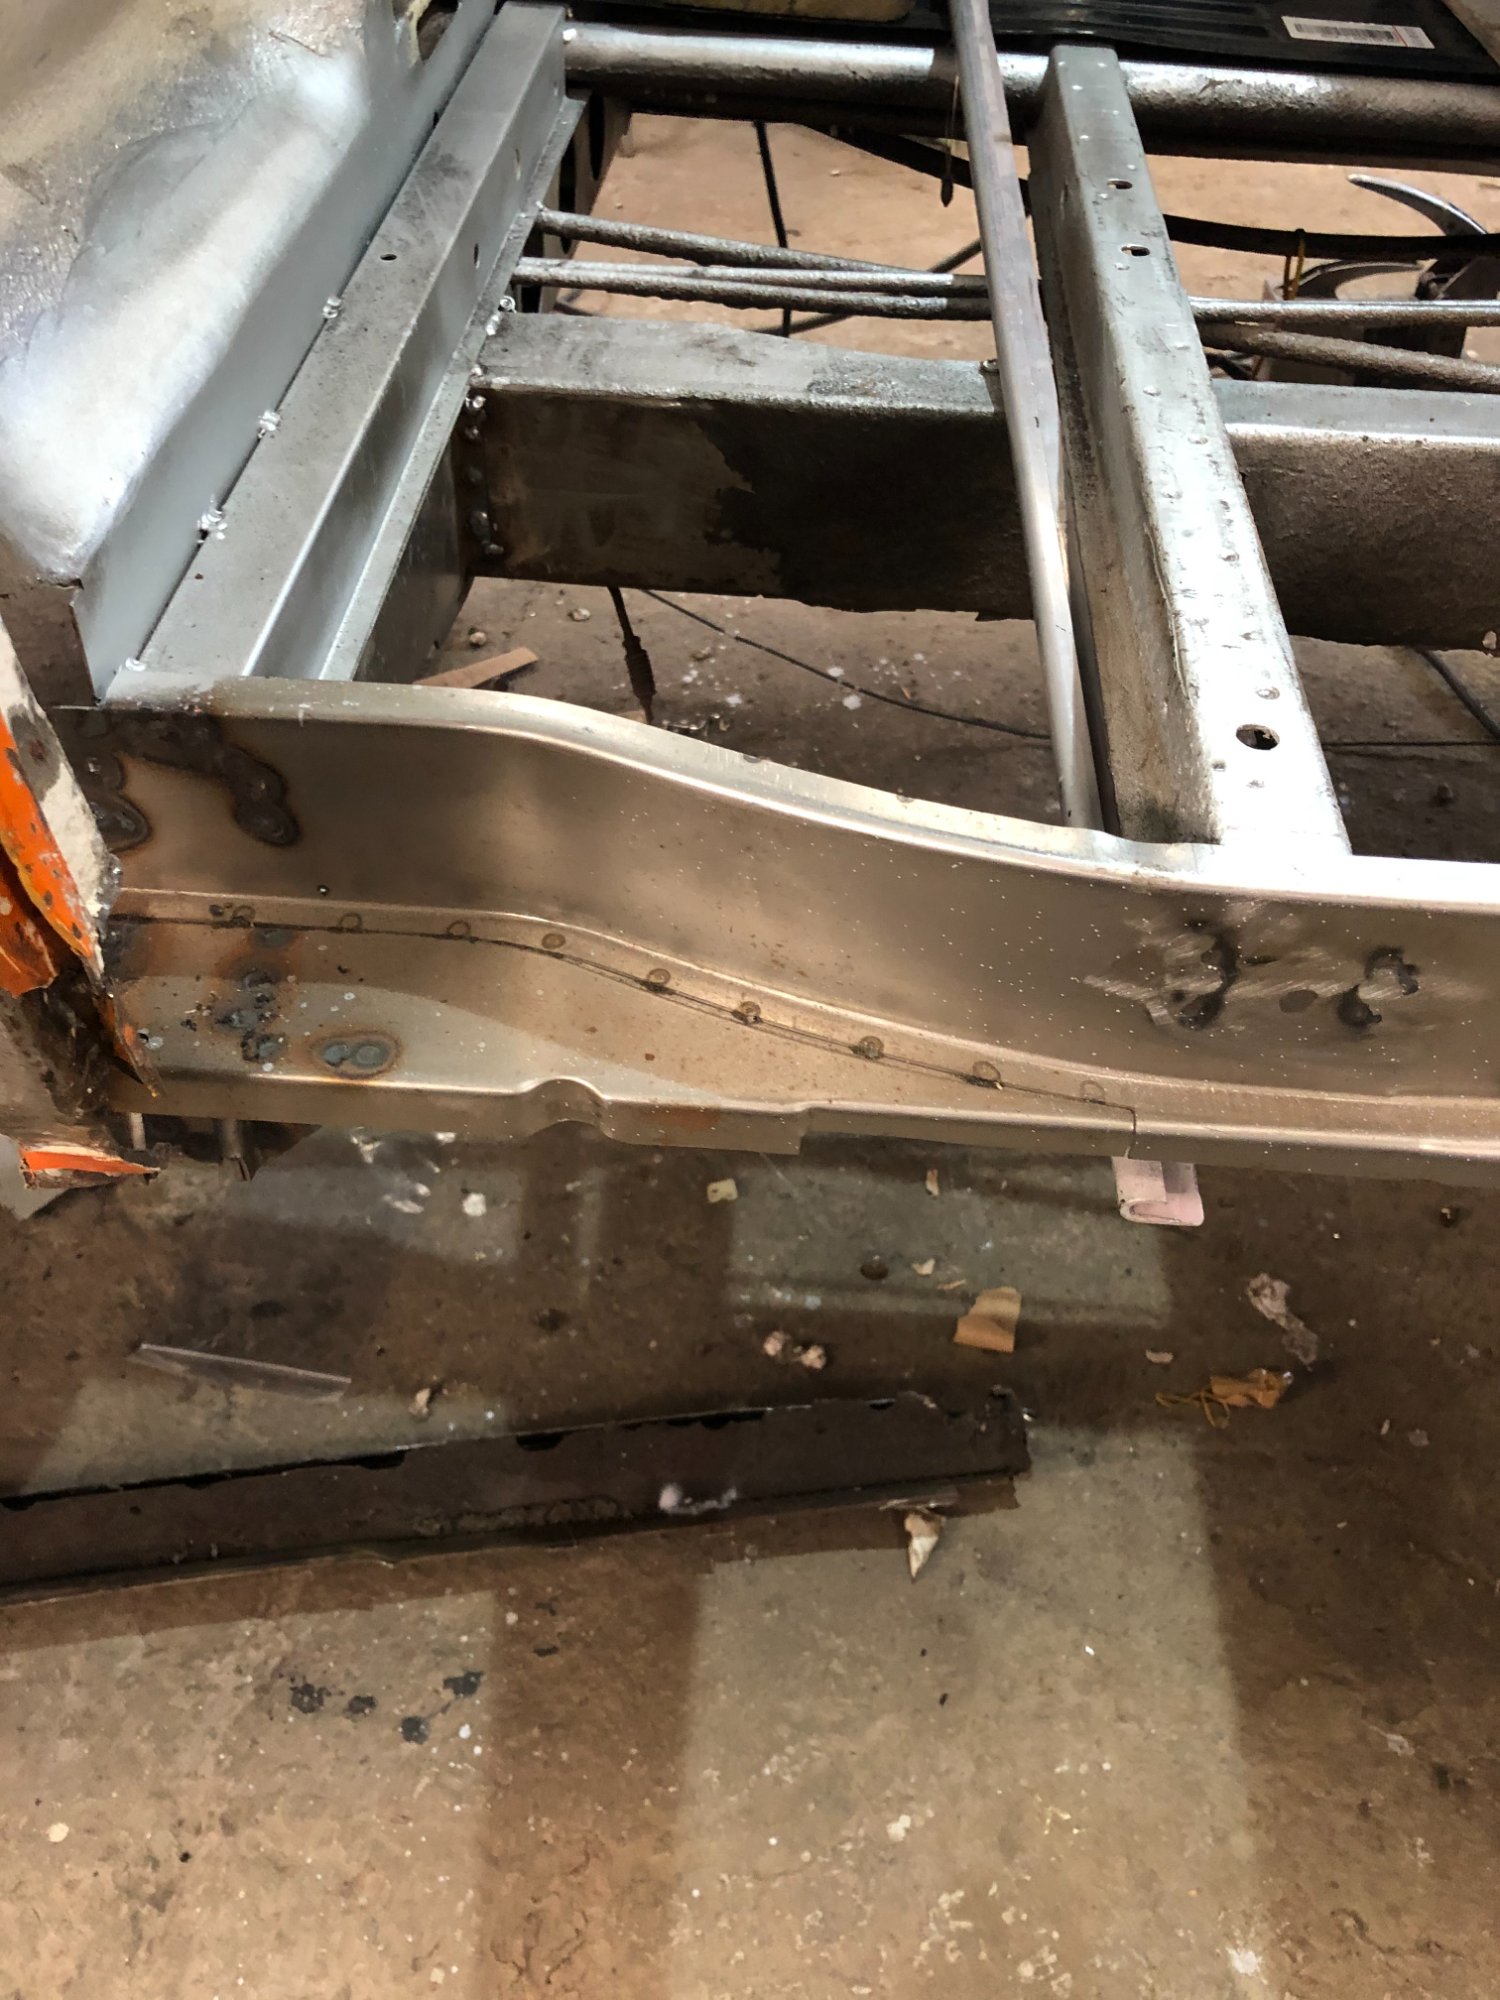
Phase 2: Metal Welding & Structural Repairs (Months 2-6, overlaps with Phase 1)
While rust is being removed, new metal is being welded. This is where rust becomes structure again.
Budget allocation: £3,000-4,500 (outsourced welding); £2,000+ (DIY equipment + supplies)
Timeline: 4-8 weeks (professional); 2-4 months (DIY, learning curve steep)
What Gets Welded:
- Sills and chassis rails (structural—non-negotiable)
- Floor pans and subframes
- A-pillar and windscreen surround repairs
- New door bottoms and window frames
- Roof panel sections (if needed)
DIY Consideration:
If you're skilled at welding, this is where you save £3,000+. But—and this is critical—poor welding on structural components is dangerous. A bad weld on a sill could compromise the entire vehicle's integrity. If you're learning to weld, this is the wrong place to practice. Learn on scrap first.
My approach: I outsourced the welding. Welding is a skilled trade. I wanted it done by someone who knows what they're doing, not me learning on Jenny's chassis.
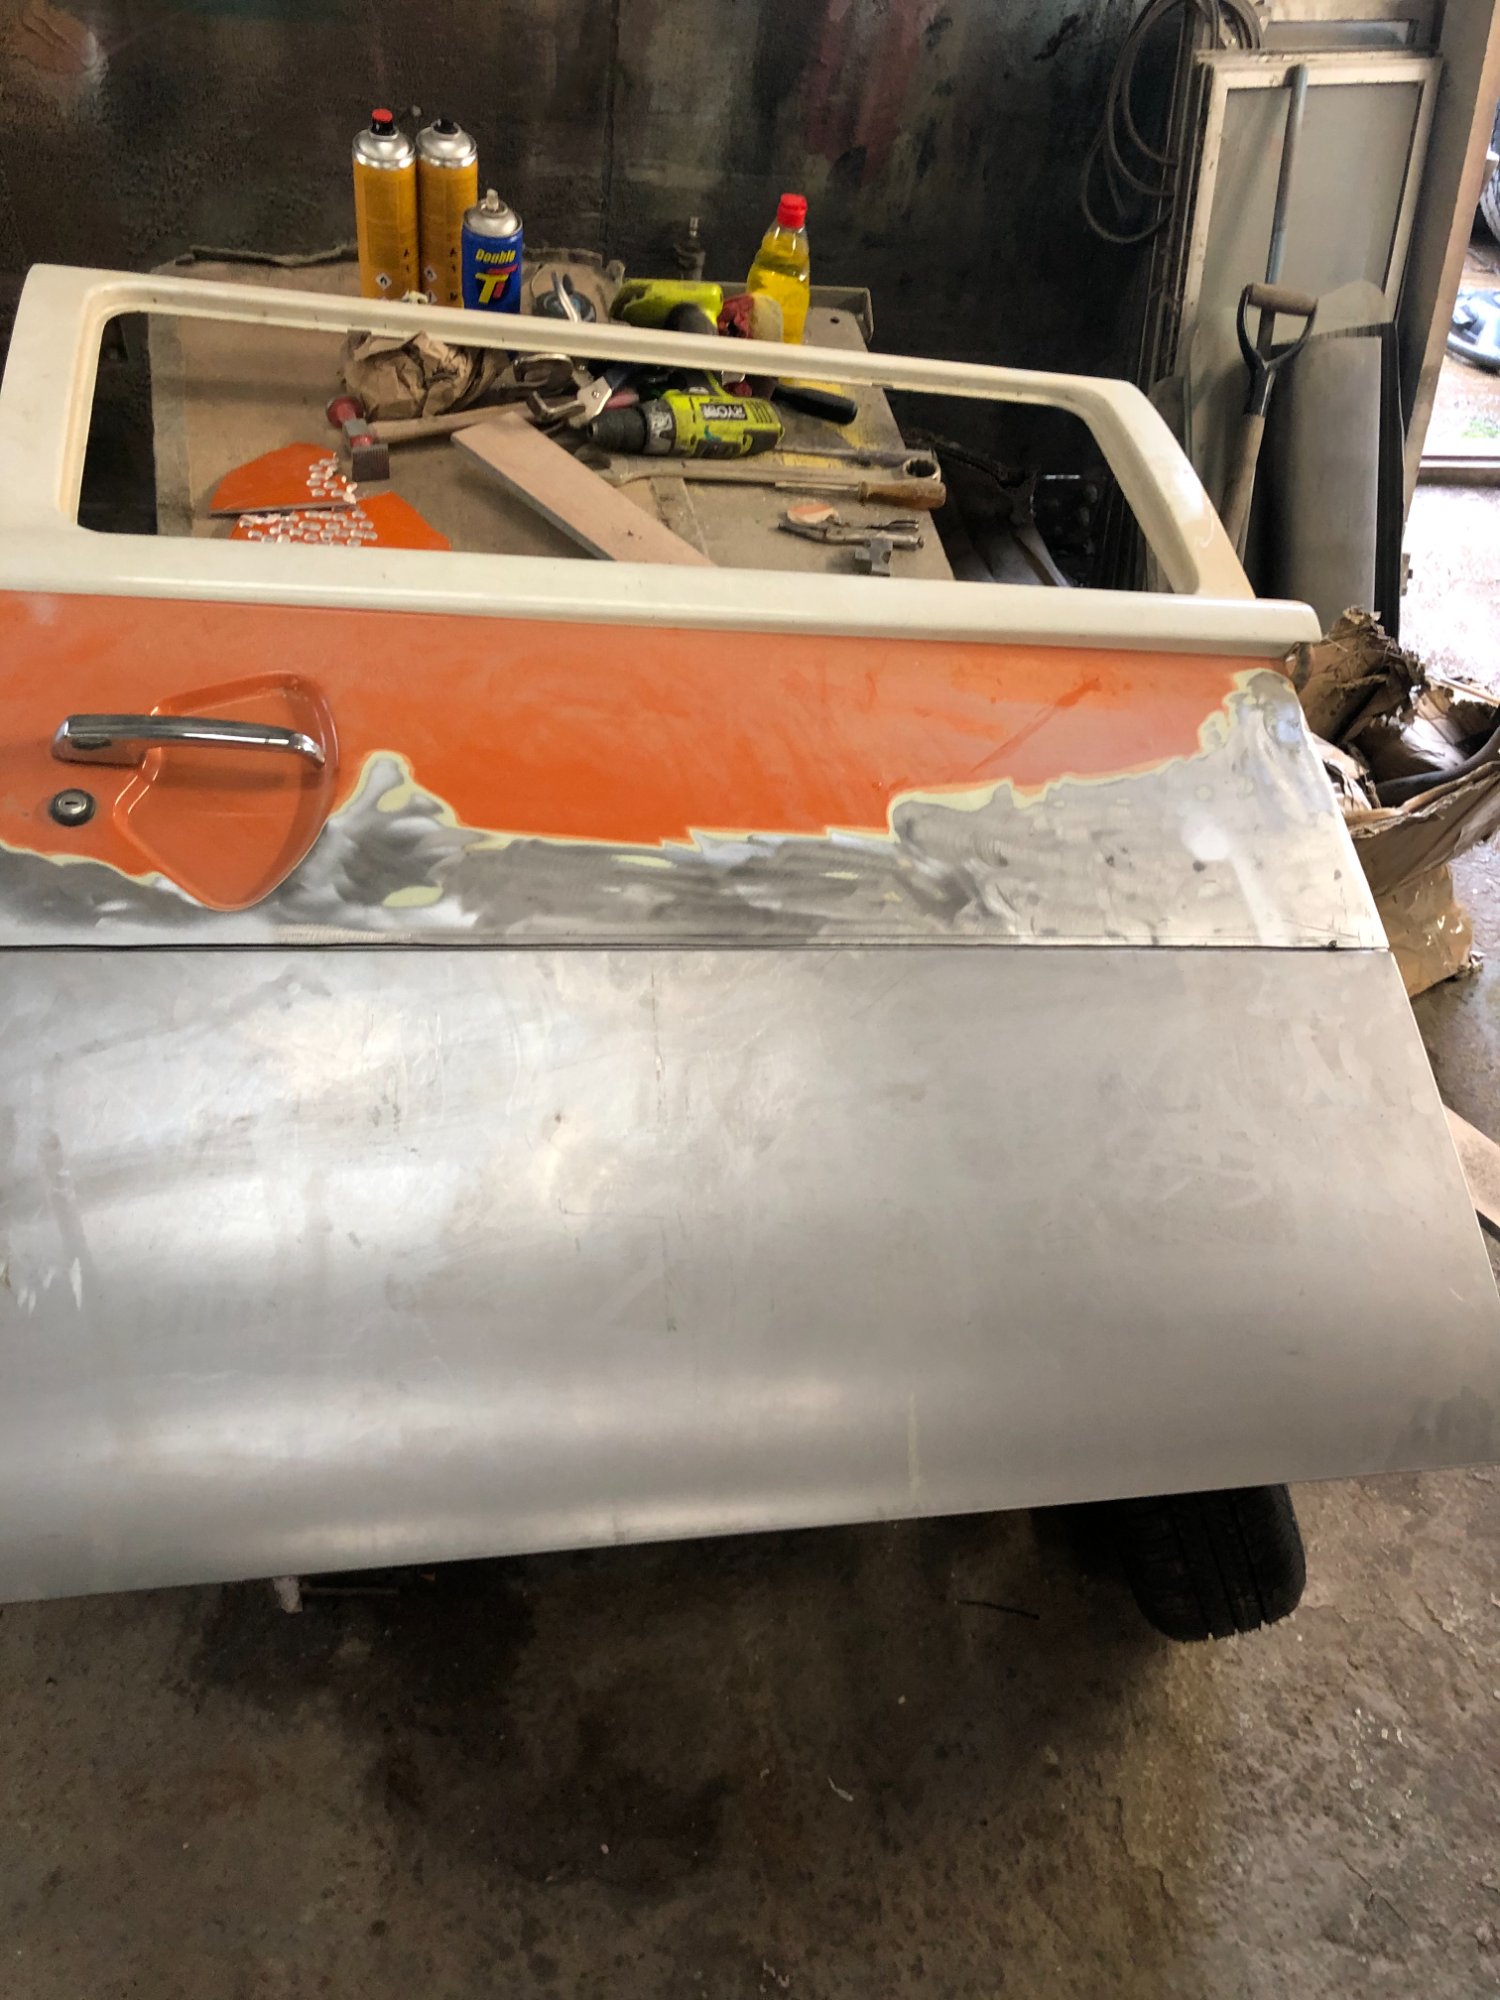
Phase 3: Body Filling, Shaping & Panel Alignment (Months 5-8)
Now you have solid metal. But it's not pretty. This phase turns rough welds and new panels into smooth, aligned body surfaces.
Budget allocation: £1,000-1,500 (if outsourced); £300-500 (DIY supplies)
Timeline: 3-4 weeks (professional); 2-3 months (DIY, tedious work)
What Happens:
- Apply body filler — high-quality two-part filler → fills gaps, seals welds, creates smooth surfaces
- Sand and shape — hours of sanding with progressively finer grits (80, 120, 180, 220, 320, 400)
- Check alignment — doors, windows, bumper mounting points all need to line up perfectly
- Second coat if needed — if you find low spots, more filler and more sanding
DIY Potential:
This phase is perfect for DIY if you have patience. It's not skilled work—it's repetitive, meticulous work. You need:
- Sandpaper in multiple grits →
- Sanding blocks →
- Time. Lots of time.
- Dust mask and workshop with ventilation
My choice: Outsourced this too. While they did the welding, they also shaped the panels and got everything smooth and aligned. This saved me weeks of sanding and ensured the paint would go on a perfect surface.
Phase 4: Surface Prep & Priming (Months 8-10)
Everything's smooth. Now you need to prepare the metal for paint—and that means really preparing it.
Budget allocation: £500-800 (outsourced prep/primer); £200-300 (DIY)
Timeline: 2-3 weeks (professional); 4-6 weeks (DIY, detail-oriented)
The Prep Process:
- Final sand and clean — remove every speck of dust, dirt, and oxidation
- Chemical clean — wipe down with wax and grease remover →
- Mask and protect — tape everything that shouldn't be painted (windows, trim, etc)
- Apply epoxy primer — quality epoxy primer → seals the bare metal and prevents rust
- Light sand the primer — smooth it out for topcoat adhesion
DIY Possible, But Consider:
You can DIY this, but:
- Dust contamination is your enemy. One speck of dust in primer = paint defect
- You need a clean workspace. Cold, dry, dust-free conditions
- Respirator mask → — essential, primer fumes are toxic
- Safety goggles → — protect your eyes from dust and chemical splash
- Disposable overalls → — essential for painting; primer and paint will ruin clothing
My choice: Sunflower Campers handled this too. By the time they handed Jenny back, she was primed and ready for paint.
Phase 5: Painting & Clear Coat (Months 10-12)
This is where your van becomes pretty. And this is almost always outsourced. If you spray paint at home, your neighbors will hate you, and the finish probably won't be professional quality.
Budget allocation: £2,000-3,000 (professional paint job)
Timeline: 2-4 weeks (professional shop); NOT RECOMMENDED DIY
Professional Paint Shop:
- Full masking — every trim piece, chrome, rubber seal protected
- Primer check — ensure prep was perfect; any imperfections corrected
- Base coat — your color, applied in coats
- Clear coat — protective finish that makes it shine and protects the paint
- Final detailing — wet sanding, polish, final checks
Why not DIY? Professional spray paint requires:
- Spray booth (thousands of pounds or rental at £200+/day)
- HVLP spray gun (£300-1,000+)
- Compressor and air filtration
- Understanding of paint chemistry (viscosity, pot life, cure times)
- Experience. Runs, sags, and orange peel are expensive mistakes
Unless you're seriously skilled, outsource this. The cost of redoing a botched paint job is more than paying a professional the first time.
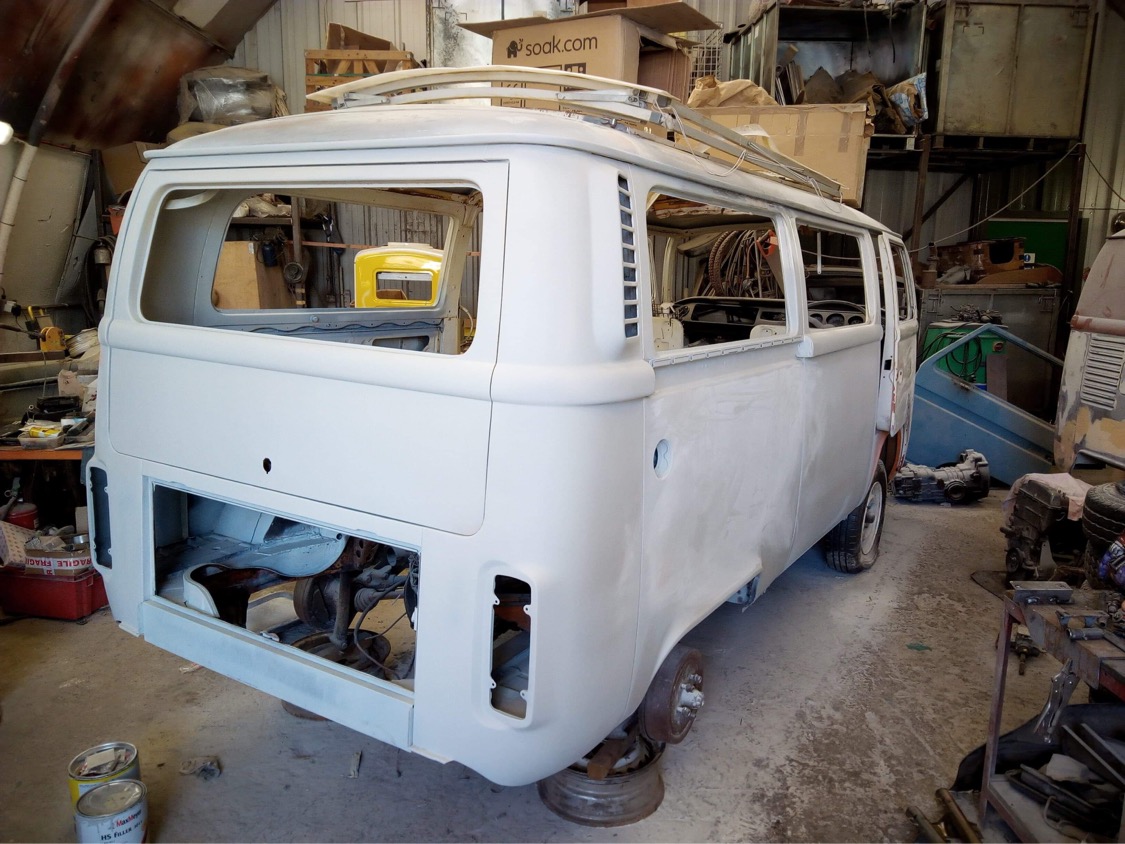
My choice: The restoration shop handled the entire spray operation. Jenny went from rusty orange to vibrant turquoise in their booth. Professional, perfect, and worth every penny.
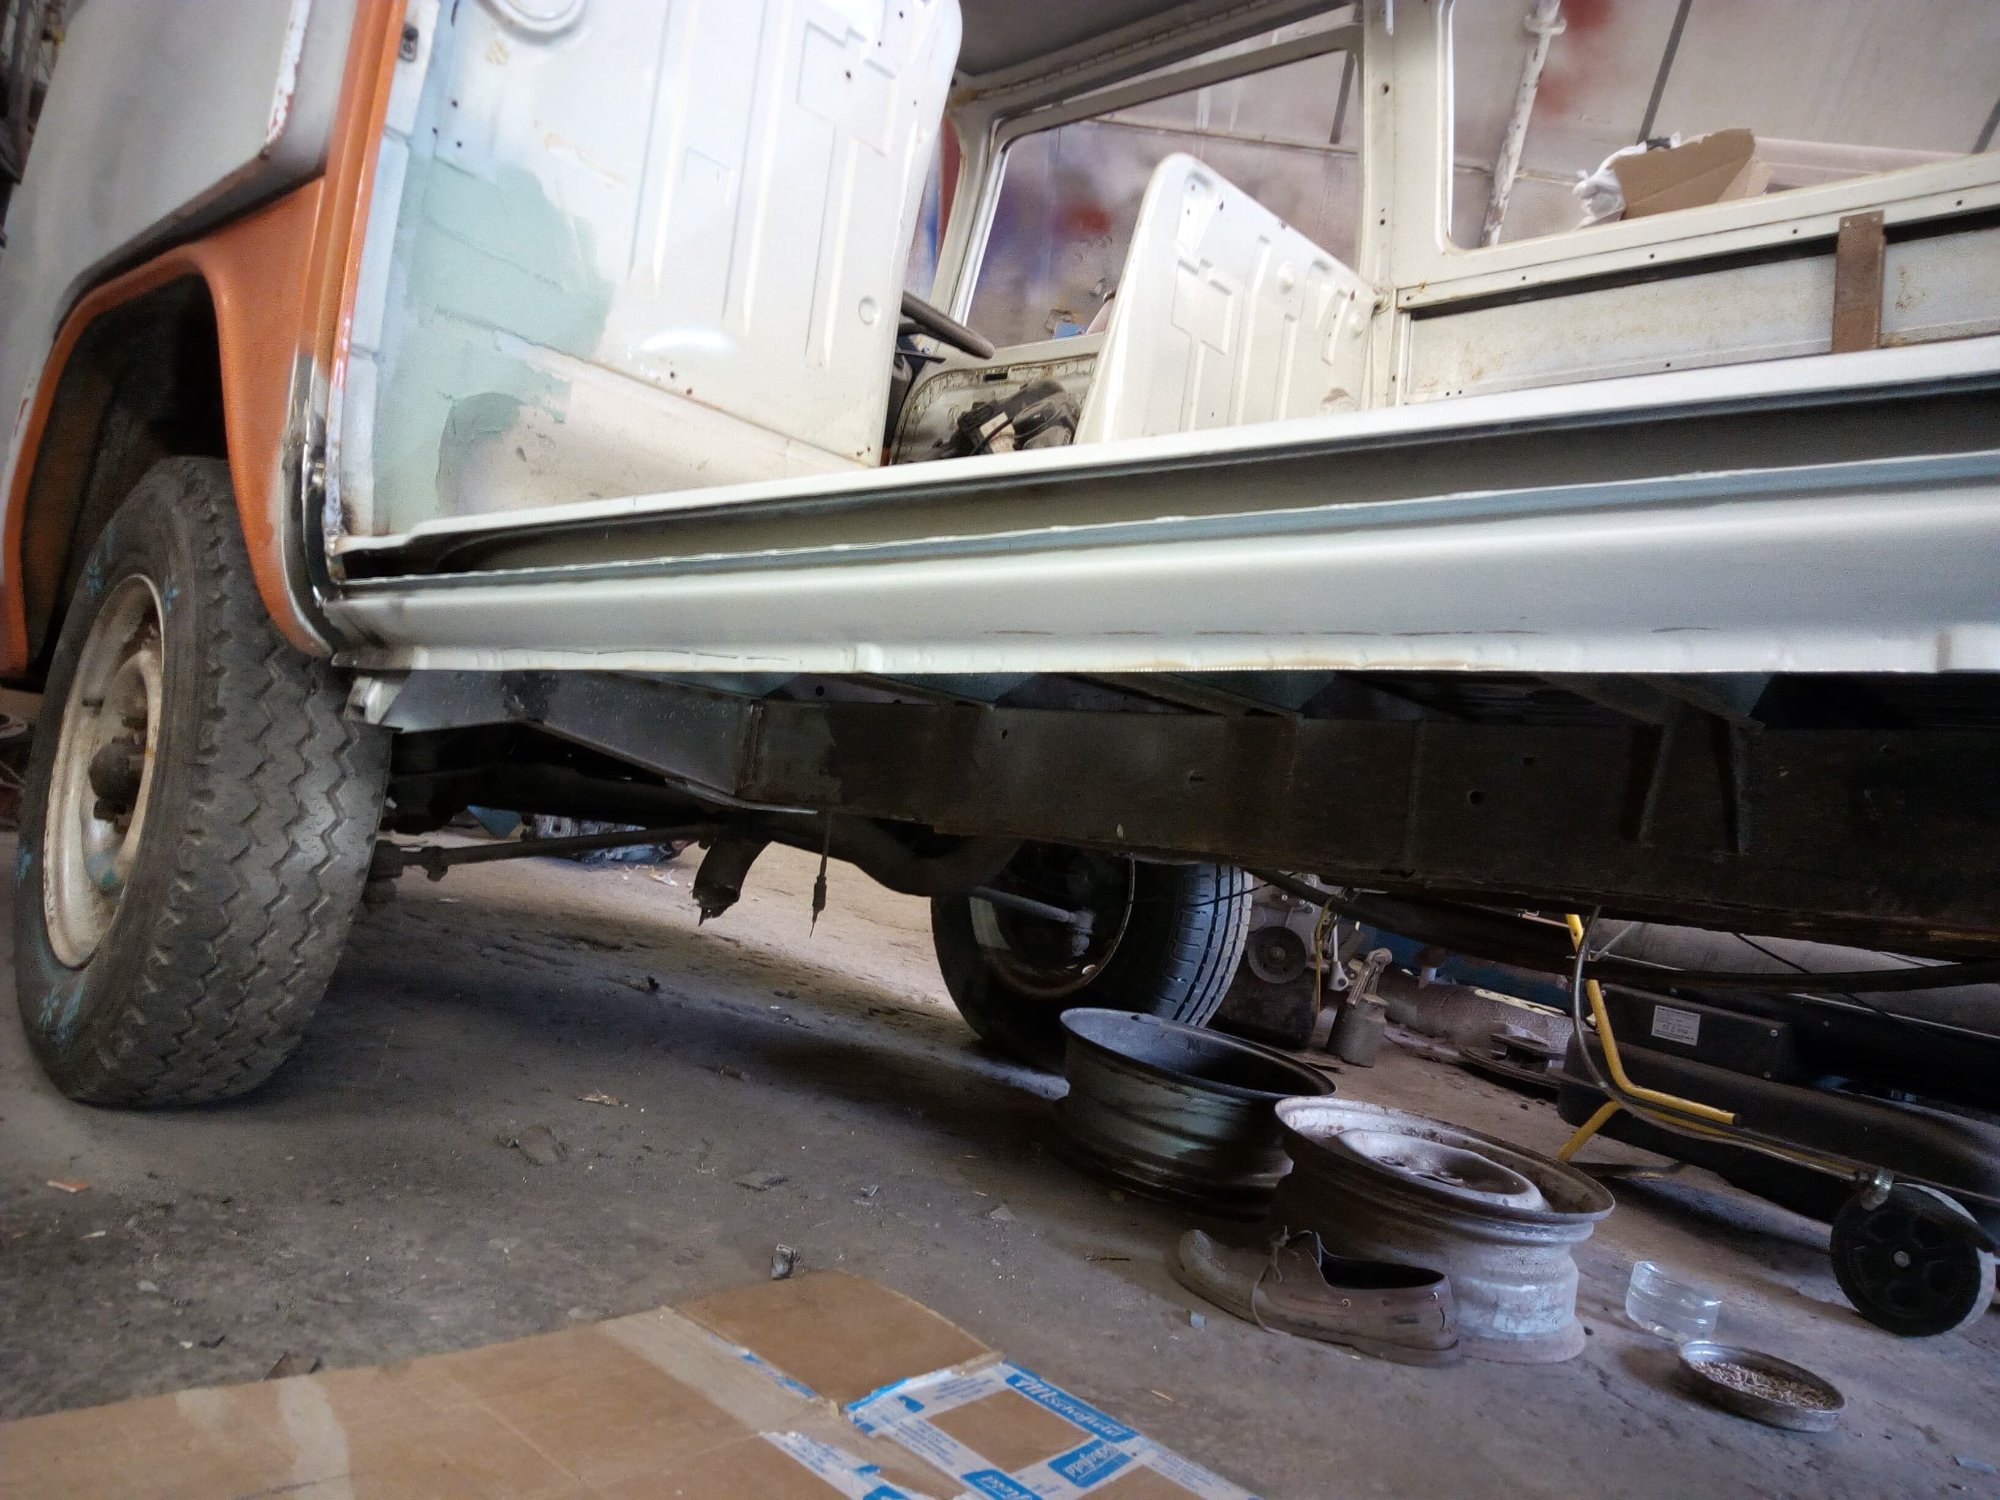
Phase 6: Assembly & Final Details (Months 12-24, overlaps with other phases)
While the body work is happening, you can be working on interior, mechanical, and reassembly. This is where DIY shines—and where you save serious money.
Budget allocation: £1,500-2,000 (parts + supplies); labor mostly yours
Timeline: 6-12 months (evenings/weekends)
What Gets Done:
- Interior restoration — new upholstery, flooring, panels. For VW T2 specific parts: upholstery & seat covers →, replacement floor mats for RHD → or LHD → and walkthrough versions →, plus sound deadening → before you lay the floor. See our maintenance guide → for more parts and tools
- Mechanical work — engine rebuild, gearbox, brakes. For parts: VW T2 engine rebuild kit →, brake kit → (safety-critical — consider outsourcing). See our engine rebuild guide → for detailed steps
- Electrics — wiring, lights, instruments. A full VW T2 wiring loom → is worth considering if your original harness is corroded
- Reassemble everything — doors, bumpers, trim, seats, windows. A magnetic parts tray → is invaluable for keeping bolts and fixings organised as you go
- Detail and test — check every system works, fix issues, polish and clean
Where to DIY:
Definitely DIY if you can:
- Interior work (upholstery, flooring, trim panels)
- Reassembly and detailing
- Engine work (if you're mechanically inclined)
- Wiring and electrical systems
Consider outsourcing:
- Welding (as discussed)
- Painting
- Complex brake/suspension work (safety-critical)
My approach: I did a lot of the interior and reassembly myself. I read, learned from YouTube, and wasn't afraid to ask questions. But I outsourced the scary structural and paint stuff. That balance worked for me.
A decision that paid off: During the welding phase, I had a choice: take a cheaper/quicker option and save a couple of months + ~£1,000, or take the whole floor up and replace it properly. I decided to do it right. It was more hassle and more expense, but since I'm never selling Jenny, I figured the long-term reliability was worth it. That's a judgment call you'll face multiple times—and my advice is: if you're keeping the van forever, do it right.
Timeline Reality Check: 2 Years Isn't Magic
My Timeline (Outsourced Body Work, DIY Interior/Mechanical):
- 2017: Bought Jenny (Nov), started planning
- 2017-2019: Found a restoration shop, negotiated scope (2 years waiting for a slot!)
- 2019-2021: Bodywork in the shop (2 years on the job)
- 2021-2024: Jenny on the road (pre-engine rebuild), while planning the next phase
- 2024-Autumn 2025: Engine rebuild (back off the road)
- Autumn 2025 onwards: Running and driving. Interior ongoing project, never finished.
That's 8 years from rusty wreck to today. But only because finding the right restoration shop took 2 years, then waiting for their availability took another 2 years.
The actual bodywork took about 2 years. The engine rebuild another year. If you're more organized and can find a shop faster, you could compress the actual work phases into 18-24 months. But only if:
- You have a clear scope before starting
- You have budget ready
- You book your restoration shop immediately
- You can work on interior/mechanical while they're doing bodywork
Cost Breakdown: The £10,000 Reality
| Phase | Budget | Notes |
|---|---|---|
| Planning & Inspection | £500–£1,000 | Books, tools, assessment |
| Rust Removal | £2,500–£3,500 | Outsourced stripping & assessment |
| Welding & Structural | £3,000–£4,500 | New metal, sills, panels (outsourced) |
| Body Filling & Prep | £1,000–£1,500 | Filler, sanding, priming |
| Painting | £2,000–£3,000 | Professional paint booth |
| Interior & Mechanical | £1,500–£2,000 | Parts, supplies, DIY labor |
| TOTAL | ~£10,000–£15,000 | Bodywork outsourced, interior/mech DIY |
Key insight: If you DIY more, costs go down but timeline explodes. If you outsource everything, costs double but timeline compresses. Find your balance based on skills, budget, and available time.
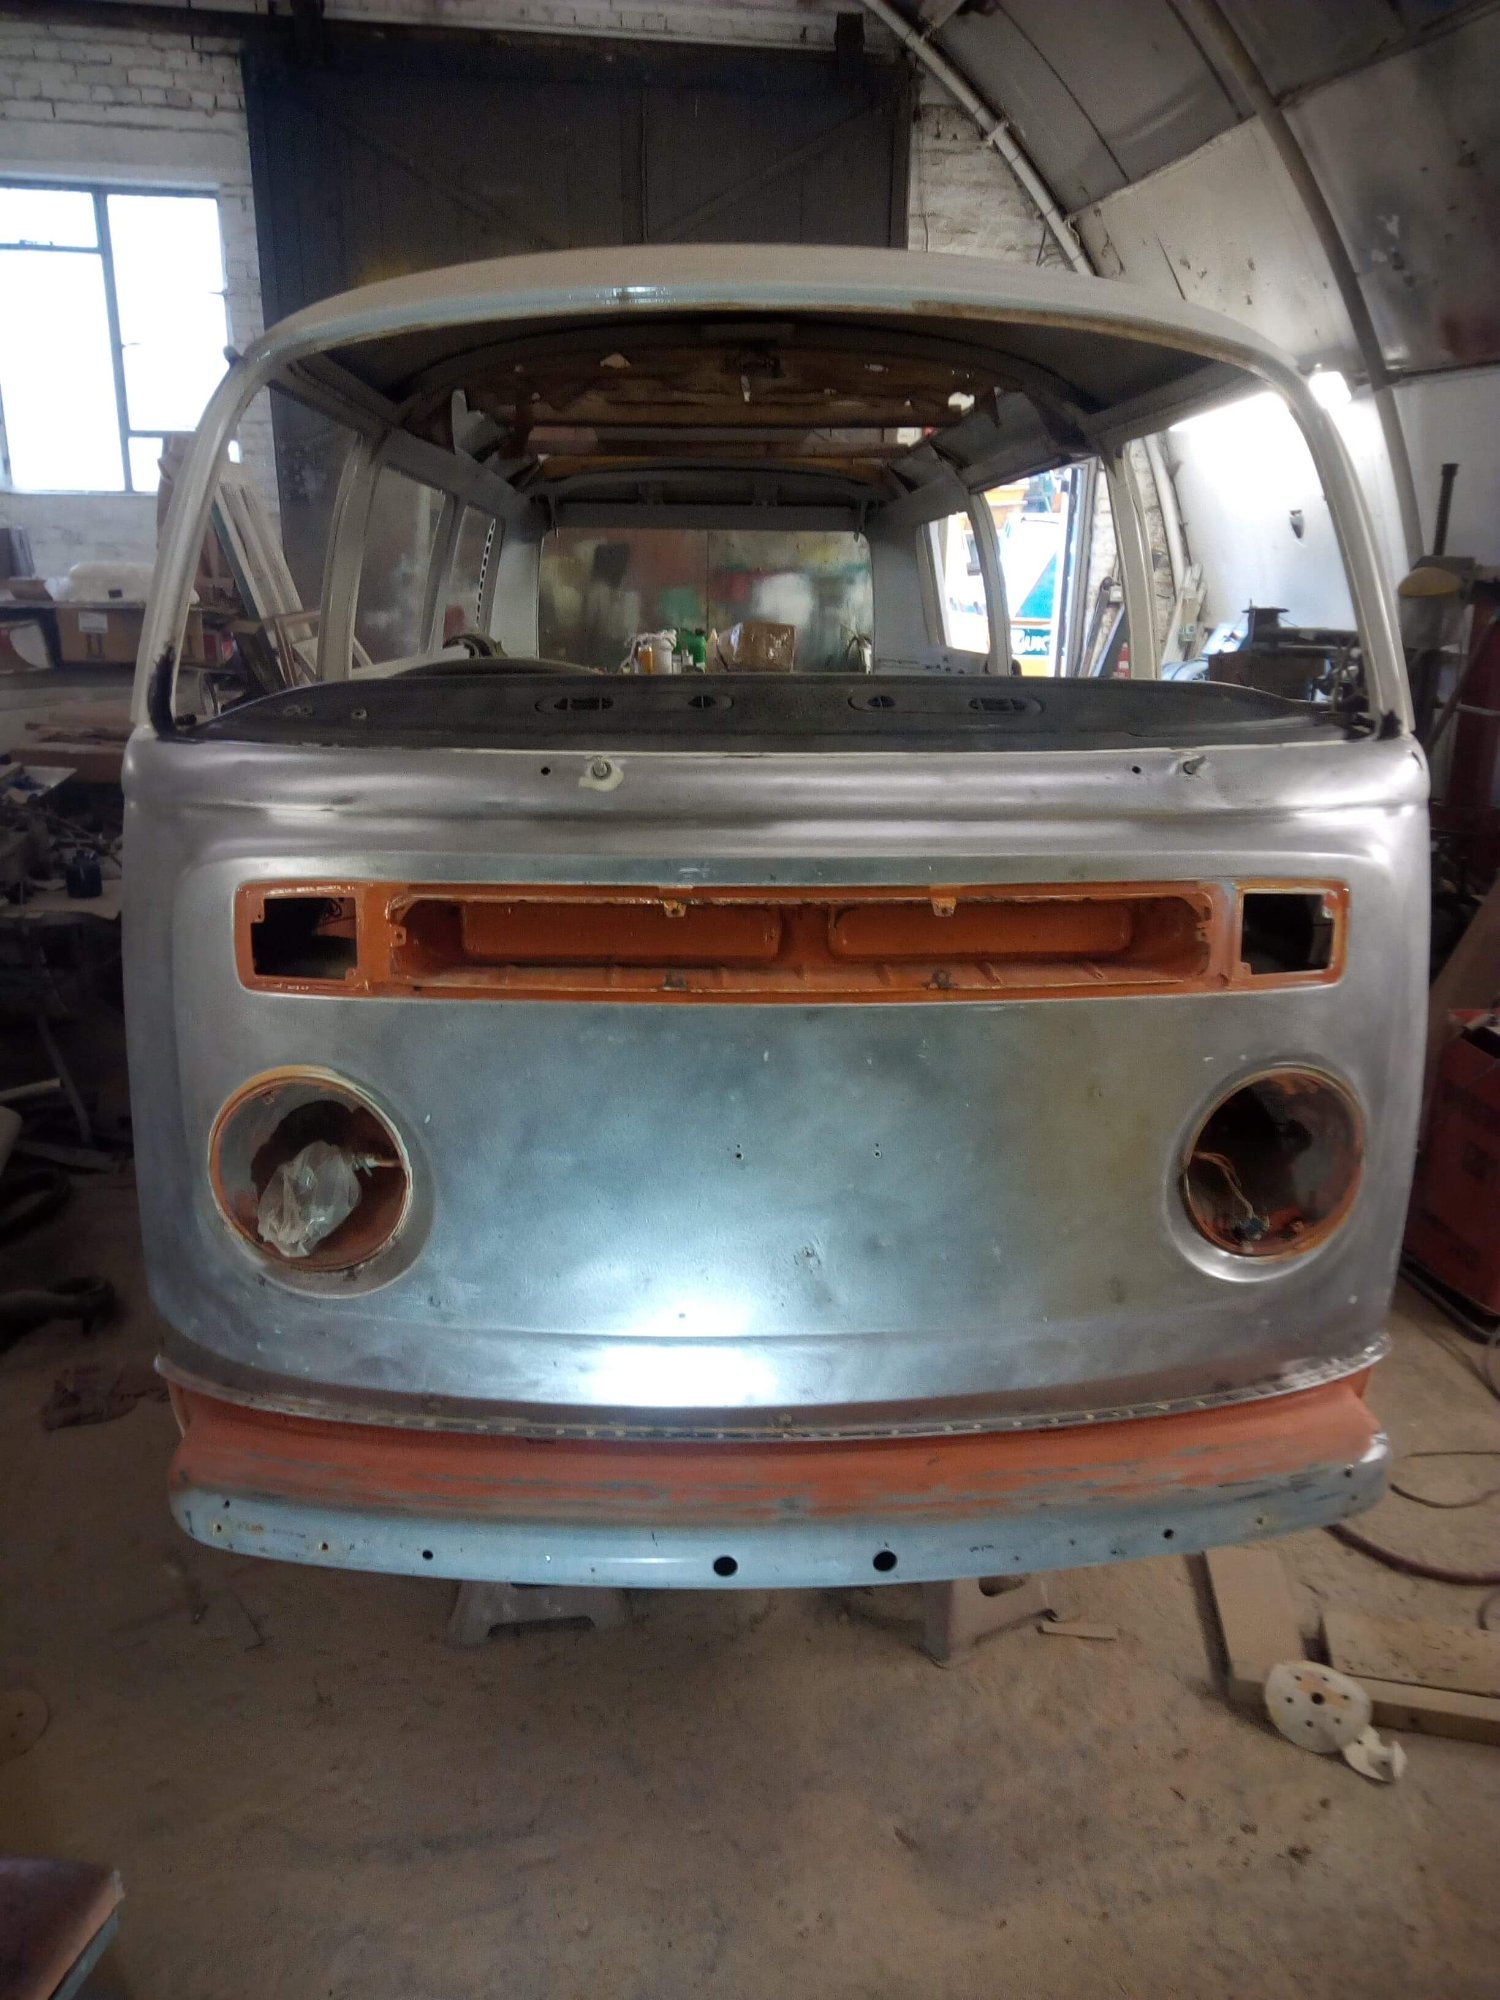
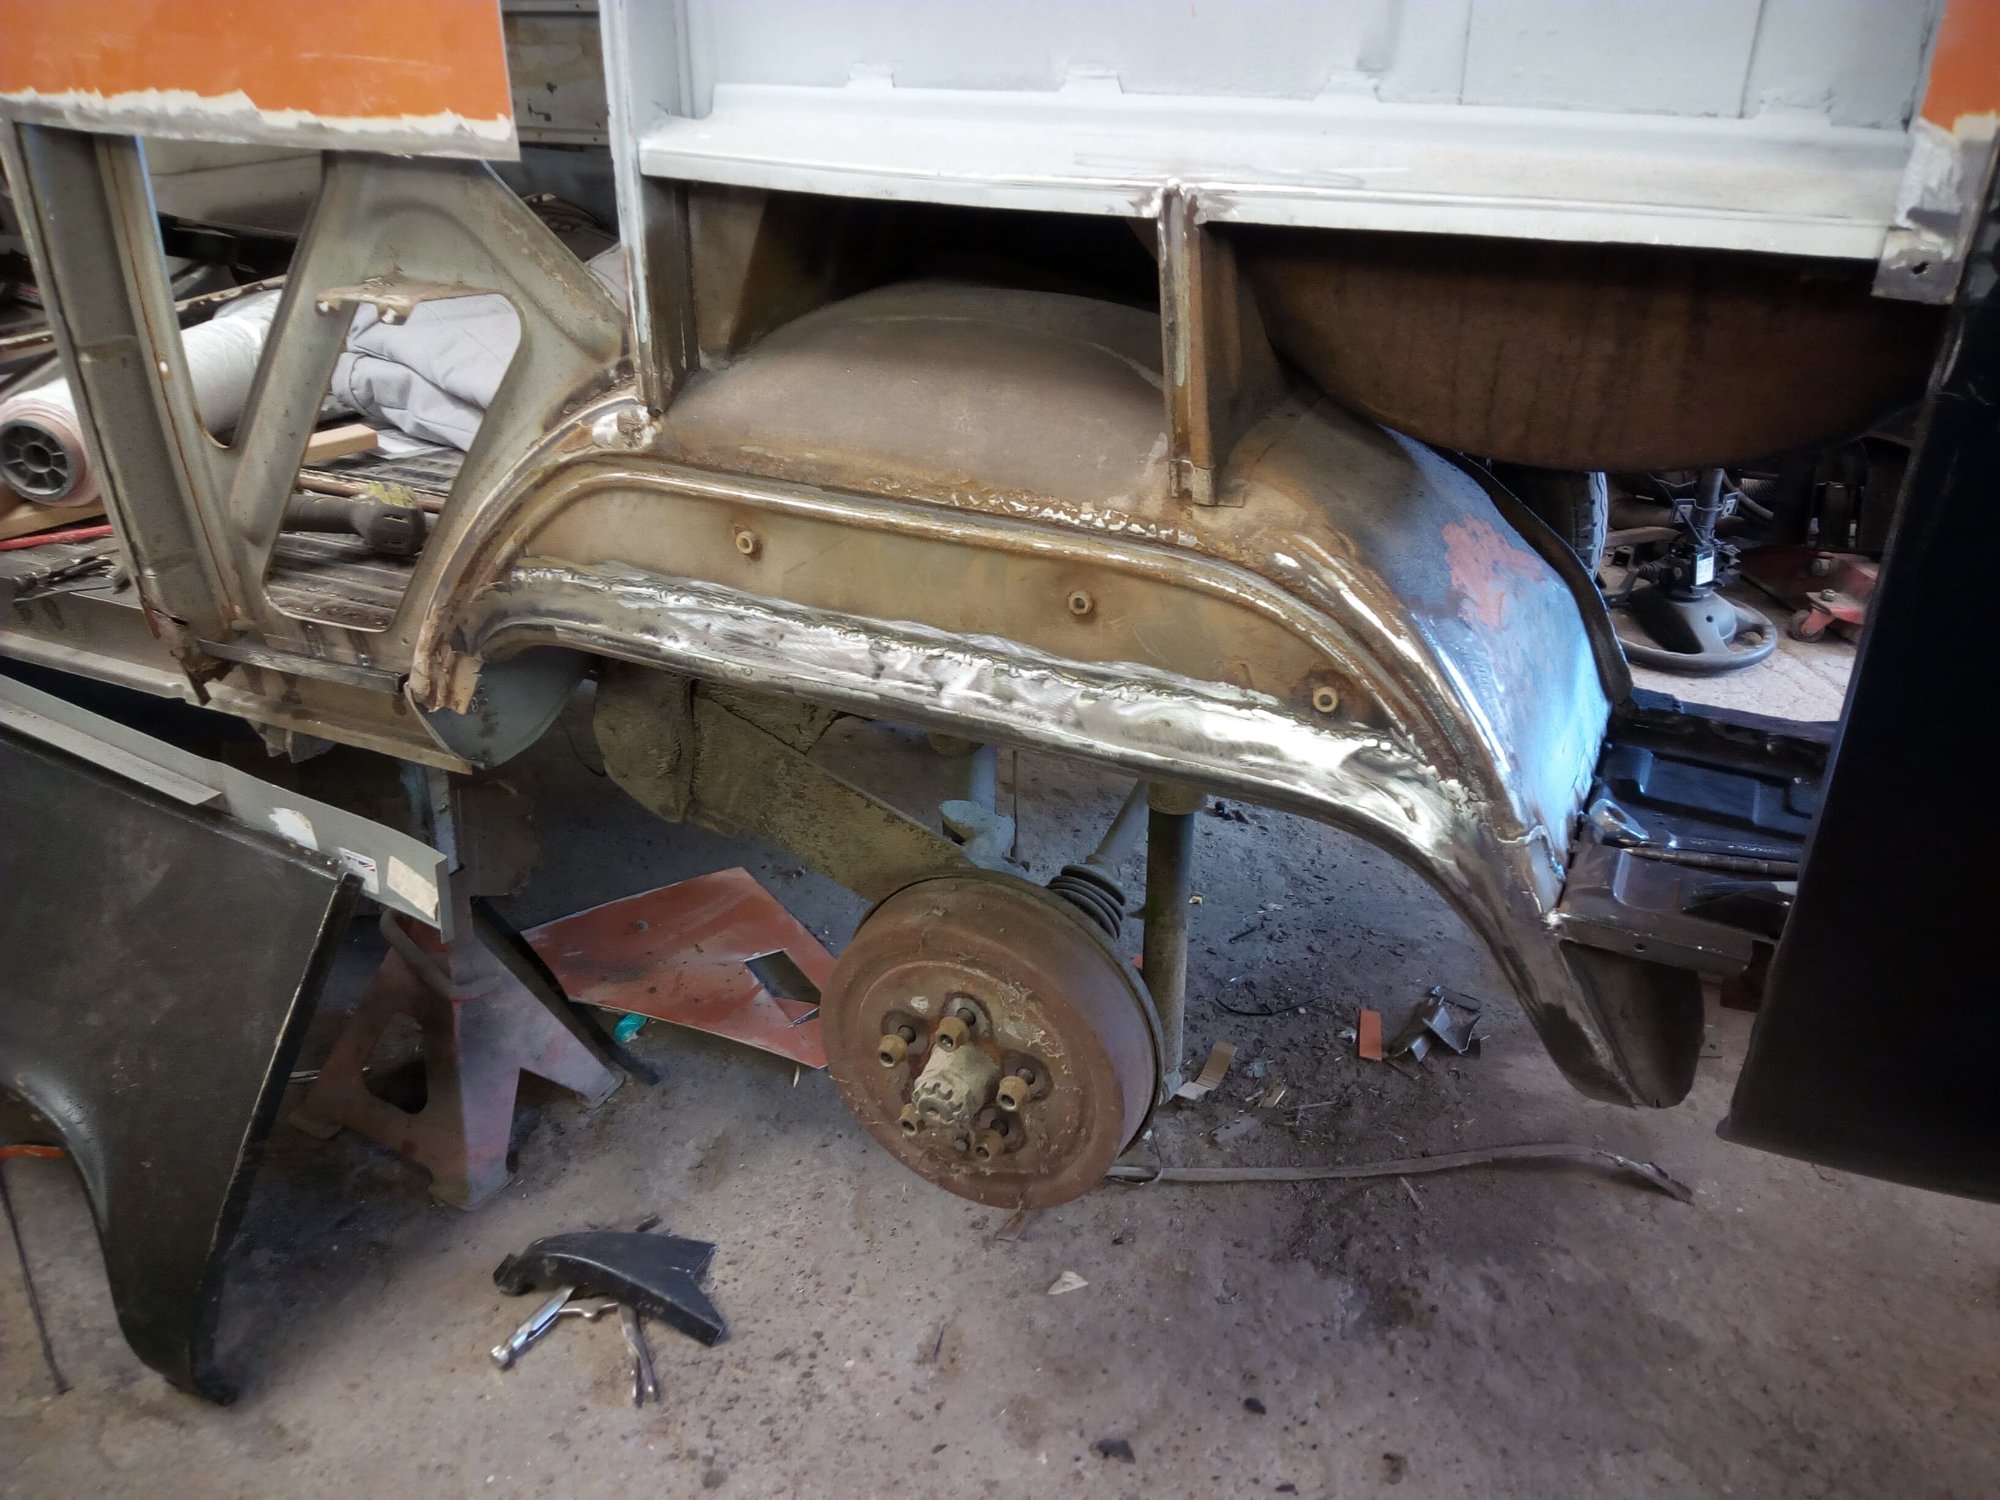
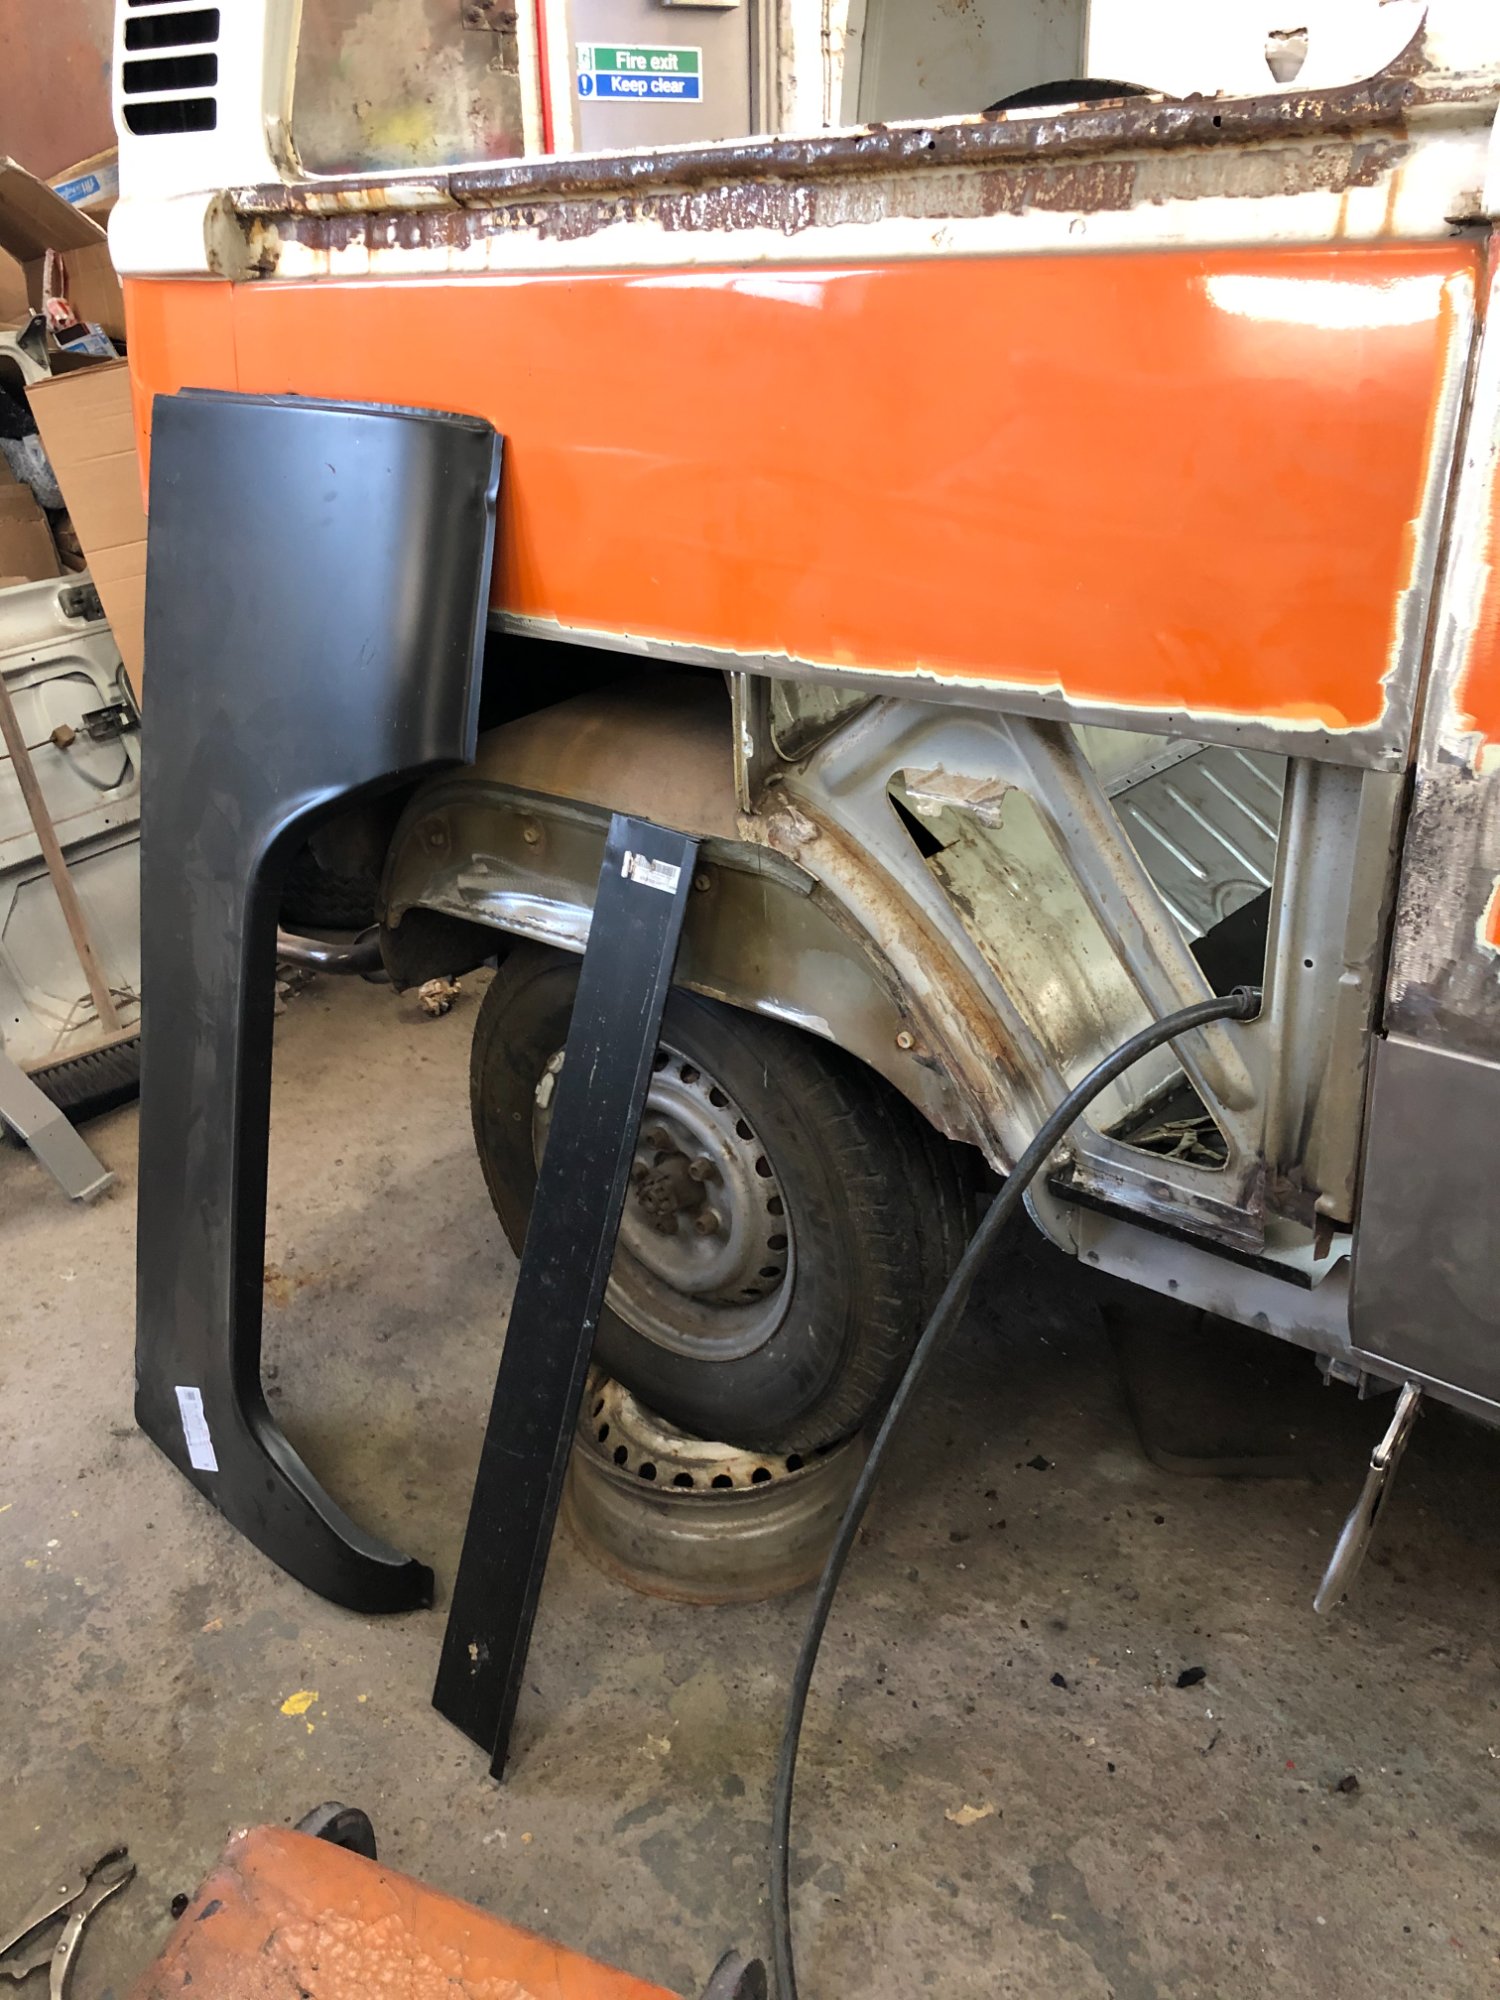
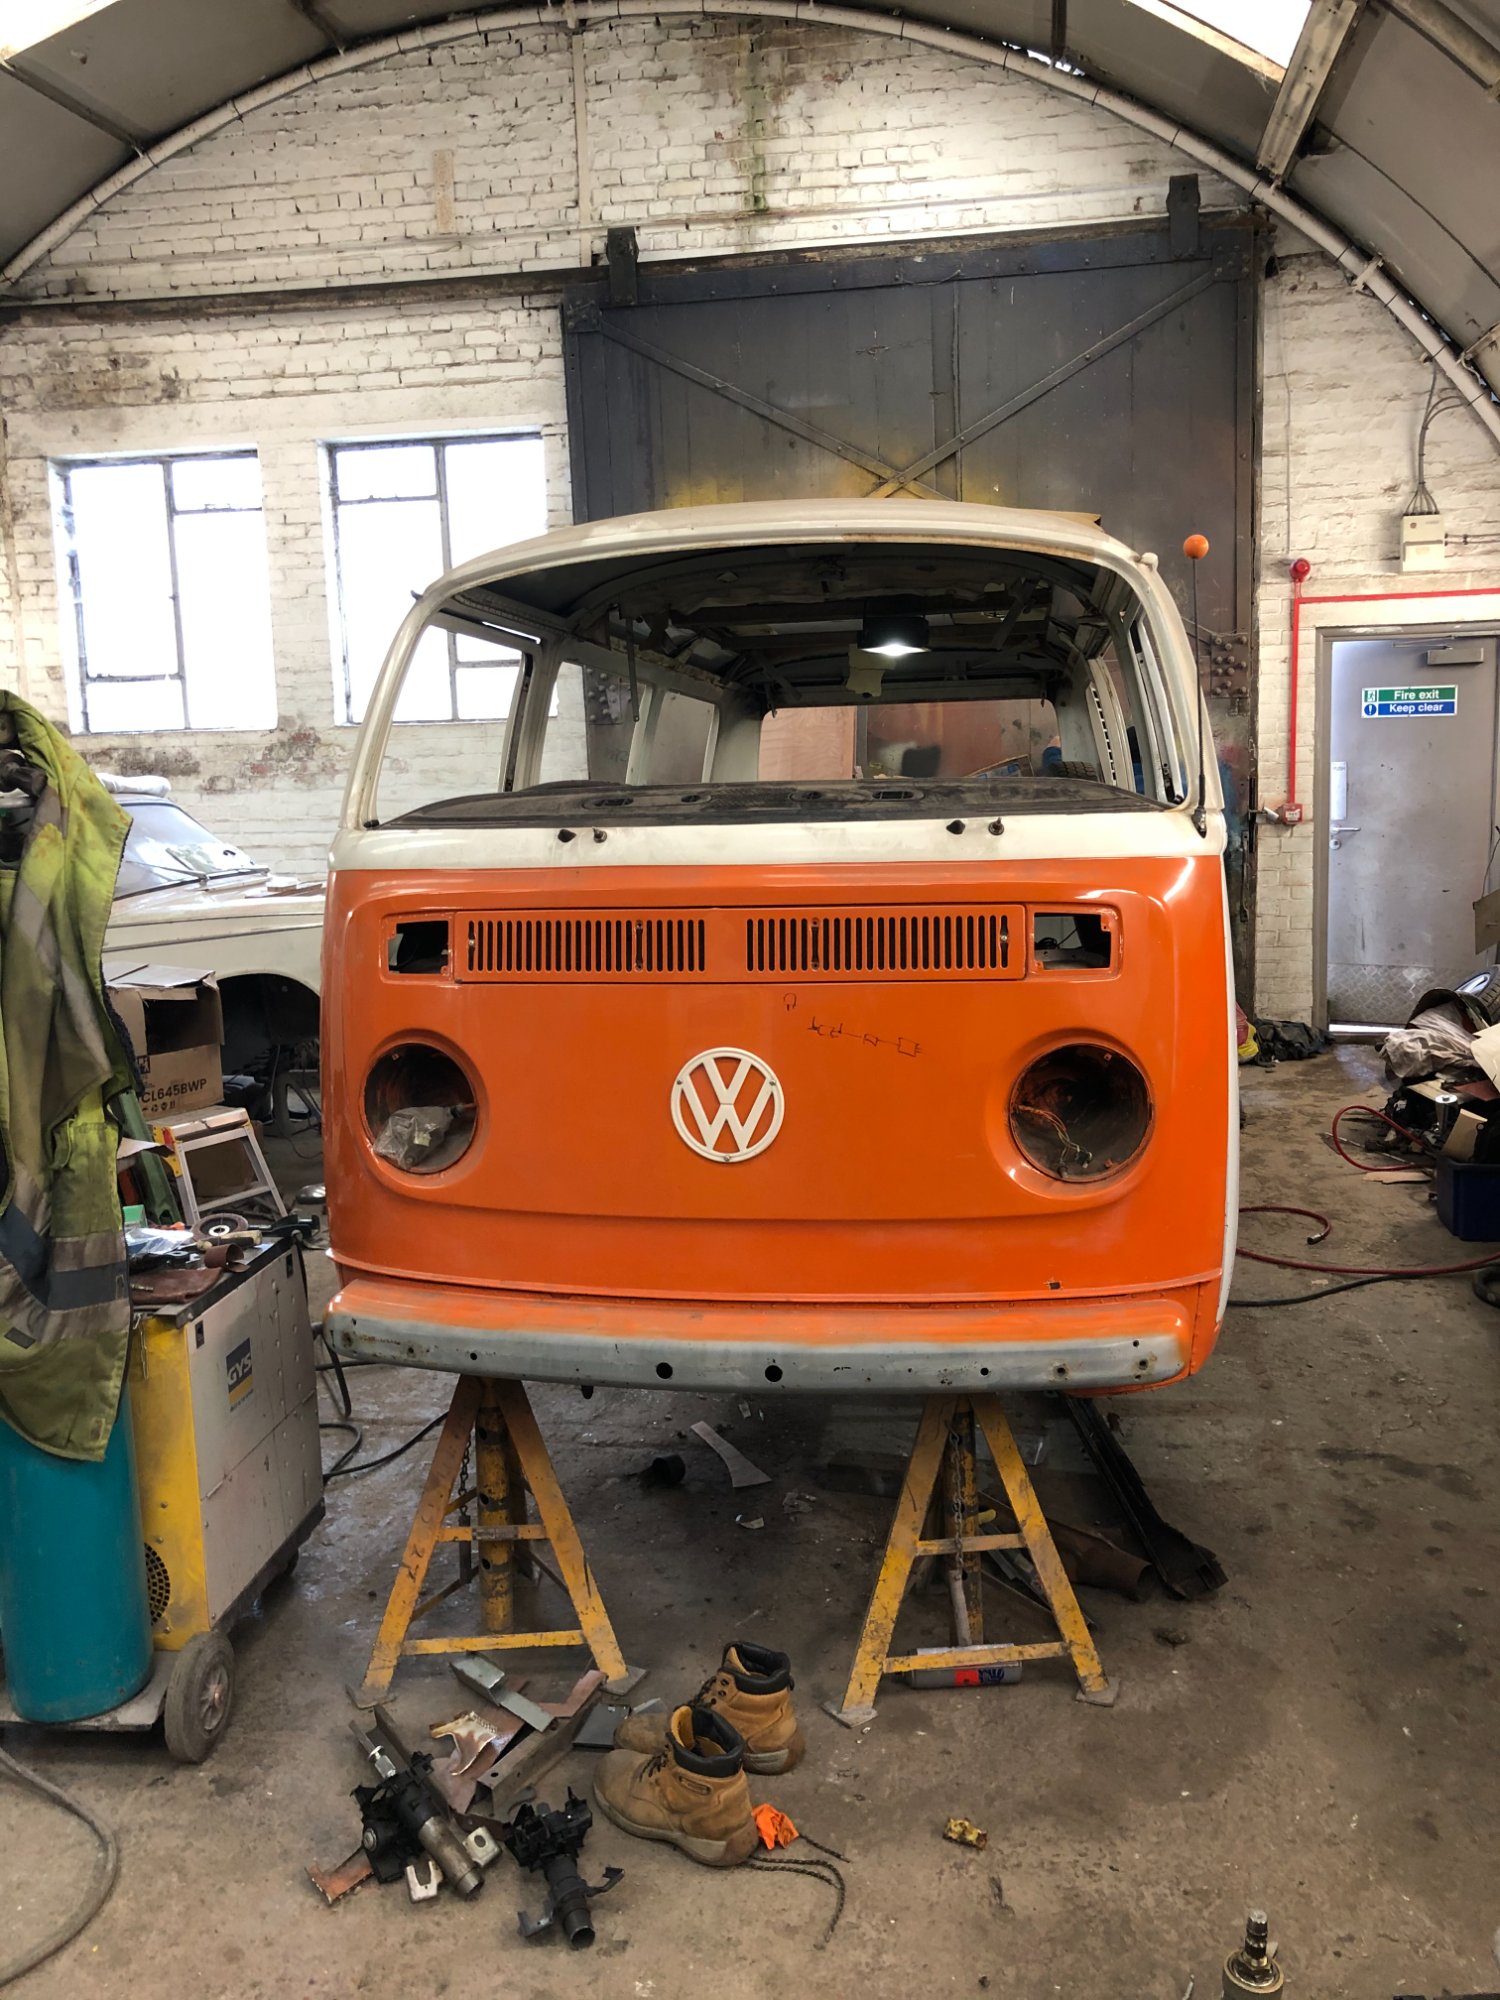
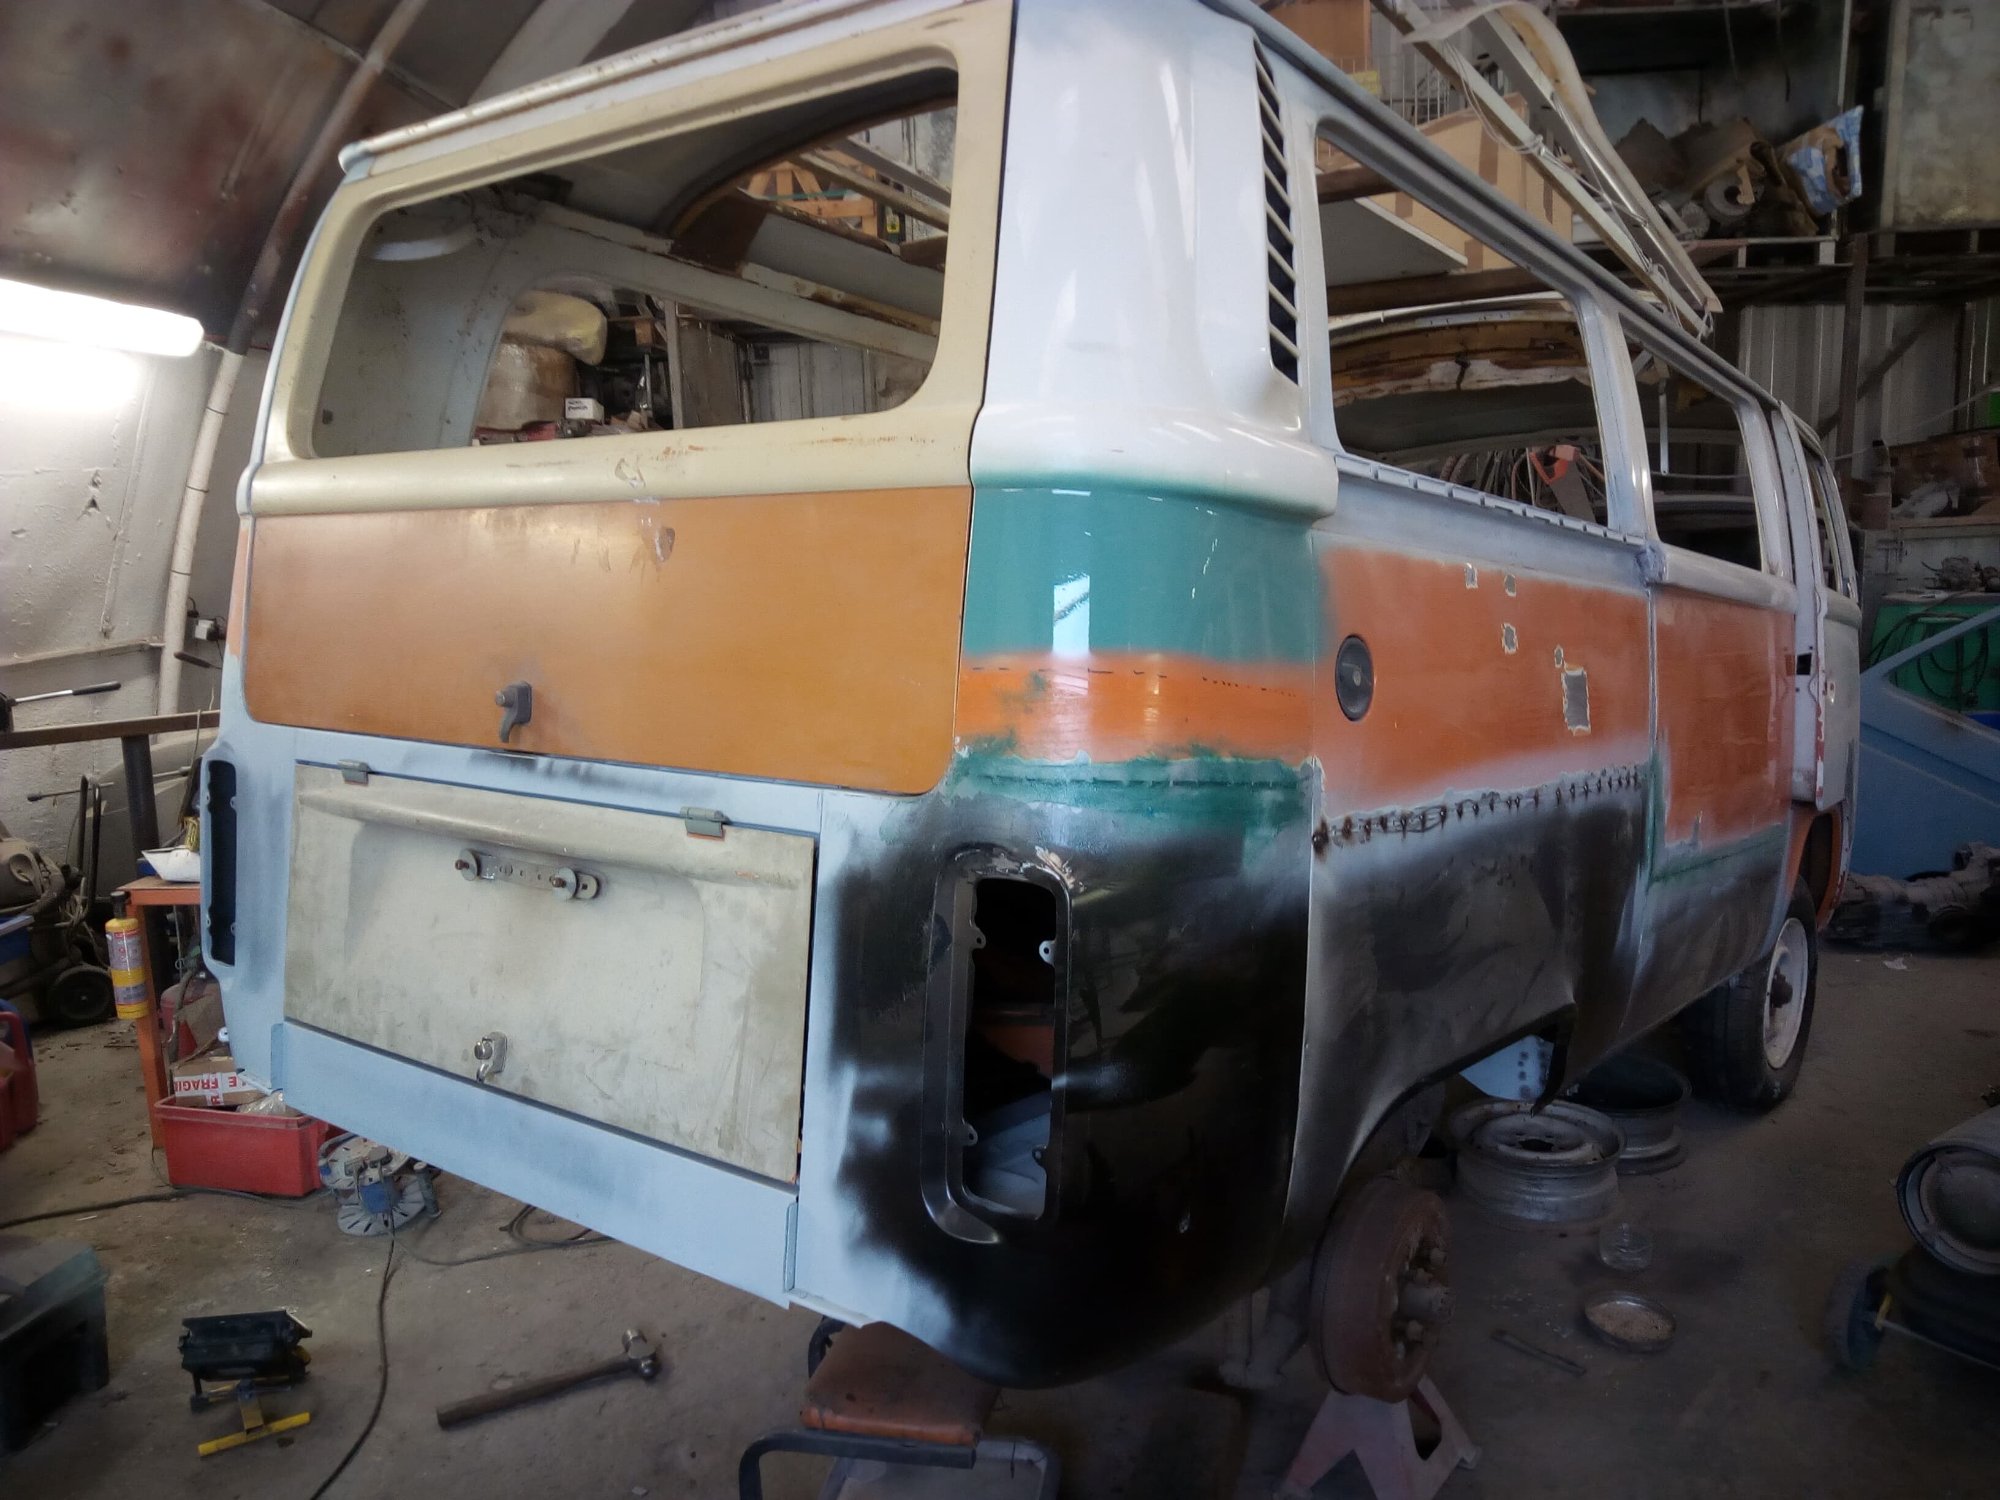
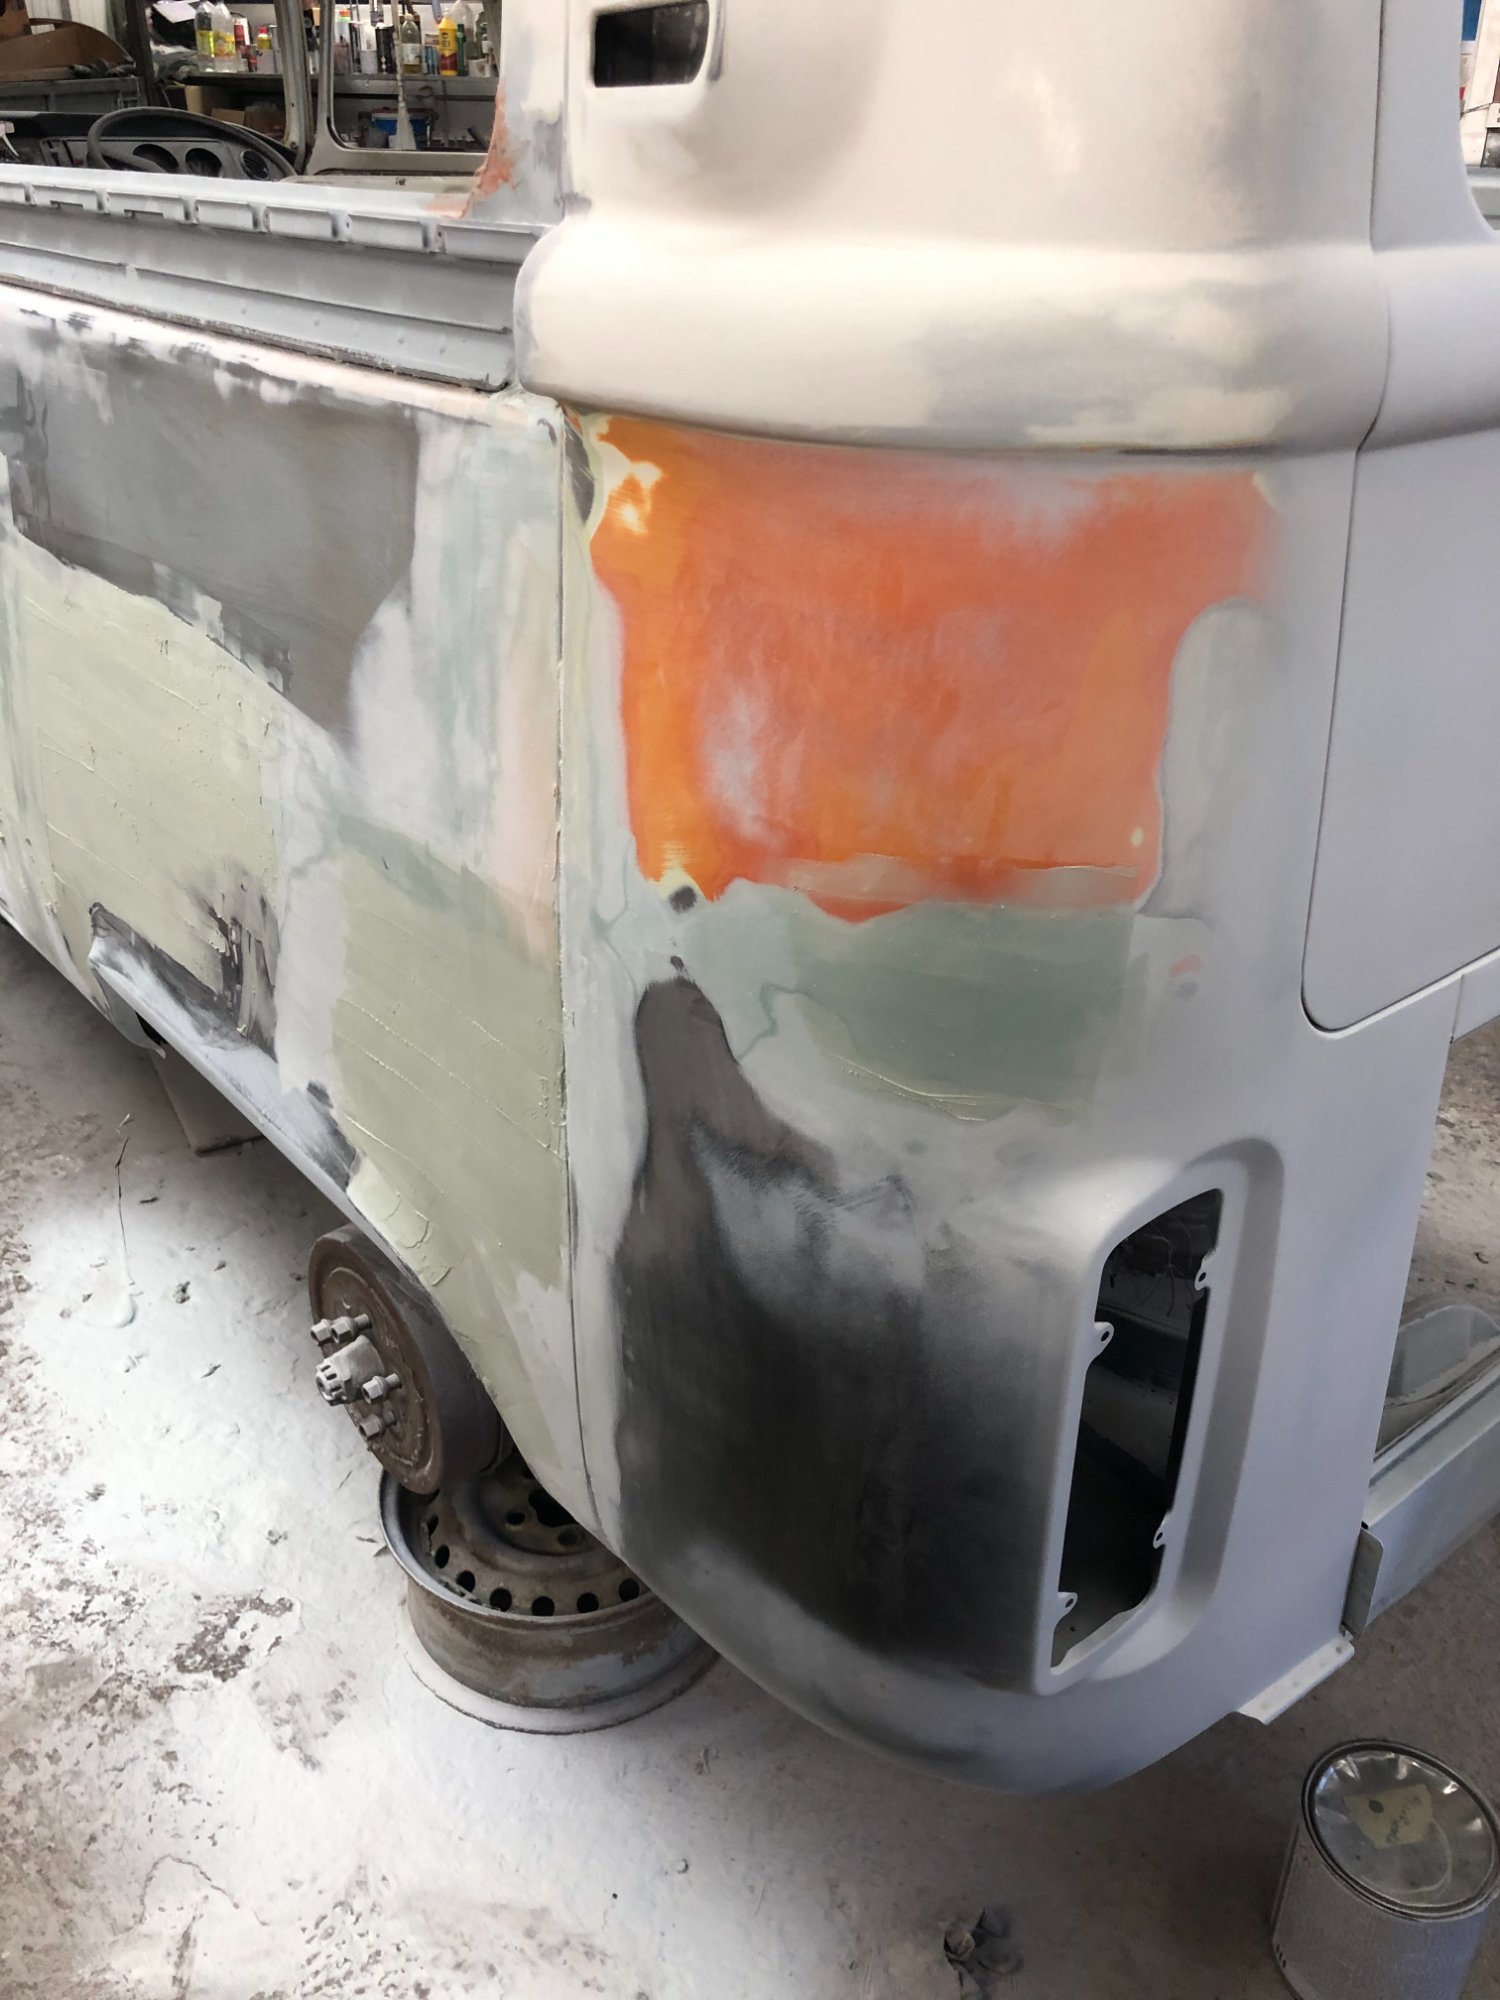
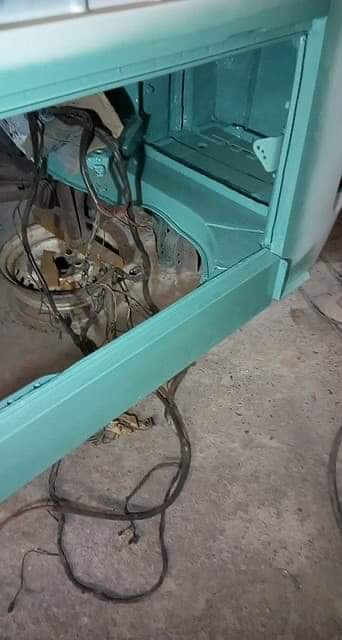
The Full Restoration Journey: 2017-2025 (Gallery)
Here's Jenny's transformation in photos. From rusty orange wreck to turquoise dream—every phase documented:
The Budget Multiplier Rule
Here's my hardest-won lesson: Whatever budget you think you need, multiply it by 1.5 to 2.
I budgeted £8,000. I spent £12,000+. Why?
- Hidden rust (always more than you think)
- While the shop was in, "while we're in there, let's fix that too"
- Inflation and changing suppliers
- One-off custom fixes specific to Jenny
- Parts that were supposed to be salvageable but weren't
It's not bad planning on my part—it's the reality of restoration. Every old vehicle has surprises. Budget realistically and add a contingency.
The Knowledge Multiplier: Learning Beats Budget
But here's the counterintuitive bit: the more you learn, the less money you waste.
I went into Jenny's restoration mostly ignorant. I learned by:
- Reading John Muir's book → (seriously, this is the VW Bible)
- Watching hundreds of YouTube videos
- Asking questions on forums and in the VW community
- Building relationships with mechanics and restoration experts
- Getting hands dirty doing what I could do myself
The VW community is extraordinary. People will help. They'll share expertise, point you in the right direction, and celebrate your wins. Take advantage of that.
Is a 2-Year Restoration Realistic?
Yes, if:
- You outsource the major structural work (rust, welding, painting)
- You have a clear scope before starting
- You have budget ready and can move quickly
- You work on interior/mechanical in parallel while waiting for bodywork
No, if:
- You're DIY-ing everything (expect 4-5+ years)
- You're learning as you go (add 50% to timeline)
- You're fitting it around work/family (add 100%)
- You discover major hidden problems (add whatever was wrong)
My honest timeline was 8 years buying to finished van, but only 2-3 years of actual work. The rest was planning, waiting for the shop, and doing work in parallel.
Final Advice: The VW Community is Your Secret Weapon
Before you start, before you spend a single pound: join the VW community.
Forums like TheSamba, Reddit's r/Volkswagen, local VW clubs, Facebook groups—these are goldmines of knowledge. People who've done exactly what you're doing. People willing to help.
Ask questions. Absorb everything. Learn from books, YouTube, blogs, and people who've walked this path. The VW community is so helpful. Use that.
And remember: your budget will be wrong, your timeline will stretch, and you'll discover problems you didn't expect. That's not failure—that's restoration. Go in with eyes wide open, budget conservatively, learn constantly, and enjoy the journey. That's what this is really about.
Related Guides
This post contains affiliate links. If you purchase through these links, I may earn a small commission at no extra cost to you. It helps keep Jenny on the road and this website running — thank you!