Complete 1600cc VW Engine Rebuild Guide
I pulled Jenny's 1600cc Type 1 engine and gave it a complete overhaul. Here's everything I learned—the tools I needed, every part I replaced, torque specifications, cost breakdown, and the mistakes that cost me time and money.
Why I Decided to Pull the Engine
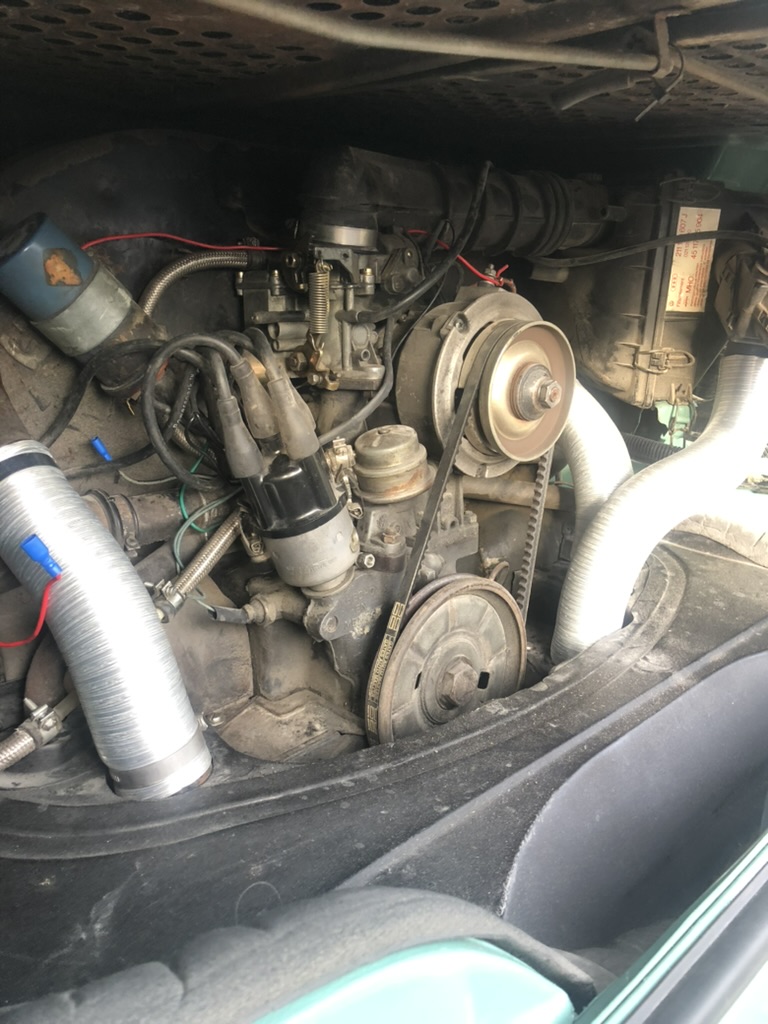
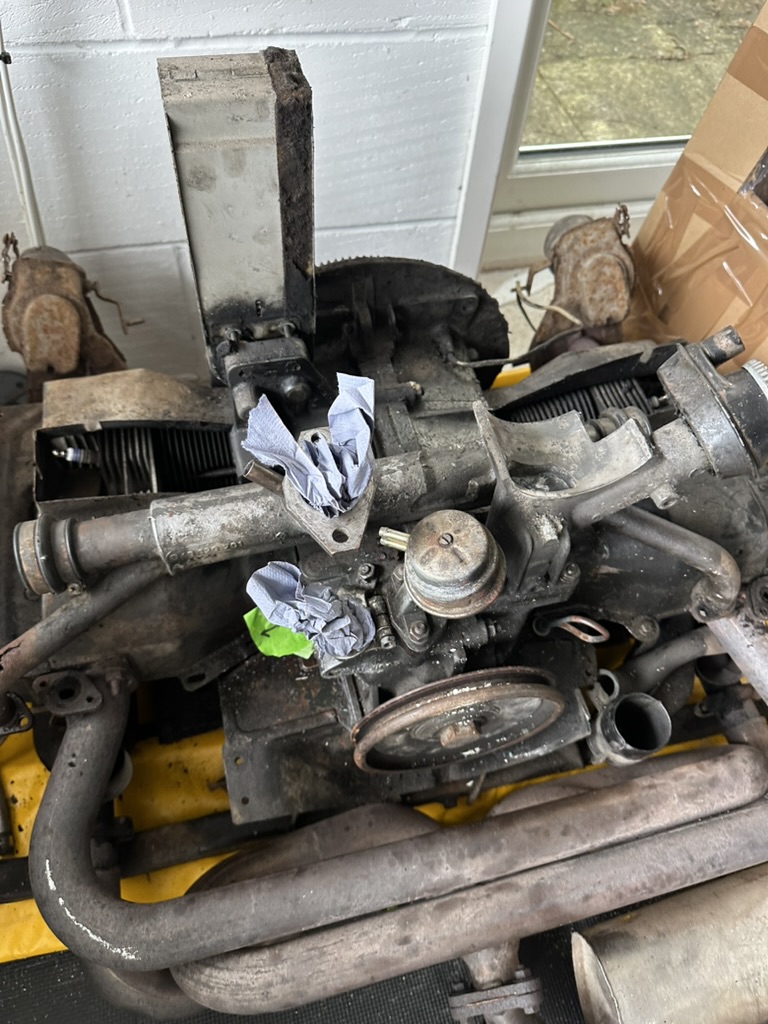
This was Jenny's engine when I finally admitted defeat—rusty, oily, and leaking from what seemed like everywhere. The main culprit? A completely corroded 🔩 oil cooler seal →. But that was just the visible problem.
I'd been putting this off for months, maybe even a year. The engine ran, sort of. But the oil leaks were getting worse, and I knew that ignoring it would only lead to bigger, more expensive problems down the line. It was time.
The main issue: Corroded oil cooler seal causing major oil leaks. But once I got into it, I found plenty more that needed attention—rusty tinware, worn seals, and general neglect from decades of use.
The oil cooler seal—completely gone. This was the main source of the leaks.
Before You Start: Tools You'll Actually Need
I won't list every basic tool. But these made the difference between frustration and success. And yes—I have links to every single one because these are the exact tools I use and trust:
Essential Tools & Equipment
- 🔧 Metric Socket Set (8mm-19mm) - Invest in a decent set. If you're going to work on your own van, you're going to need them. View on Amazon →
- ⚙️ Torque Wrench (10-150 Nm) - A good investment that saved me borrowing my mates' tools all the time. View on Amazon →
- 🧹 Wire Brush Set - Once the engine is out, you're going to want to clean it. View on Amazon →
- 📏 Feeler Gauge Set - Essential for setting your valve clearances. View on Amazon →
- 📋 Trolley Jack (x2 recommended) - I used two trolley jacks and an old pallet to lower the engine on my own! View on Amazon →
- 🧹 Brake Cleaner - This stuff works miracles on an oily engine! View on Amazon →
- 🔧 Axle Stands - Goes without saying—if you're working under the van, make sure it's supported. View on Amazon →
- 🔦 Magnetic Torches - Great for when you need a third or fourth hand in the engine bay. View on Amazon →
- 🛏️ Mechanic's Creeper - This makes getting in and out so much easier, especially for a gentleman of 40+. View on Amazon →
- ⚡ Digital Multimeter - Always using this to see if there's power going where it should be. Cheap as chips and I keep mine on board. View on Amazon →
- 🛢️ Oil Drain Pan - It's just easier and less messy with one of these! View on Amazon →
Affiliate links - I earn from purchases at no extra cost to you.
The Rebuild Steps — Step 1: Removing All the Tinware
Before you can drop the engine, you need to strip off all the external components. And trust me—there's more tinware on these engines than you think.
Starting to remove all the rusty old tinware—it all has to come off.
The Rusty Reality
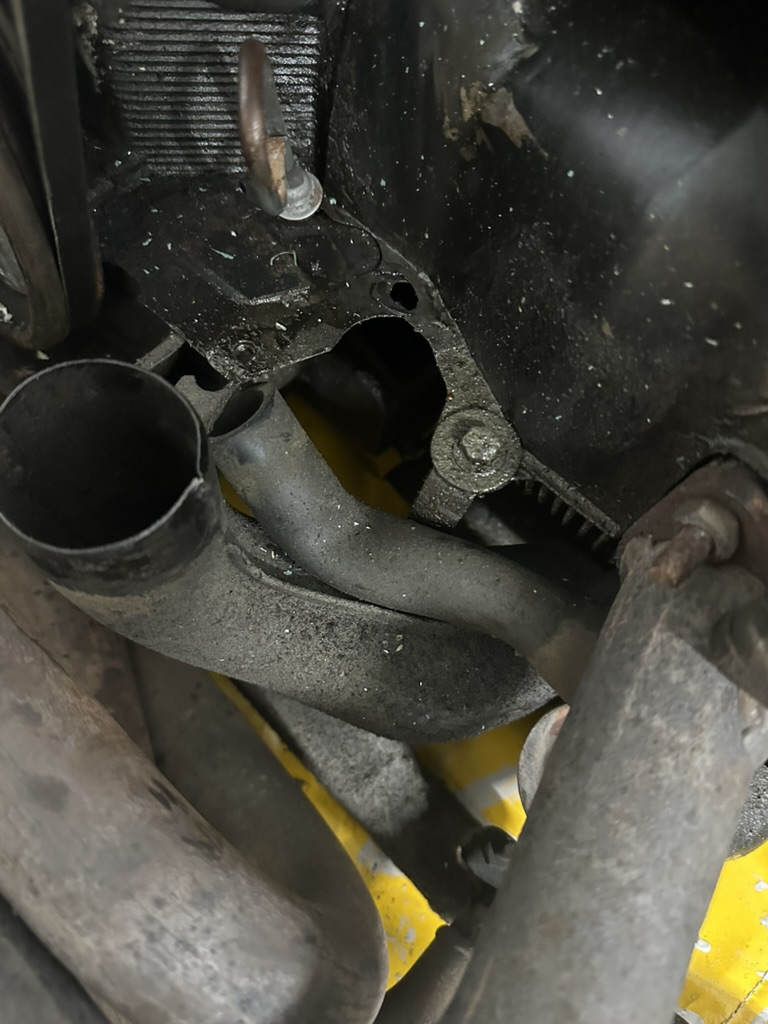
My tinware was in rough shape. The heat risers were completely rusted through—barely holding together. This is common on Bay Windows, especially if they've spent years outside or in damp storage.
Old split heat risers—completely rusted through. These had to go.
Step 2: Label EVERYTHING
This is the single most important piece of advice I can give you: label everything before you disconnect it.
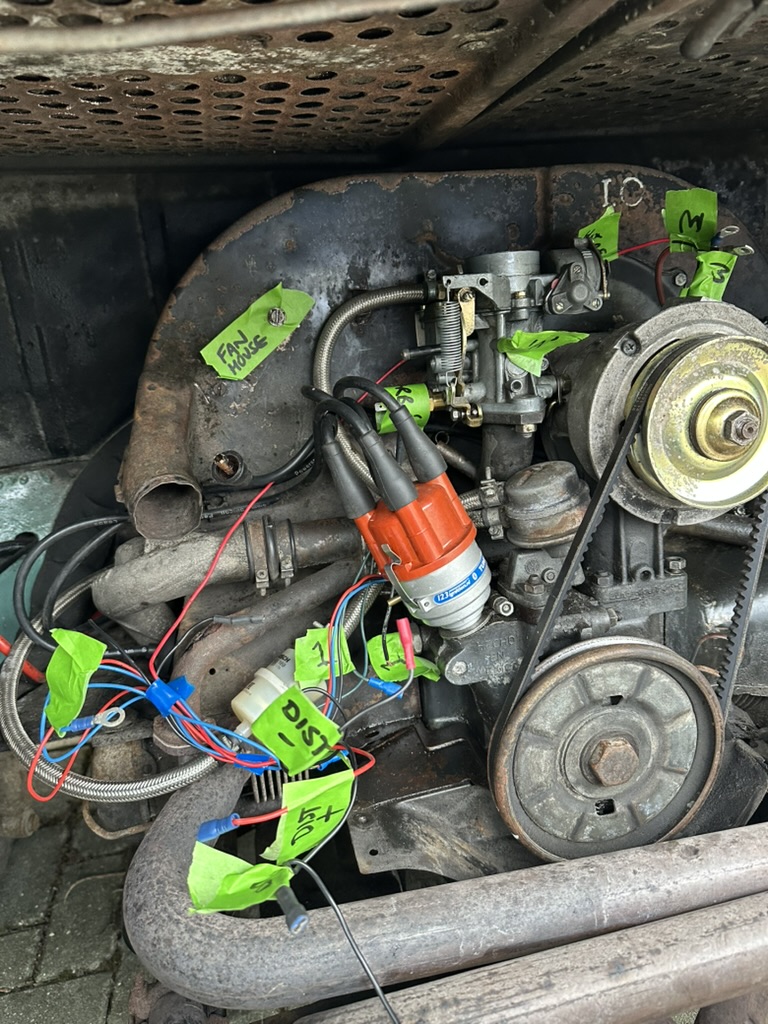
Meticulously labelling everything. You'll thank yourself during reassembly.
I used 🖊️ masking tape and a marker → to label every single wire, hose, and connection. Best advice I had was to label everything so you know how to put it back together! Where does it go? What does it connect to? Write it down. Take photos. Be obsessive about this.
Trust me—three weeks from now when you're trying to remember which wire goes where, you'll be incredibly grateful for the 20 minutes you spent labelling everything.
Step 3: Dropping the Engine
Here's the beautiful simplicity of air-cooled VW engines: four bolts. That's it. Four bolts connect the engine to the gearbox.
Dropping the engine—just four bolts to undo!
Before You Drop It:
- Disconnect battery (obviously)
- Drain oil (have an oil drain pan → ready)
- Disconnect throttle cable
- Disconnect accelerator cable
- Remove fuel line (it will drip—have rags ready)
- Disconnect all electrical connections
- Remove exhaust (four nuts at heat exchangers)
Label Every Fastener
As you remove bolts, nuts, and washers, put each set in its own labelled bag. I'm serious about this—label EVERYTHING.

Every nut, bolt, and washer in its own labelled bag. This saved me hours during reassembly.
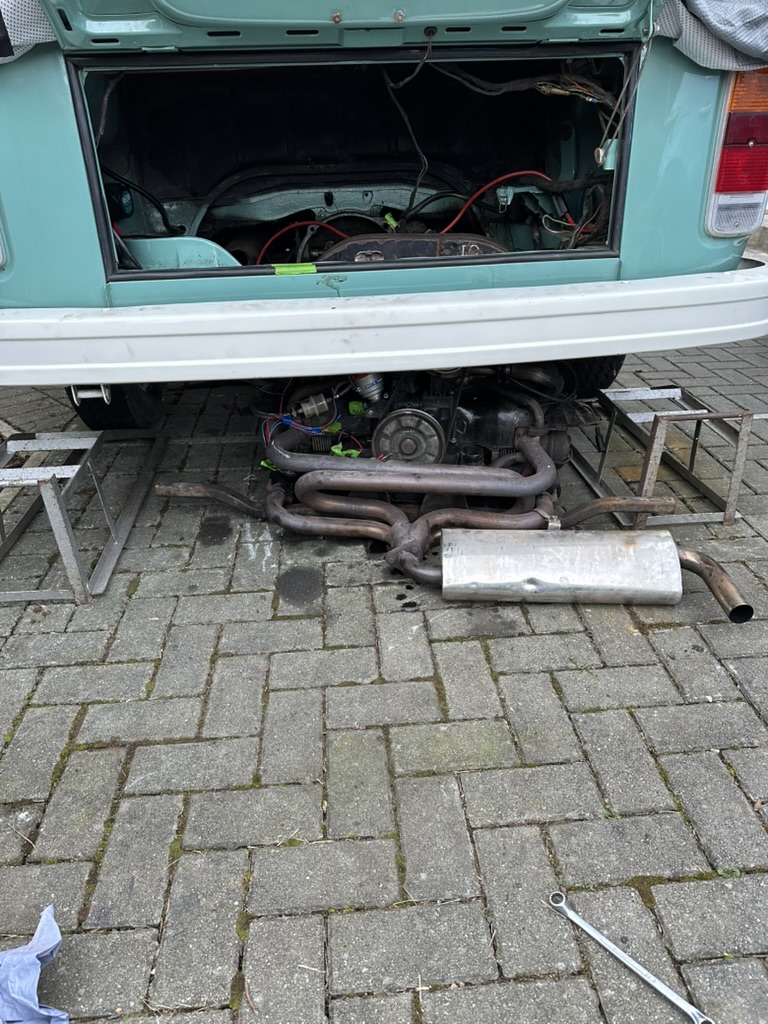
Getting It Out
Support the engine with a trolley jack → with a block of wood. Remove the four engine-to-gearbox bolts. Then carefully slide the engine straight back—it needs to come off the gearbox input shaft cleanly.
Have a friend help you guide it. Engines aren't heavy (about 60kg), but they're awkward, and you don't want to damage anything.
Getting the engine out from under the van—awkward but doable with two people.
TAKE PHOTOS
Before you remove anything else, take photos. Every angle. Every connection. You cannot have too many photos.
Take photos of everything before you remove it. You'll need these later!
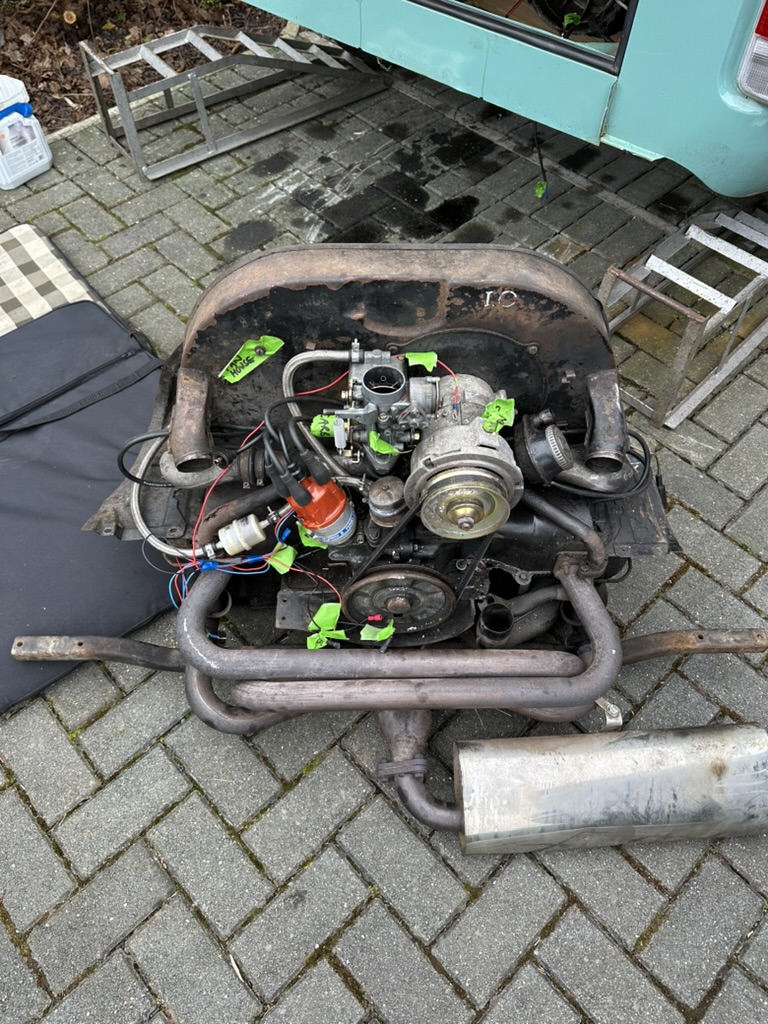
Step 4: Stripping It Down
Now the engine's out, it's time to strip everything off. This is where you really see what you're working with.
Tinware, fan housing, carb, alternator, and pulley all removed.
Off came: tinware, fan housing, carburetor (which I was replacing anyway), alternator, pulley, and all the cooling shrouds. Every piece got inspected as it came off.
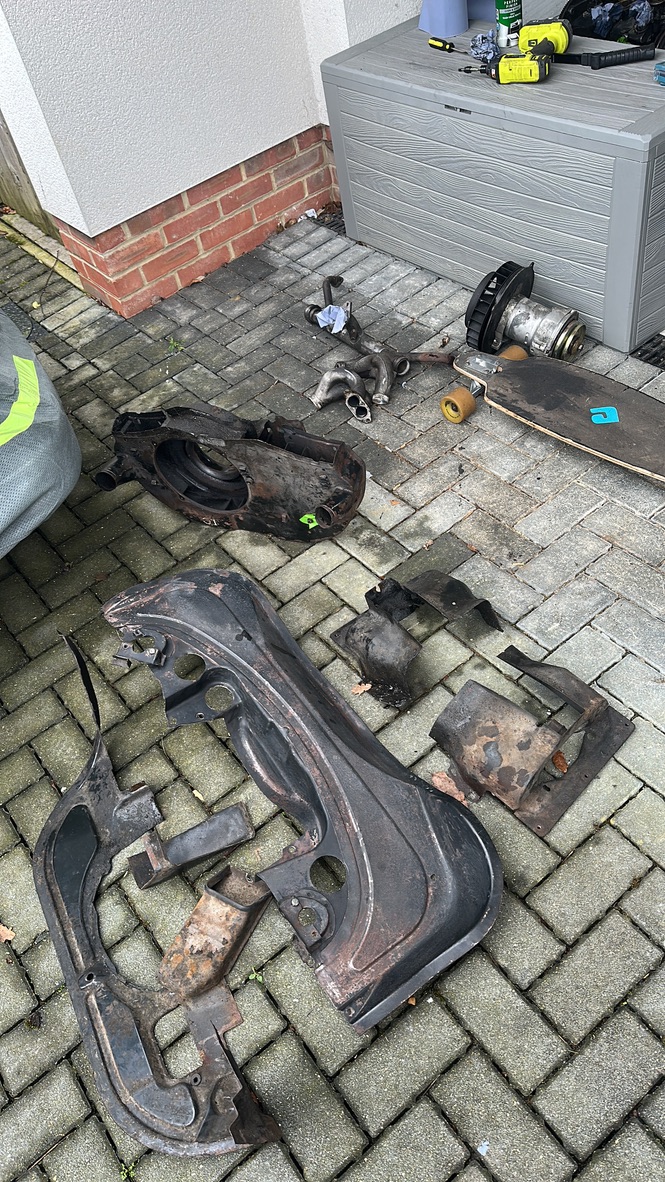
Piles of rusty, oily tinware—decades of neglect evident.
The tinware was in shocking condition. Years of heat, oil, and moisture had taken their toll. Some pieces would be salvageable with work. Others needed replacing.
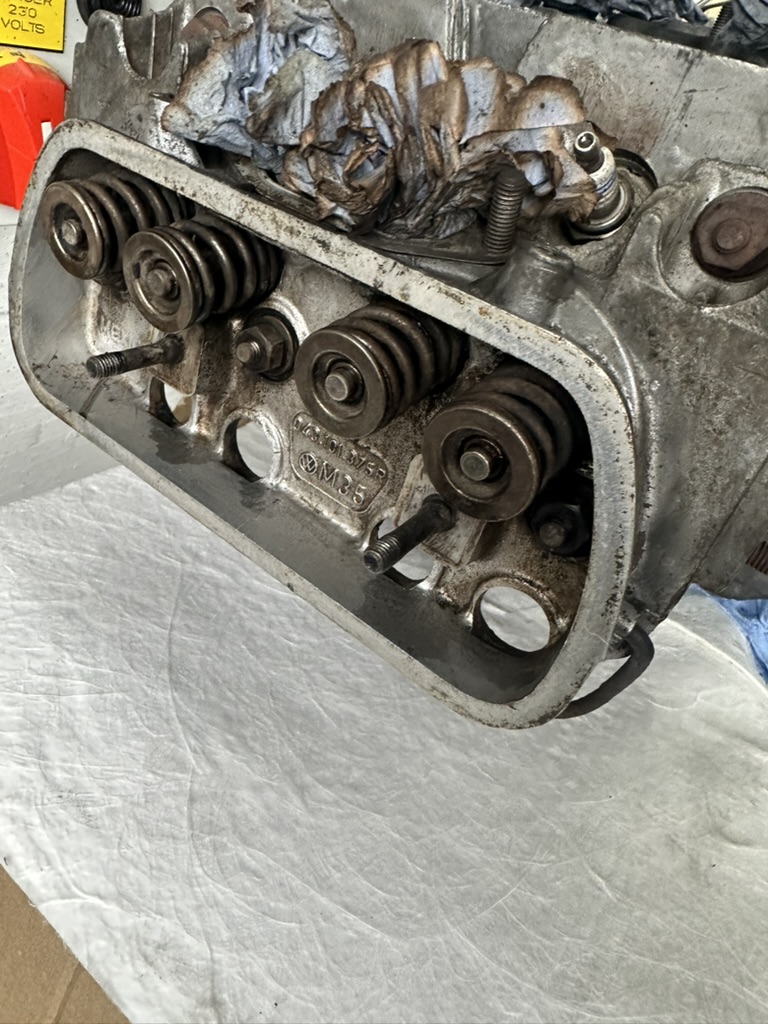
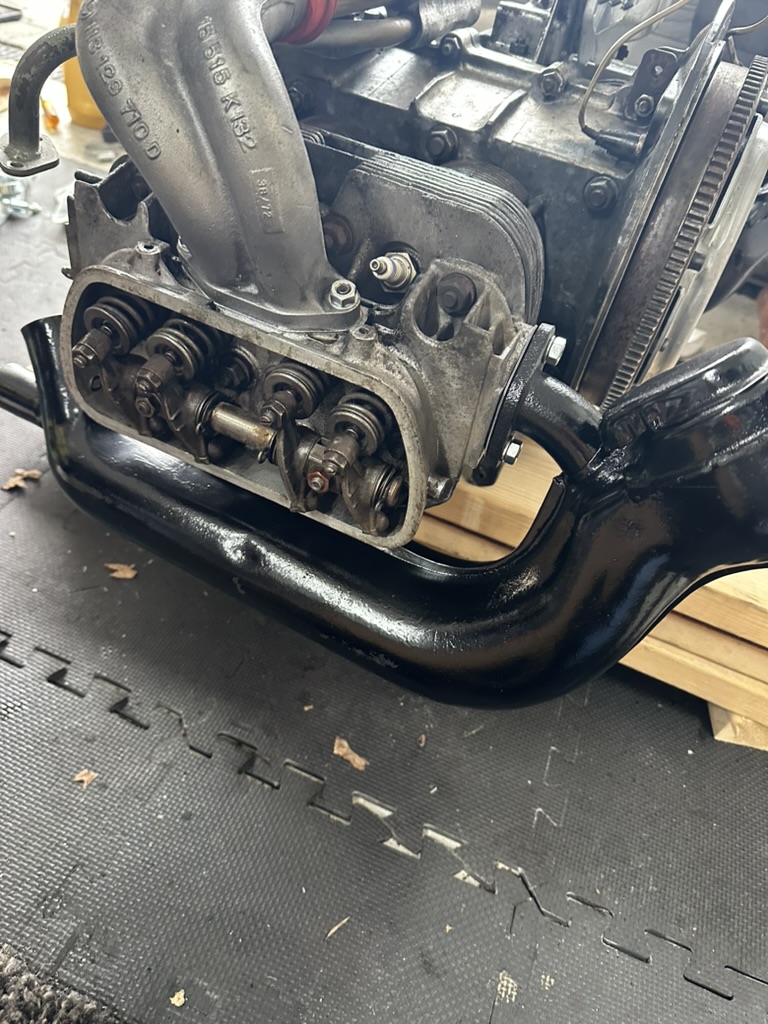
Step 5: Getting Back to the Block
With everything external removed, I finally got back to the block itself—or close to it.
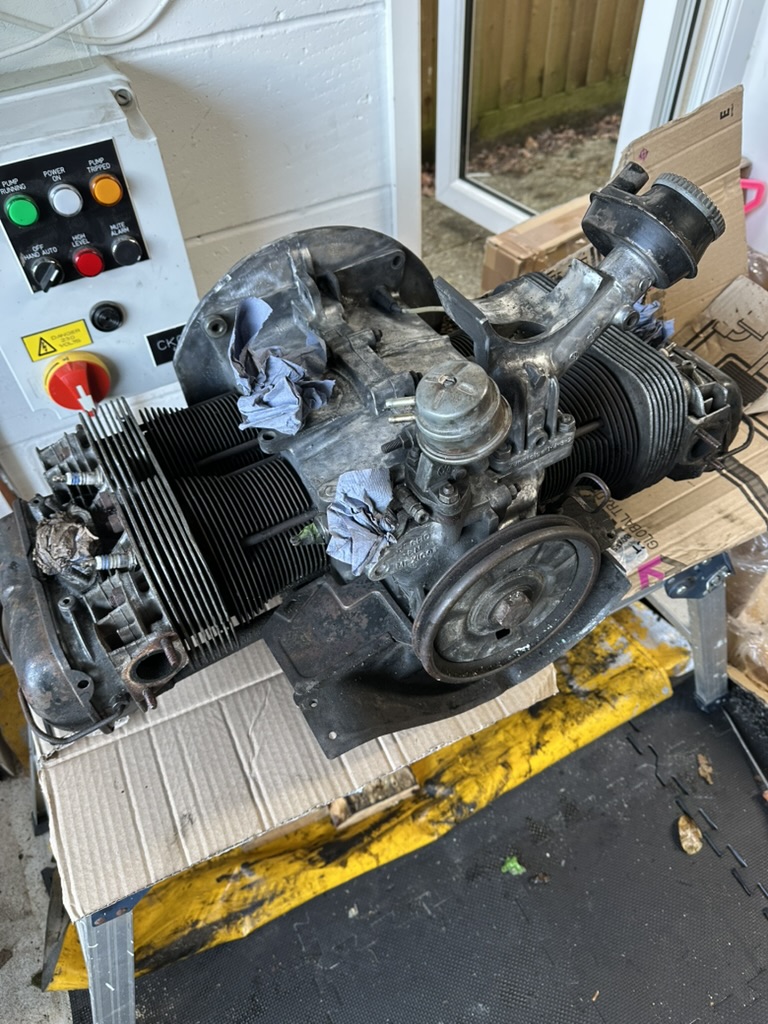
Back to the block—or thereabouts. Now the real work begins.
Step 6: Cleaning Everything
This took longer than I expected. Every surface needs to be absolutely spotless before reassembly.
Wire brush and brake cleaner became my best friends. So. Much. Cleaning.
I went through cans of 🧹 brake cleaner →. Wire brushed every surface with my 🧹 wire brush set →. Scraped off decades of oil, dirt, and grime. It's tedious work, but it's essential. Any dirt left behind could cause problems later.
Step 7: Clutch and Rear Main Seal
With the engine out, I could finally access the clutch and rear main seal—both of which needed attention.
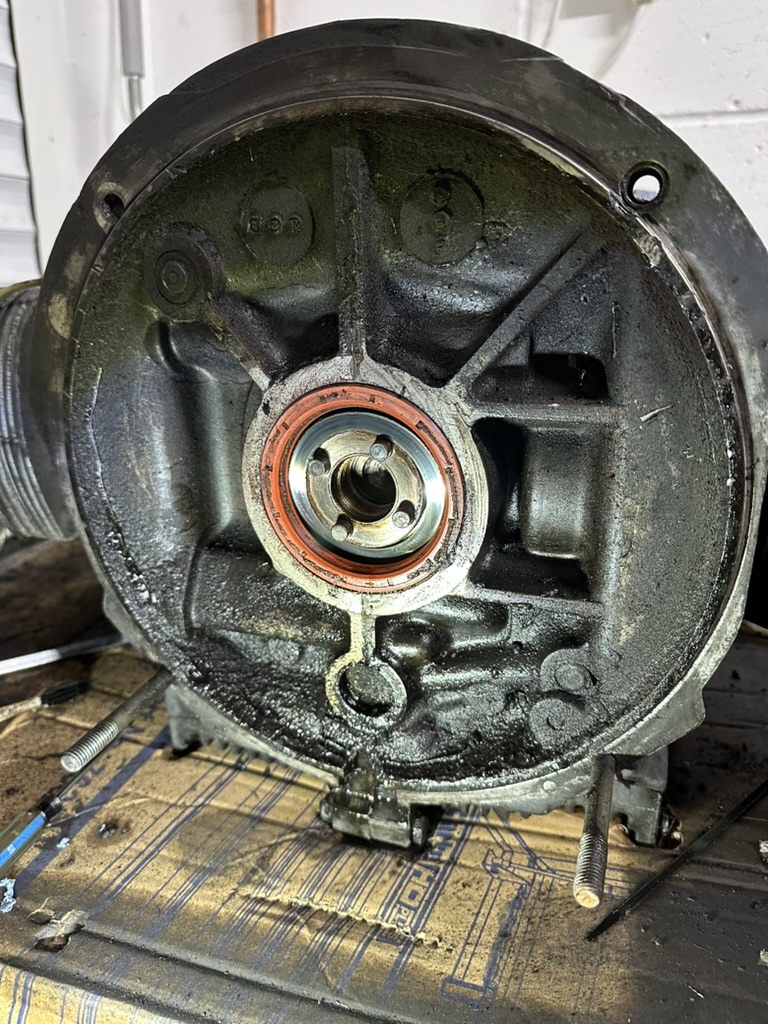
Clutch removed. The rear main seal was quite the mess!
The 🔩 rear main oil seal → was leaking—no surprise there. This was another seal that should always be replaced when your engine is out. The old one was leaky! This is a common issue on older VW engines, and it's impossible to replace with the engine in the van. So while everything's out, it's the perfect time to sort it.
Push Rod Tubes & Spring-Loaded Upgrades
I also removed the old push rod tubes. These were oil-soaked and past their best. I labelled each push rod in order—they need to go back in the same positions they came out of. Later, I fitted 🔩 CSP spring-loaded push rod tubes → which are awesome and completely prevent the leaks those old ones had.
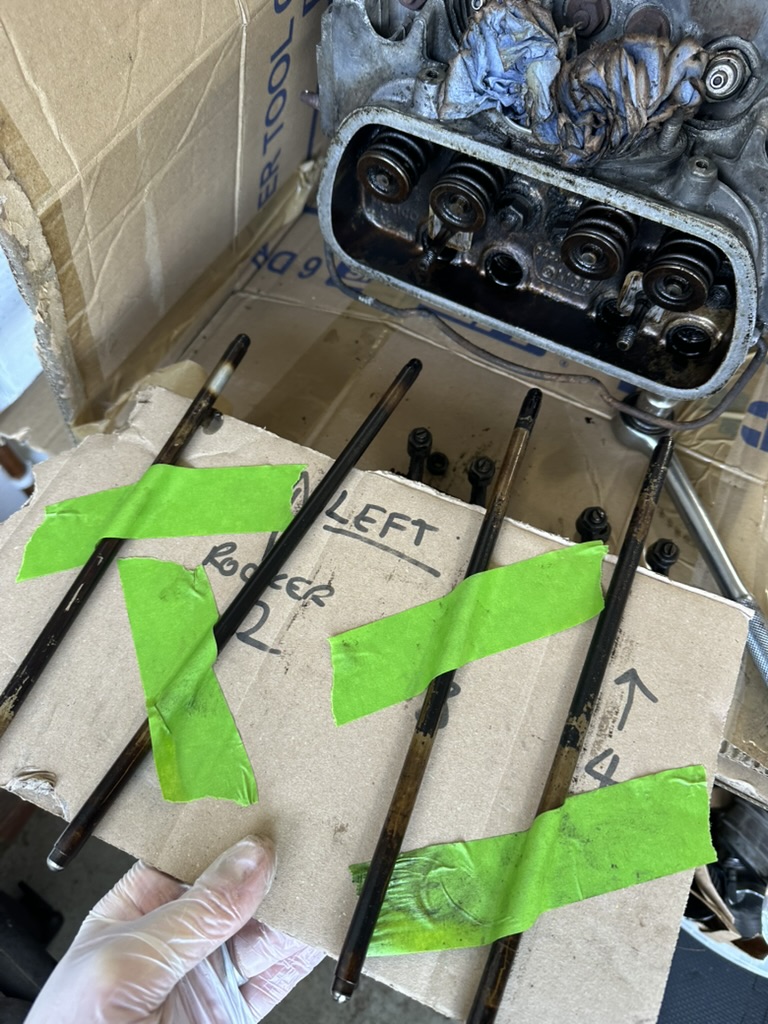
Removing old push rod tubes and labelling the push rods in order—critical for reassembly.
Step 8: More Cleaning
Did I mention cleaning? Because there's a lot of it. Every surface that will mate with a gasket needs to be spotless.
More brake cleaner, more cleaning. I probably went through 6-7 cans of the stuff.
Torque Specifications — The Critical Part
Here's where precision matters. These are the correct torque specs for a classic air-cooled VW Type 1 1600cc engine. Always verify against your specific service manual, but these are the standard specs:
| Component | Bolt Size | Torque (Nm) | Notes |
|---|---|---|---|
| Cylinder Head Bolts (M10) | M10 | 31 | Follow sequence, bolts should be clean and lightly oiled |
| Cylinder Head Bolts (M8) | M8 | 24 | Secondary head bolts, same sequence |
| Rocker Shaft to Head | M8 | 21 | Even pressure across all mounting points |
| Connecting Rod Nuts | M9 | 30 | Critical—tighten in stages |
| Crankcase Bolts (6-main) | M10 | 28 | Follow reverse sequence when removing |
| Oil Drain Plug | M14 | 25 | Don't overtighten—will strip |
| Engine Mounting Bolts | M12 | 68 | Gearbox bolts—critical for alignment |
| Fan Belt Pulley | M14 | 70 | Use puller—don't hammer |
Always follow the manufacturer's torque sequence (usually a spiral or cross pattern). Torquing in random order will distort gaskets and cause leaks.
Step 9: New Rear Main Seal
With everything clean, I fitted the new 🔩 rear main seal →. The difference is night and day.
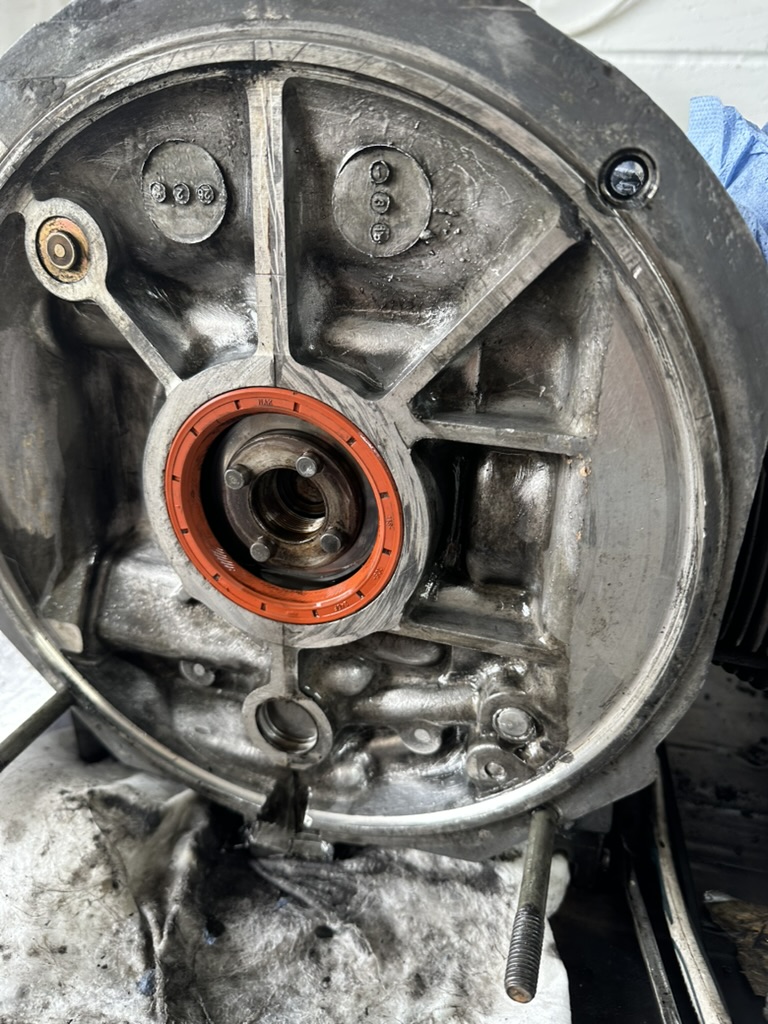
New rear main seal fitted. Everything's nice and clean now too.
This seal is what stops oil from leaking out the back of the engine. Get it right now, and you won't have oil dripping onto your clutch later.
Complete Rebuild Kit — What I Replaced:
- 📦 Full Gasket Set (VW 1600cc) - Cheap as chips and the set includes everything you need and nothing you don't. View on eBay →
- ⚡ Spark Plugs - Obviously wanted to make sure the service parts were replaced before firing her up again. View on eBay →
- 🔄 Oil Strainer & Gaskets - Your oil filter equivalent. View on eBay →
- 🔩 Rear Main Oil Seal - This was another seal that should always be replaced when your engine is out. The old one was leaky! View on eBay →
- 🔩 Oil Cooler Seal - This was the part that started it all—I'd hoped that would be it! However, once the engine was out there were so many more issues to sort. View on eBay →
- 📦 Classic 20W50 Engine Oil - Always get decent oil. This is my preference. View on eBay →
Upgrades I Made (Not Always Essential, But I Love These!):
- 🔄 Oil Cooler - Decided while the engine was out to replace the cooler as well as the seal. View on eBay →
- 🔩 CSP Push Rod Tubes (Spring-Loaded) - The old ones were leaking quite a bit—they were a right mess. These new spring-loaded push rods are awesome! View on eBay →
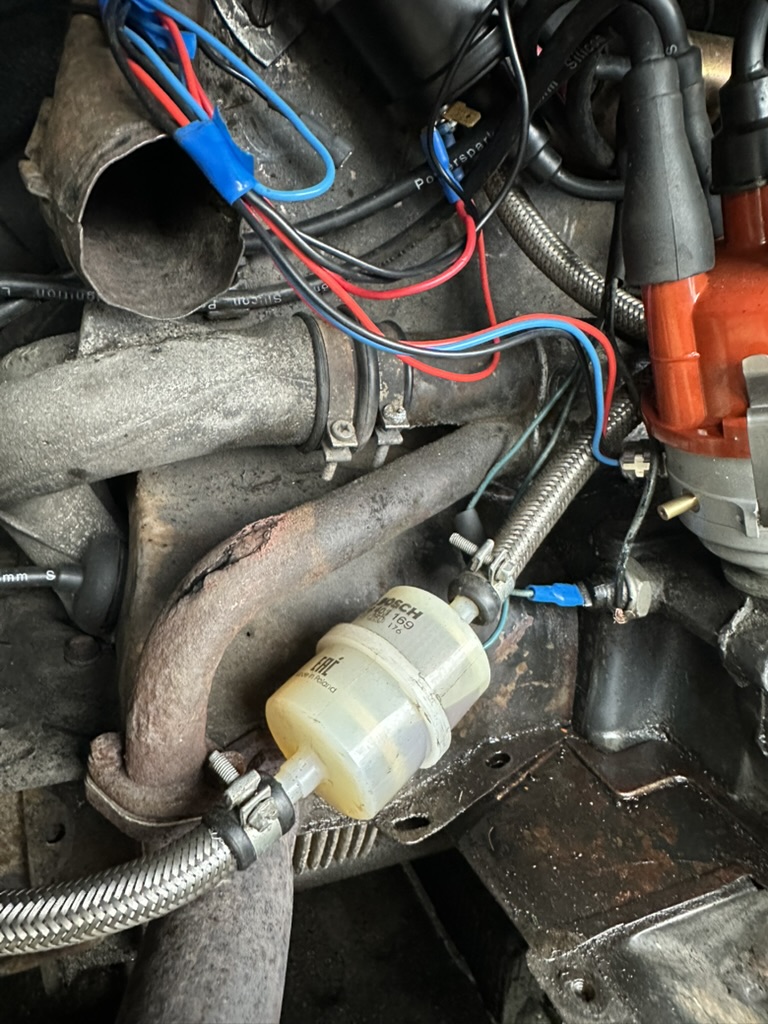
- ⚡ 123 Ignition Distributor (Bluetooth) - I added this so I didn't have to fiddle about with points anymore. As a complete novice, this was a great little update. View on eBay →
- ⚙️ Weber Progressive Carburetor (32/36 DGEV) - This was a bit of an excessive purchase, but my old carb was past its best and the heat risers had burnt through. However, it runs like a dream now! View on eBay → | Full installation guide →
Steps 10-18: Reassembly with Upgraded Parts
Now the restored heat exchangers go back on, along with the original fan housing and oil cooler cover—all shot blasted and resprayed.
Resprayed original heat exchangers going back on. They look fantastic.
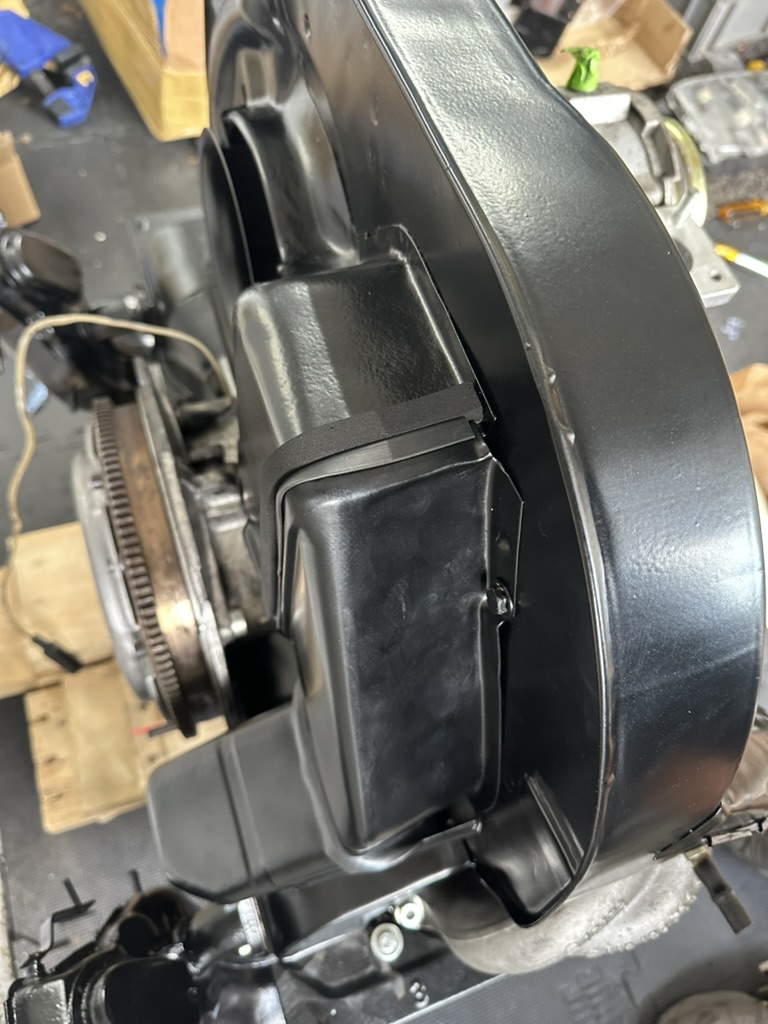
Original fan housing and oil cooler cover—shot blasted and sprayed. Now back on and looking brilliant.
The original alternator was working fine, so I kept it. But I upgraded to a new aluminium pulley—lighter and looks better too.
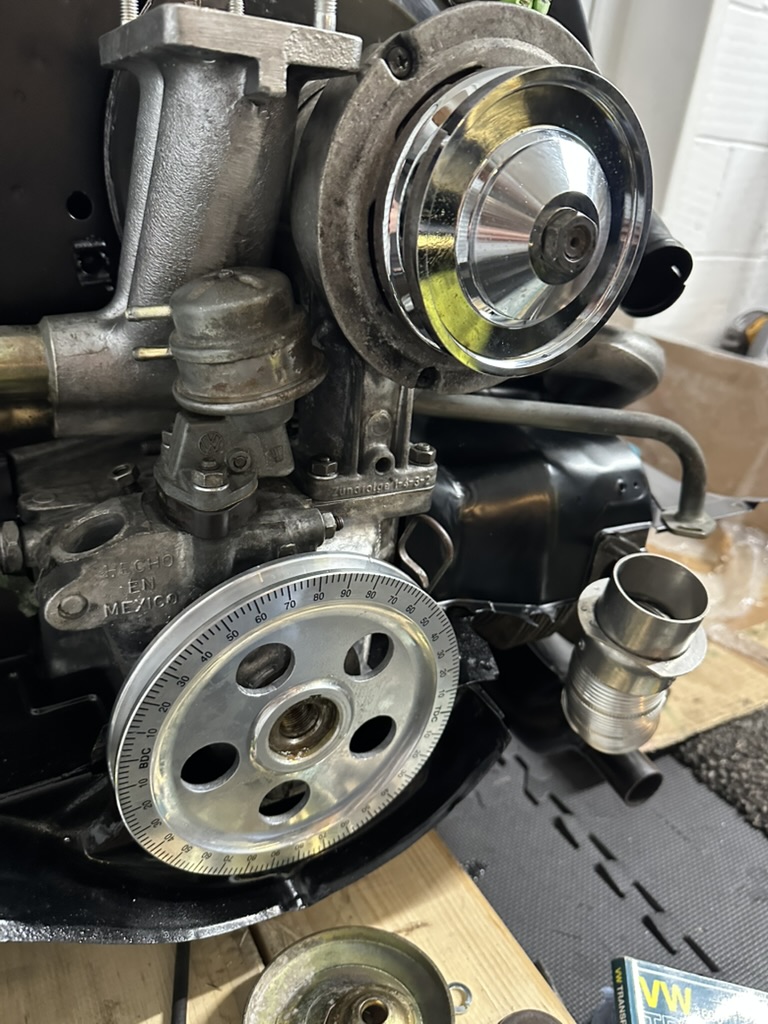
Original alternator with new aluminium pulley fitted.
New push rod tubes, new clutch, new oil cooler, and stainless steel heater hoses all go in place of the old corroded originals. For the paint work, I used 🎨 engine spray paint → on small less visible bits like the heat exchangers.

Stainless steel CSP heater hoses fitted—these look brilliant and will last forever.
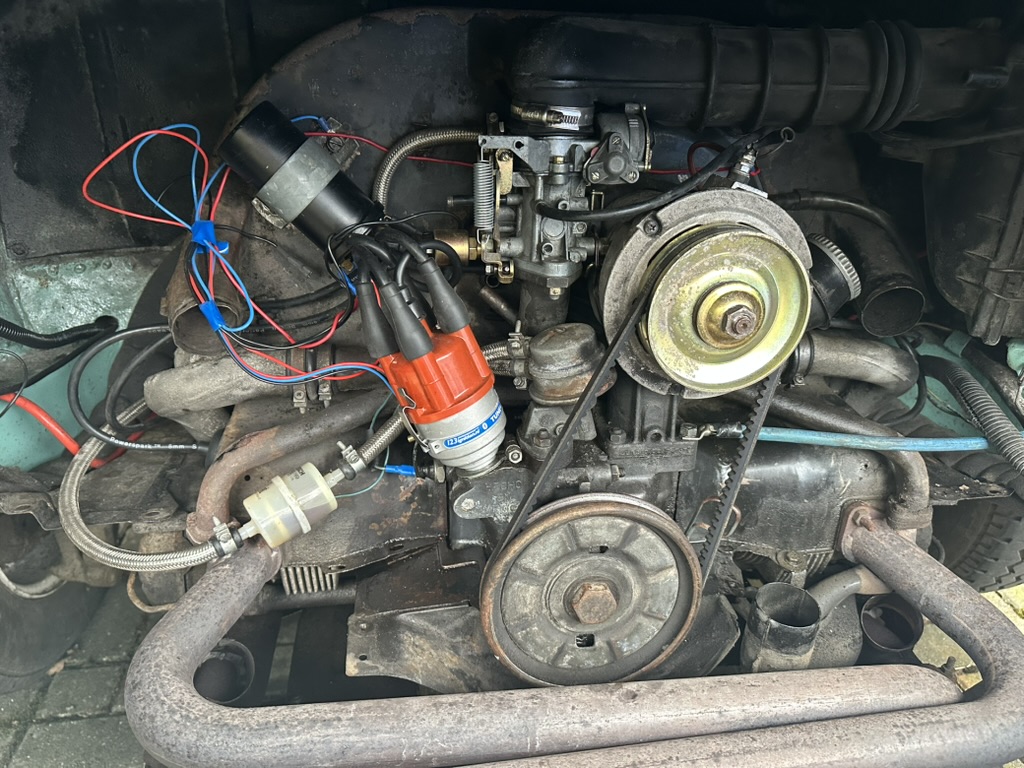
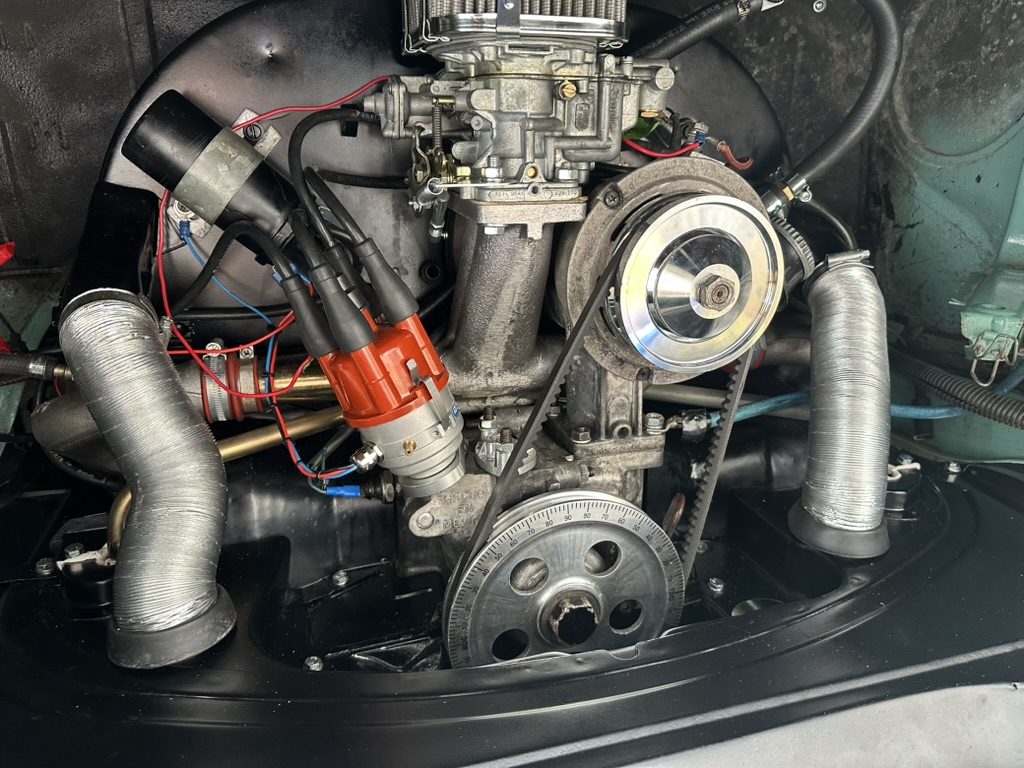
The crowning glory: new Weber Progressive Carburetor → and the 123 Ignition Distributor → all fitted and ready to go.
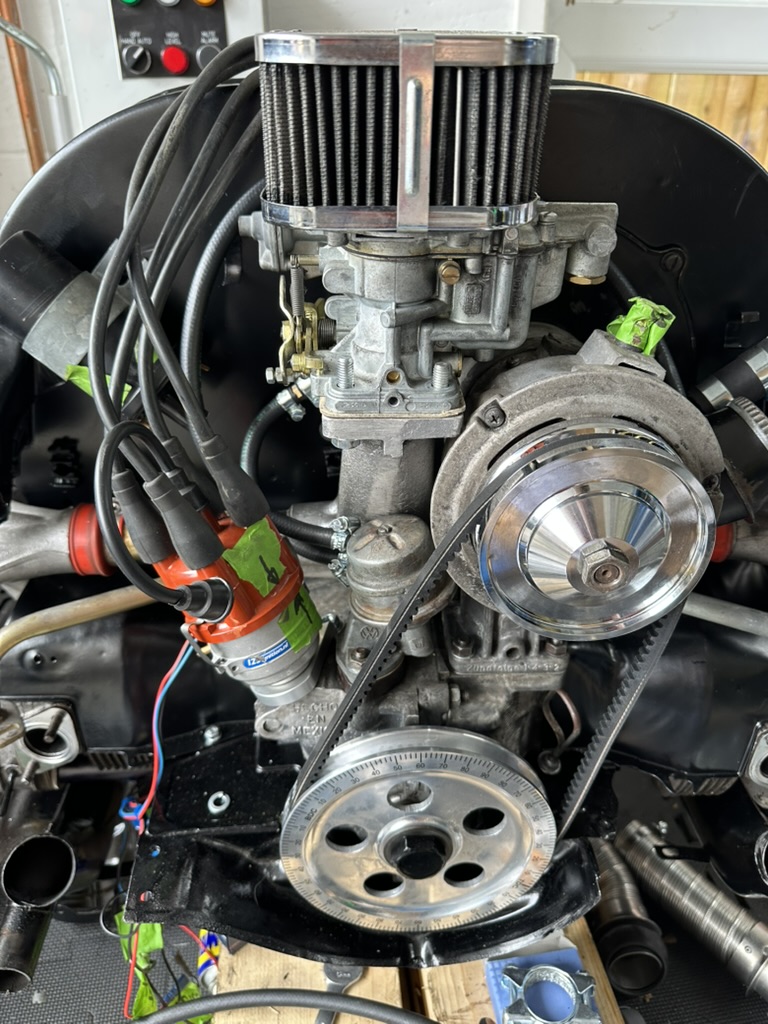
New Weber Progressive carb and distributor fitted. This transformed how Jenny runs.
The Weber Progressive 32/36 DGEV is such a massive improvement over the stock Solex carb. Better throttle response, easier starting, more reliable. Combined with the electronic ignition, the engine runs better than it probably ever has.
I wrote a complete guide on installing and tuning the Weber carb here: Weber Progressive Carb Installation Guide →
Back In and Ready to Go
Finally, after weeks of work, the engine went back in. The reverse of removal—support it on the jack, line it up carefully with the gearbox input shaft, slide it forward, bolt it up.
Engine back in and ready to go. Clean, sealed, upgraded, and reliable.
Reconnect everything (this is where those labels and photos save you), fill with quality oil →, connect the battery, and cross your fingers.
First Start
This is the moment. Weeks of work come down to turning the key.
Jenny fired up immediately. The sound of a clean, properly sealed engine is genuinely special. No leaks, smooth idle, plenty of power. All that work was worth it.
🚨 Common Mistakes to Avoid
Mistake #1: Not Having All Parts First
Needed a seal three days in. Engine sat half-assembled waiting for delivery. Order your complete gasket set → upfront. Make a checklist, verify you have it all before you start pulling things apart.
Mistake #2: Rushing Valve Adjustment
Rushed it first time. Engine ran rough. Did it properly with feeler gauges →—transformed how it ran. This takes 20 minutes. Don't skip it.
Mistake #3: Using Old Hardware
Some bolts are one-time-use. Learned when one snapped. Replace all fasteners or at least the critical ones. New hardware isn't expensive—engine damage is.
Mistake #4: Not Labelling Properly
Cannot stress this enough. Label everything with masking tape and marker →. Three weeks later you won't remember which spark plug wire goes where. Masking tape and a marker cost £2. Mistakes cost hours.
Mistake #5: Skipping the Cleaning Stage
Dirt left inside will cause problems. Take the time to wire brush and brake clean everything. Get brake cleaner in bulk →. It's tedious but essential.
Supplies You'll Need (Buy These First)
Don't underestimate how many consumables you'll go through:
- Brake Cleaner Spray (buy a 12-pack!) → - I went through 6-7 cans
- Wire Brush Set → - For all that rust removal
- Masking Tape & Markers → - For labelling EVERYTHING
- Engine Spray Paint → - For small less visible bits like heat exchangers
- Book: How to Keep Your VW Alive → - Without this book, I'd not have been able to do half the jobs
Cost Breakdown
| Item | Cost |
| Oil cooler & seals | £120 |
| Gasket and seal kit | £85 |
| Weber carburetor | £225 |
| 123 Ignition distributor & coil | £180 |
| Clutch kit | £150 |
| CSP stainless heater hoses | £95 |
| Heat risers & inlet manifolds | £110 |
| Push rod tubes | £65 |
| Aluminium pulley | £45 |
| Shot blasting & paint supplies | £80 |
| Brake cleaner, oils, supplies | £95 |
| Total | £1,250 |
Time: About 3 weeks (evenings and weekends, not rushing).
I saved money by restoring the original heat exchangers, fan housing, and oil cooler cover rather than buying new ones. Shot blasting and respraying them cost about £80 total—new parts would have been £300+.
Frequently Asked Questions
What are the correct torque specifications for a VW 1600cc engine?
VW 1600cc engines require specific torque values for different components. Cylinder head bolts (M10): 31 Nm, Cylinder head bolts (M8): 24 Nm, Connecting rod nuts: 30 Nm, Crankcase halves (6-main): 28 Nm, Oil drain plug: 25 Nm. Always consult your specific service manual and follow the proper torque sequence patterns for even pressure distribution. I've included a full torque table above for reference.
How long does a VW engine rebuild take?
A complete VW 1600cc engine rebuild typically takes 40-80 hours depending on engine condition, your experience level, and whether you encounter any damage. My rebuild took about 3 weeks of evenings and weekends, not rushing. A full professional rebuild might take 60-100 hours. Plan for disassembly, cleaning (this takes longer than you think), inspection, parts replacement, reassembly, and testing.
Do I need special tools for a VW engine rebuild?
Yes, you'll need a socket set →, torque wrench → (essential for accuracy—not optional), gasket scraper →, engine stand →, feeler gauges →, and miscellaneous items. A crank pulley puller is helpful too. Many specialist shops hire or loan tools if you don't own them. Don't try to shortcut on the torque wrench—that's where most problems start.
What's the difference between a complete rebuild and an overhaul?
A complete rebuild involves full disassembly, inspection of all parts, replacement of worn components (pistons, rings, bearings, gaskets), and reassembly to like-new condition. An overhaul is lighter work—replacing gaskets and seals, maybe honing cylinders, and replacing basic wear items without full disassembly. Most people doing engine work at home are doing a rebuild, not an overhaul.
Should I replace my gaskets during a rebuild?
Absolutely yes. Always replace gaskets, seals, and O-rings during any major rebuild. Old gaskets won't seal properly and will cause leaks—defeating the whole purpose of the rebuild. Get a complete gasket set →. Consider it part of the rebuild cost. Quality gasket sets cost £40-80 and are essential for preventing future problems. Don't cheap out here.
Essential Reading
Before you start an engine rebuild, get yourself a copy of How to Keep Your VW Alive by John Muir →. It's THE essential book for any VW owner. Clear instructions, helpful illustrations, and written in plain English. Without this book, I'd not have been able to do half the jobs I've done this last couple of years.
Was It Worth It?
Absolutely. Jenny now runs better than she probably ever has. No more oil leaks. The Weber carb and electronic ignition transformed how she drives. The confidence of knowing exactly what's been done is priceless.
More importantly, I learned an enormous amount. I understand this engine now. I know what every part does, where everything goes, how it all works together. That knowledge is worth as much as the mechanical improvements.
And honestly? There's something deeply satisfying about pulling an engine, fixing everything, and having it fire up first time. If you're considering this, do it. Take your time, label everything, take photos, and enjoy the process. After your rebuild, keep your engine happy with our complete maintenance schedule guide—regular oil changes and checks will keep it running strong for years.
Key Takeaways
- Label everything - Cannot stress this enough. Use masking tape and markers →
- Take endless photos - More than you think you need
- Order all parts upfront - Don't wait for deliveries mid-job. Get your gasket set → immediately
- Budget more time for cleaning - It takes way longer than expected. Get brake cleaner in bulk →
- Restore what you can - Original parts can often be saved
- Use correct torque specs - This isn't the place to guess. Get a quality torque wrench →
- Upgrade while it's apart - Weber carb and electronic ignition = huge improvements
- Don't rush - This isn't a race. Quality work takes time.
Questions about engine rebuilds? Drop me a message on Instagram @jennythebus—happy to help!