The Reality Check
Starting out with a Volkswagen campervan restoration can be a daunting process. I'm not going to sugarcoat this: finding the right restoration company took me nearly two years of frustration, false starts, and broken promises.
It's really important to do your research and find the right restoration company for you. Personally, I wanted to be part of the restoration journey—be involved, maybe even help along the way. I needed someone with the patience to put up with my everlasting list of questions. I wanted to learn as much as I could, and I was starting with next to zero knowledge.
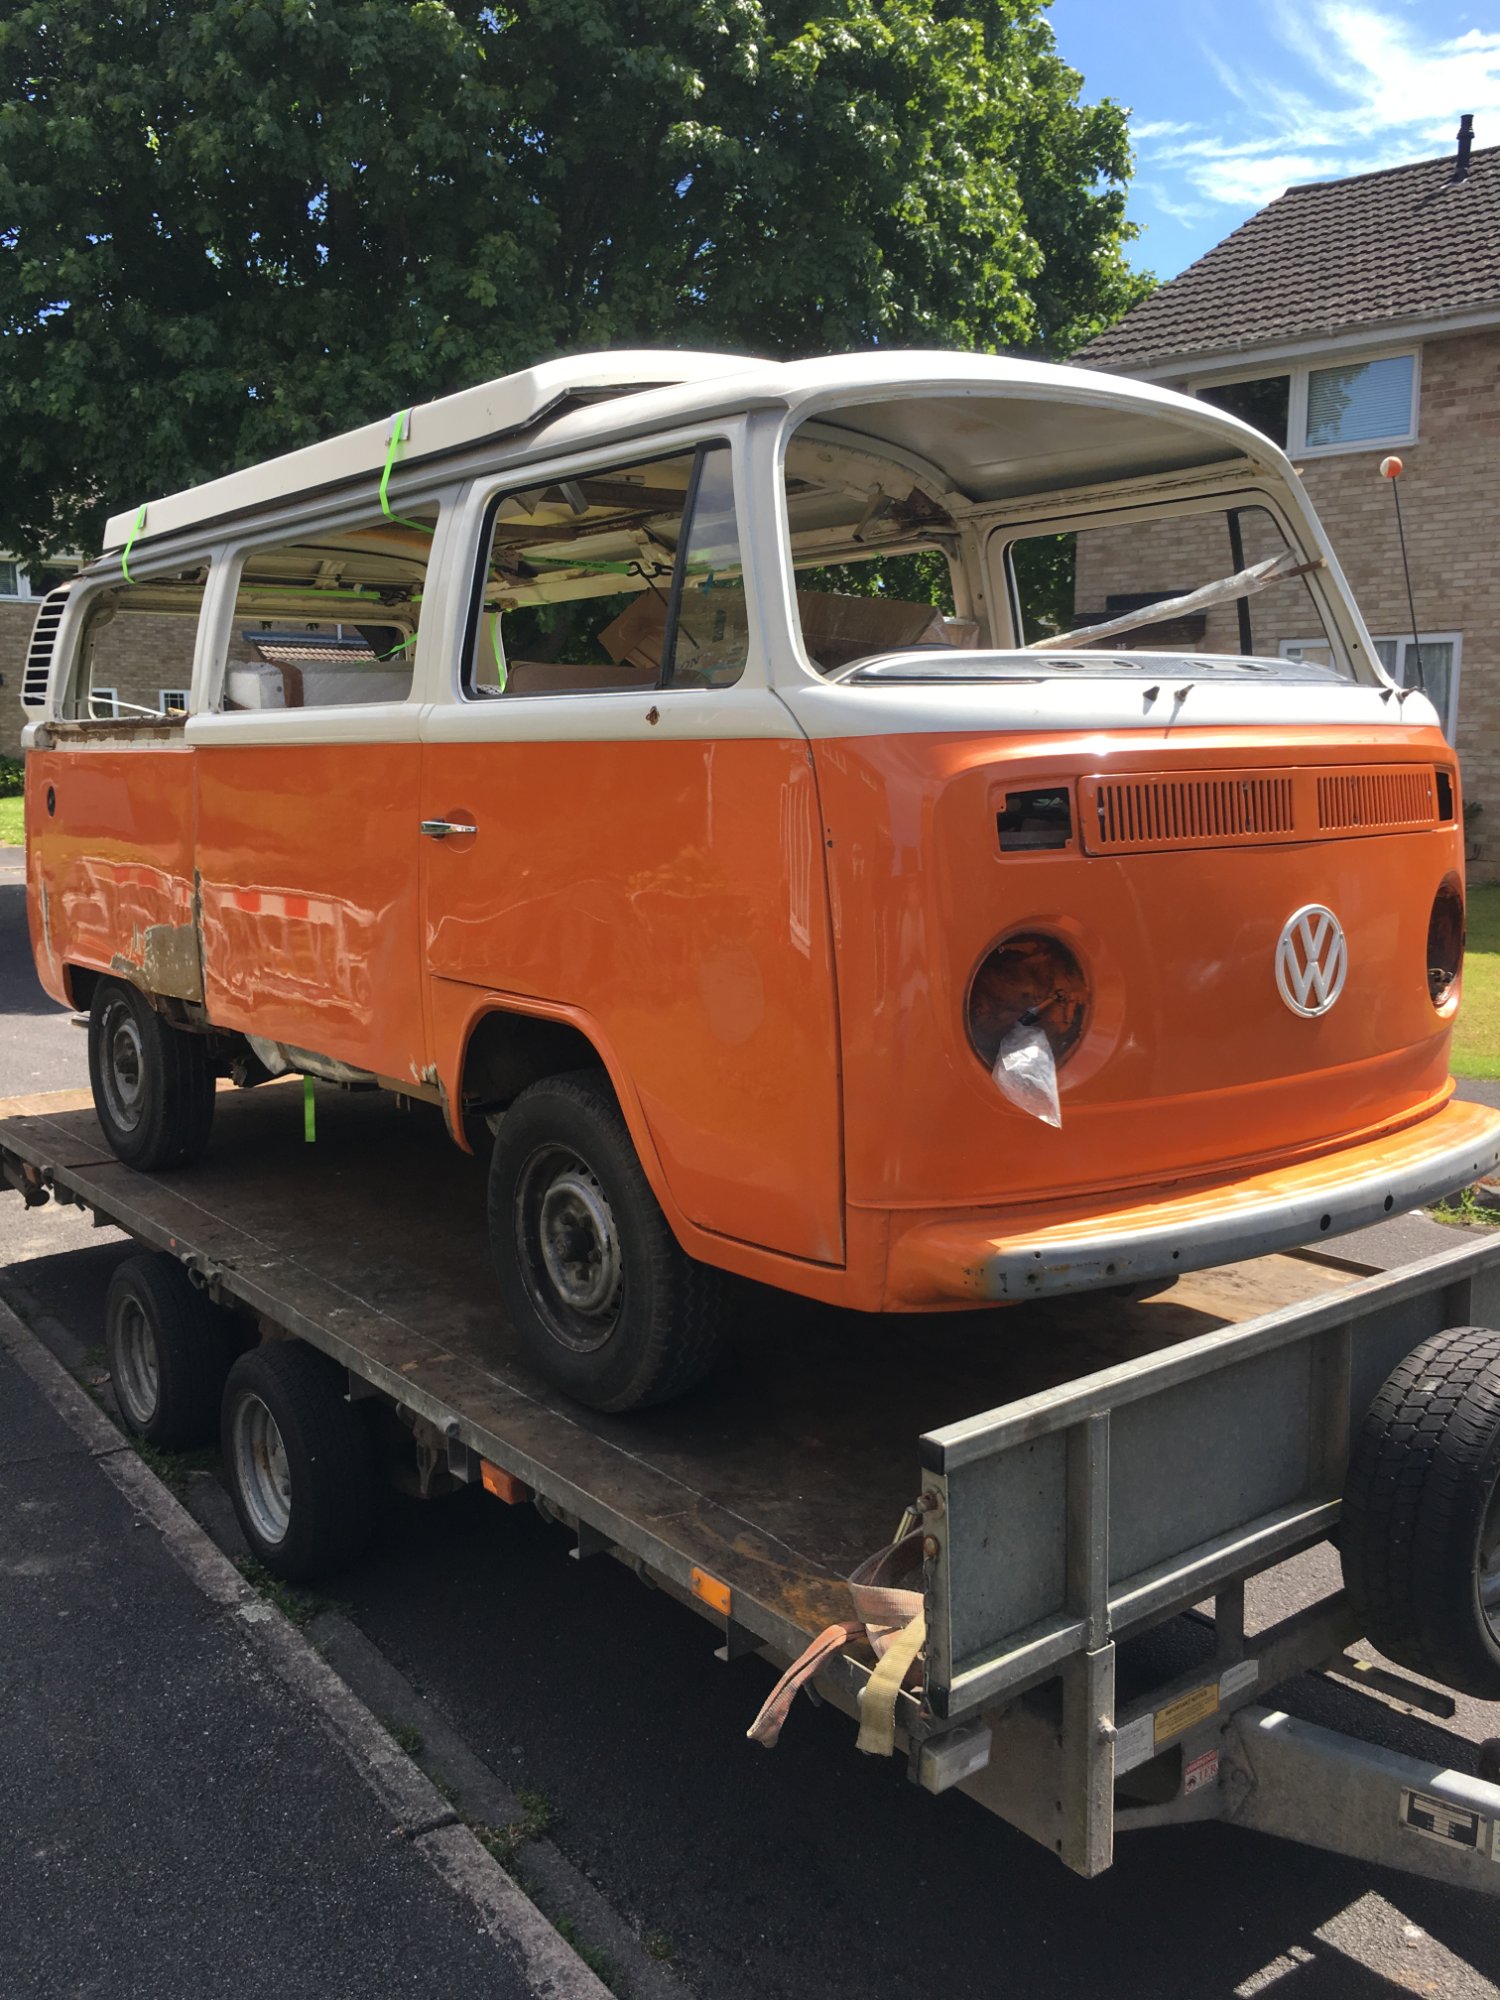
Day one: Jenny arriving. Full of rust, holes, windows and doors mostly off. Engine ran but not well.
When I bought Jenny, she was full of rust and holes. The windows and doors were mostly off. The engine ran, but not well—she'd been sat dormant for a couple of years. I knew she needed work, but I hadn't fully grasped the scale of what lay ahead.
The Search (Or: Two Years I'll Never Get Back)
I thought finding someone to do the work was going to be easy. I had a fairly decent budget and a clear brief—why wouldn't anyone want to take it on?
I was so naive.
After being promised and strung along by numerous people—the last one telling me they'd definitely be up for it but kept pushing the date back further and further until I gave up asking—I learned a harsh lesson: this project was bigger than I'd planned for and required a specialist.
The Problem with VW Restoration Specialists
Anyone worth their salt is busy. Very, very busy. Wait times to get in? A year or more. This isn't an exaggeration—this is the reality of the VW restoration world.
I was so frustrated by this point. I had lost almost two years without making any progress at all. Jenny was sat on my driveway, deteriorating, while I chased promises that never materialized.
Finding Sunflower Campers
It was a chance encounter that led me to Jon at Sunflower Campers. (Sadly, they're no longer trading, but I couldn't have recommended them enough at the time.)
Yes, I had to be patient and wait. But it was worth it.
Jenny went into Sunflower Campers and stayed there for about nine months. Nine months of proper, professional restoration work by people who knew exactly what they were doing.
Why I Bought a Shell (And You Should Too)
I bought Jenny as a shell. Deliberately.
By having her stripped back properly and restored professionally, I wouldn't have to worry about the quality of the work. More importantly: I knew exactly what was hiding under the freshly sprayed paintwork—solid metal.
There are so many horror stories of people paying top dollar for a van that looks amazing, only to discover later that it's full of filler. You're not buying solid metal—you're buying concealed rust with a pretty coat of paint over it.
I wanted to avoid that nightmare entirely.
The Strip-Down: Discovering the Real Damage
As we continued to strip the van back to metal, there were plenty of surprises. Filler hiding under seemingly solid panels. Rust far worse than I'd anticipated. Holes where there should have been metal.
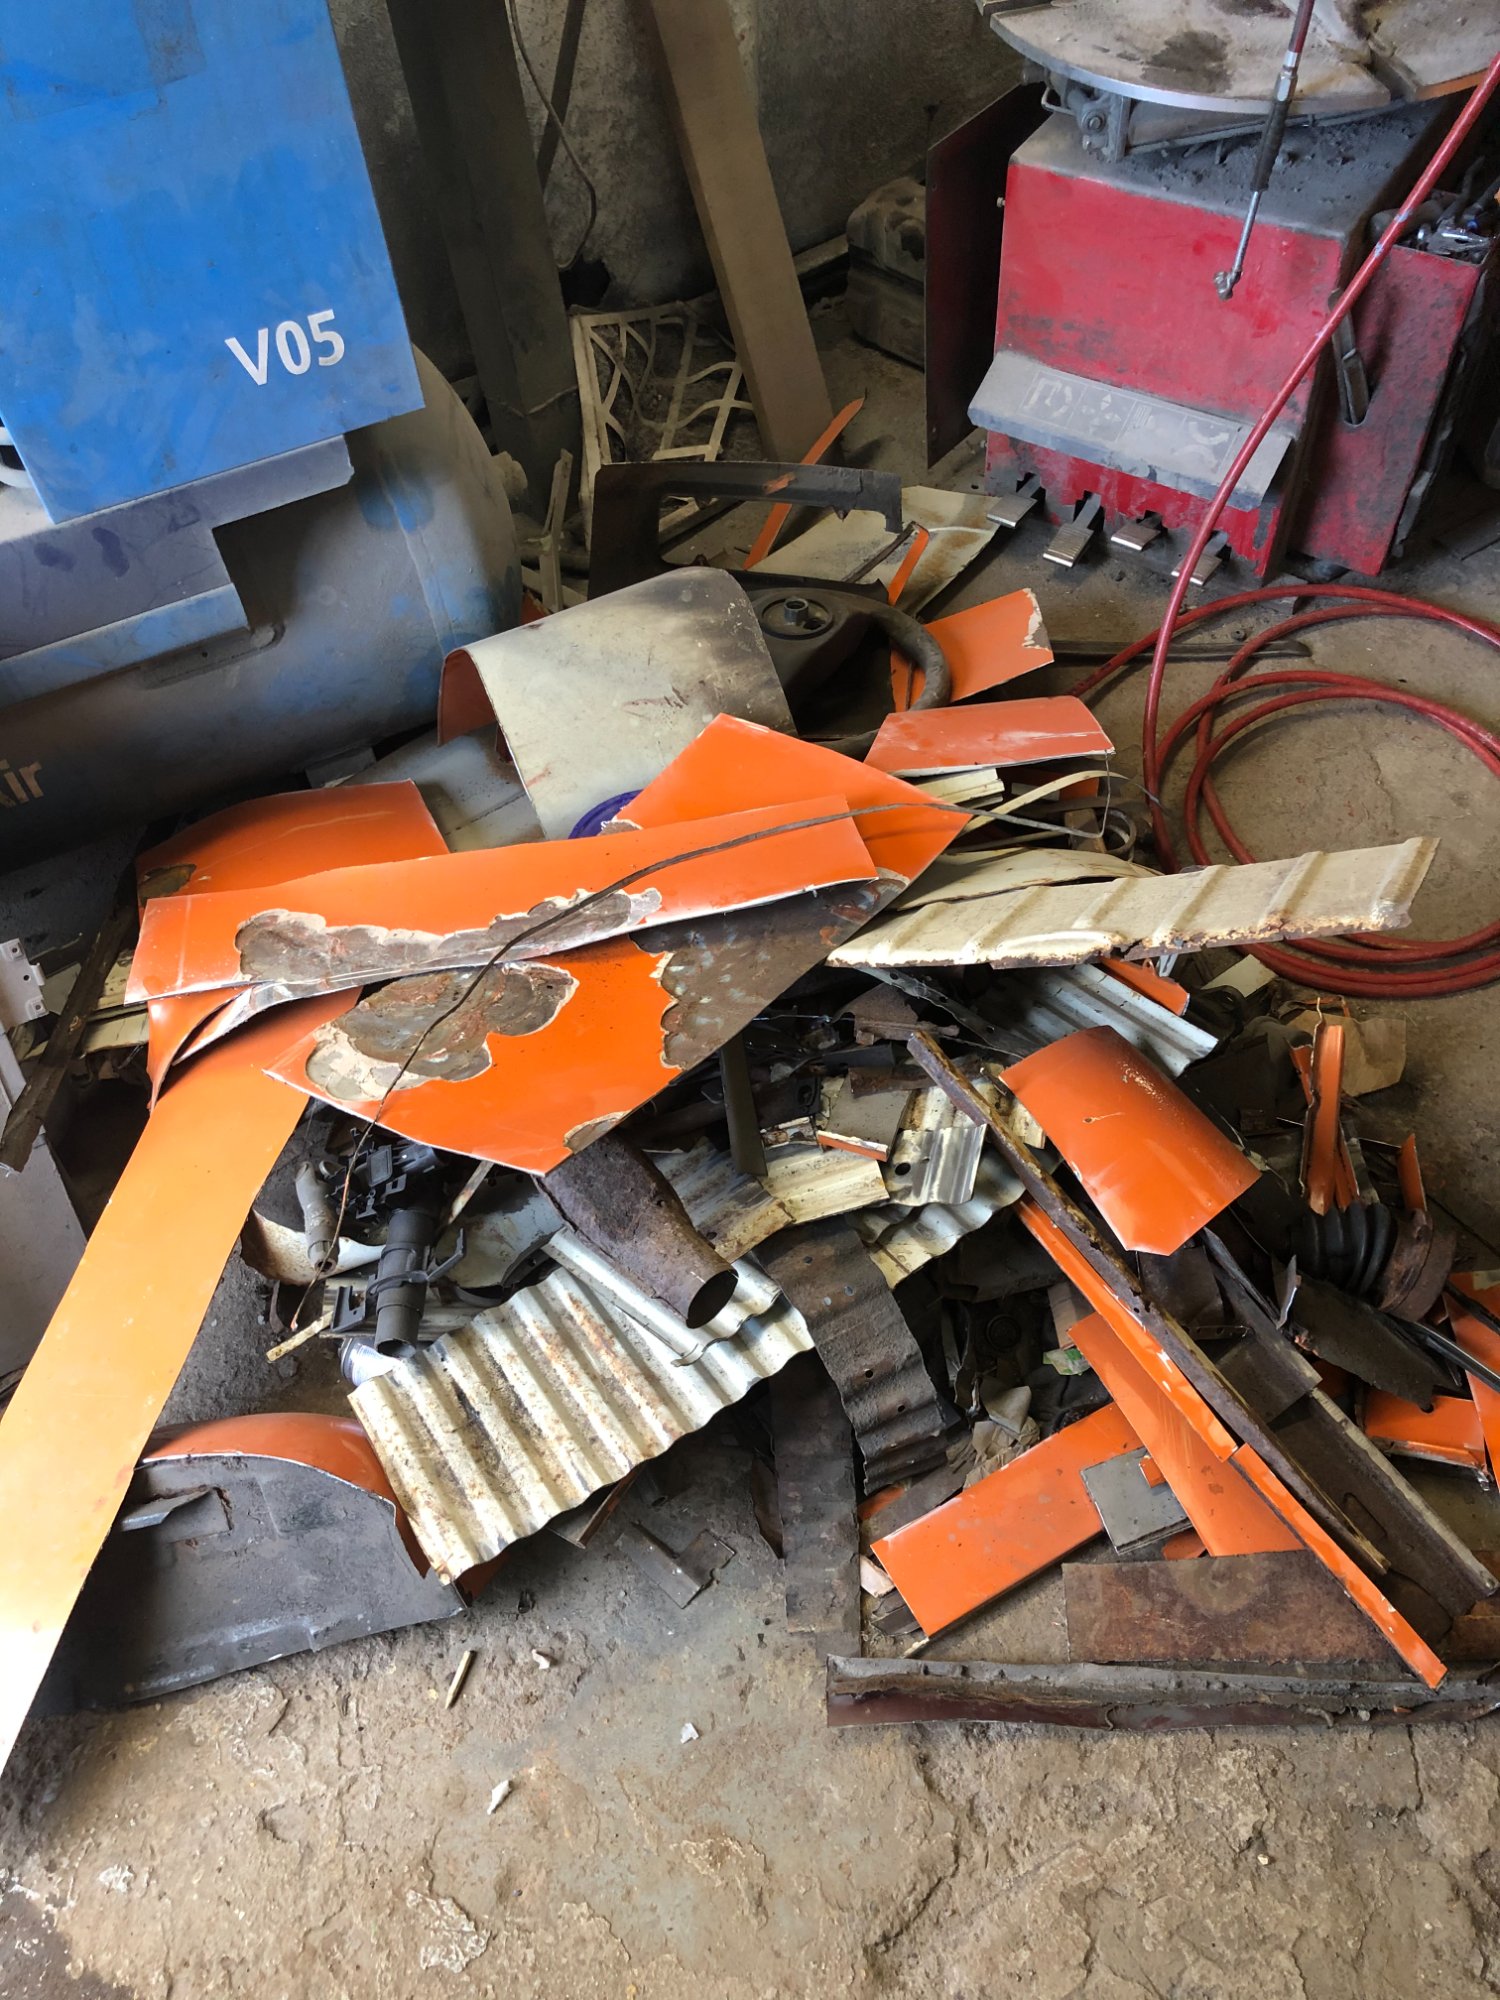
The reality: a mountain of rusty panels cut from Jenny to get back to good metal.
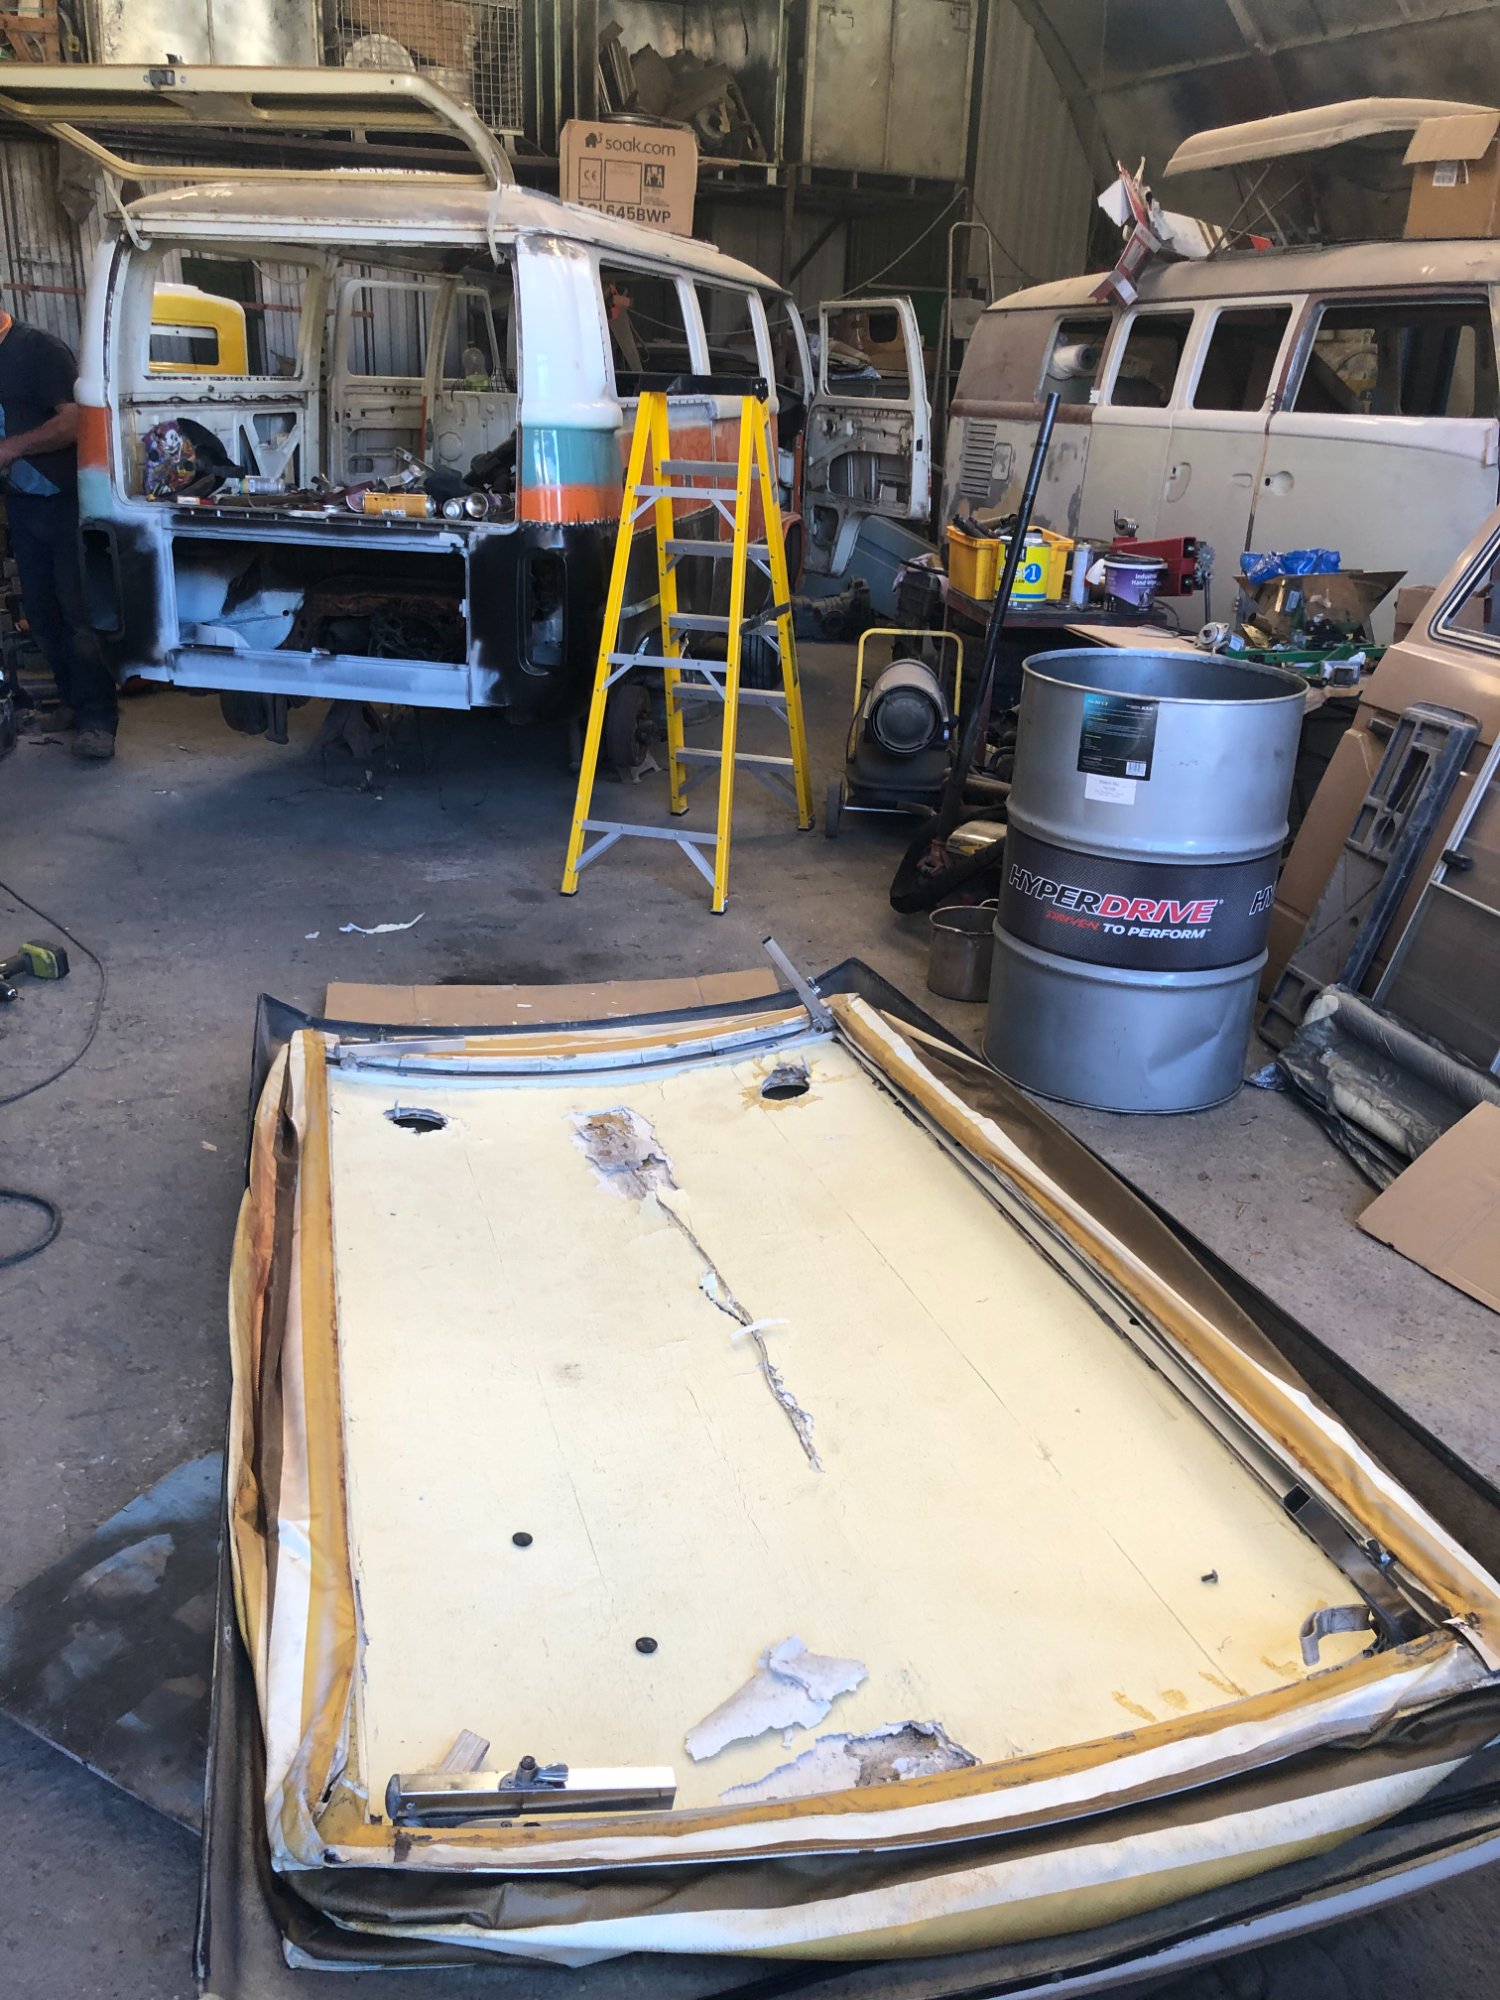
The pop-top came off. It wouldn't be going back on for a while.
The Floor: Worse Than Expected
Once we started cutting away the flooring, the extent of the problem became clear.
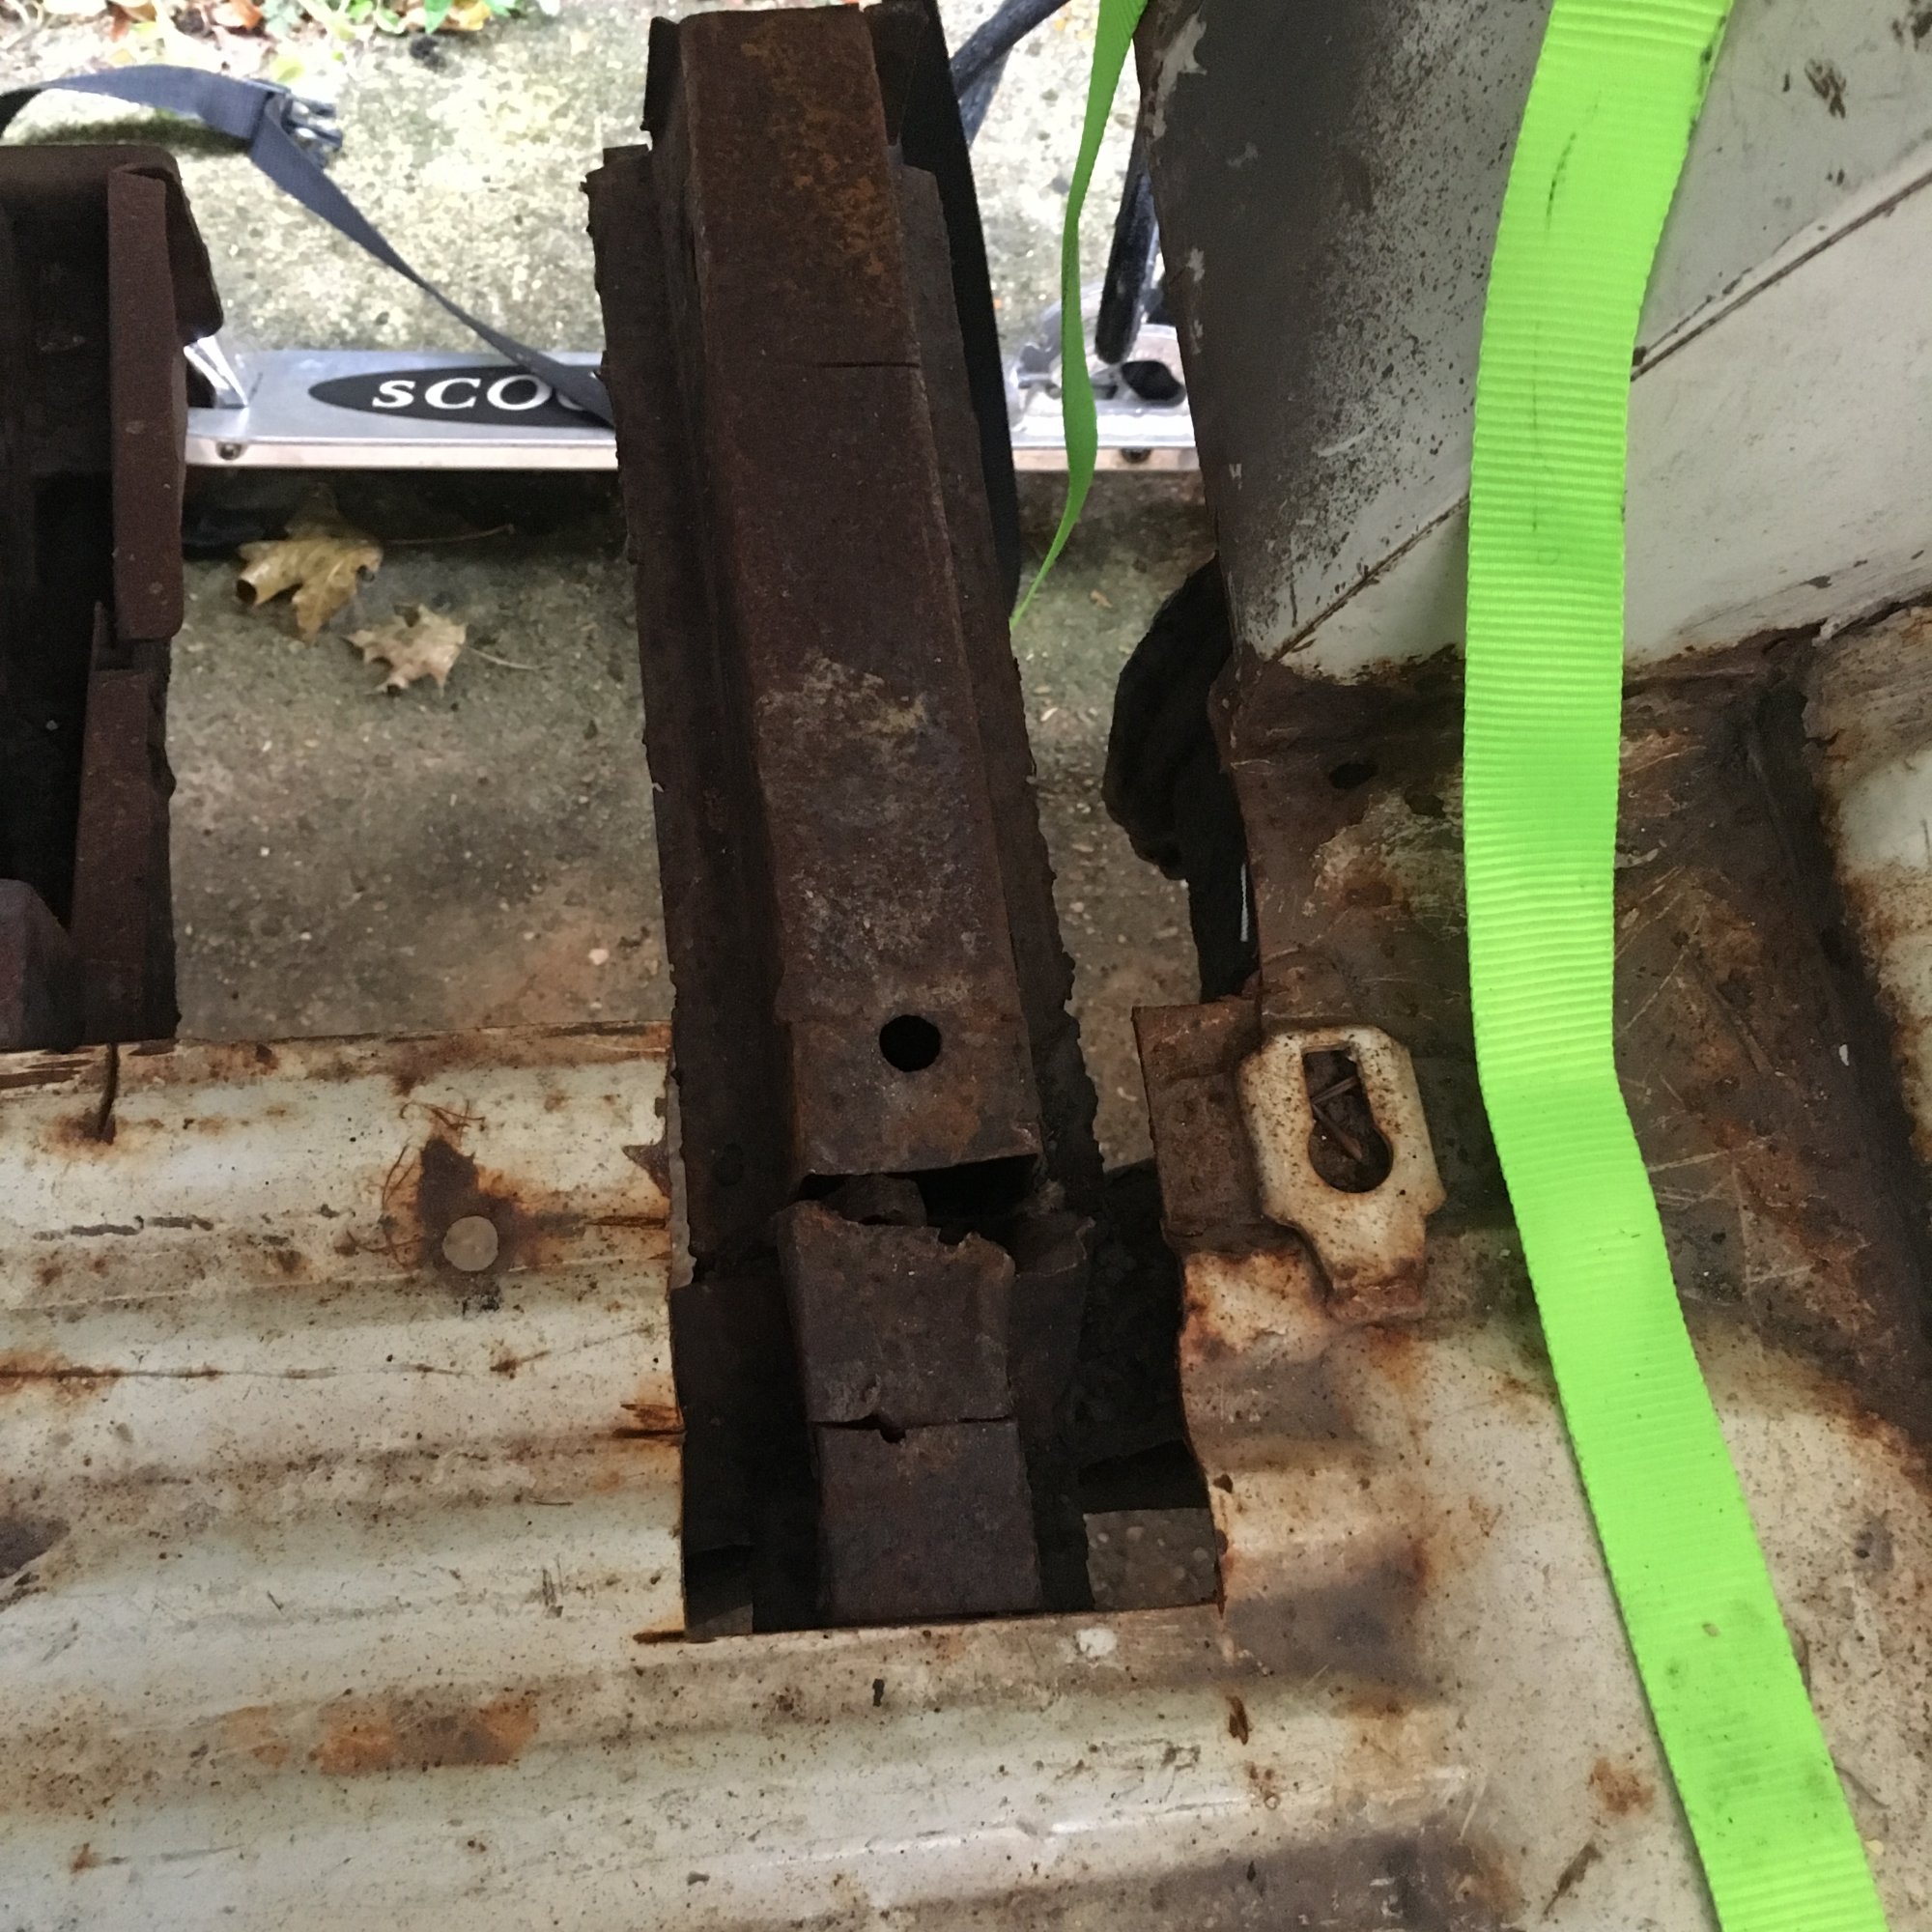
Nice holes in the floor showing rusty top hats. Not ideal.
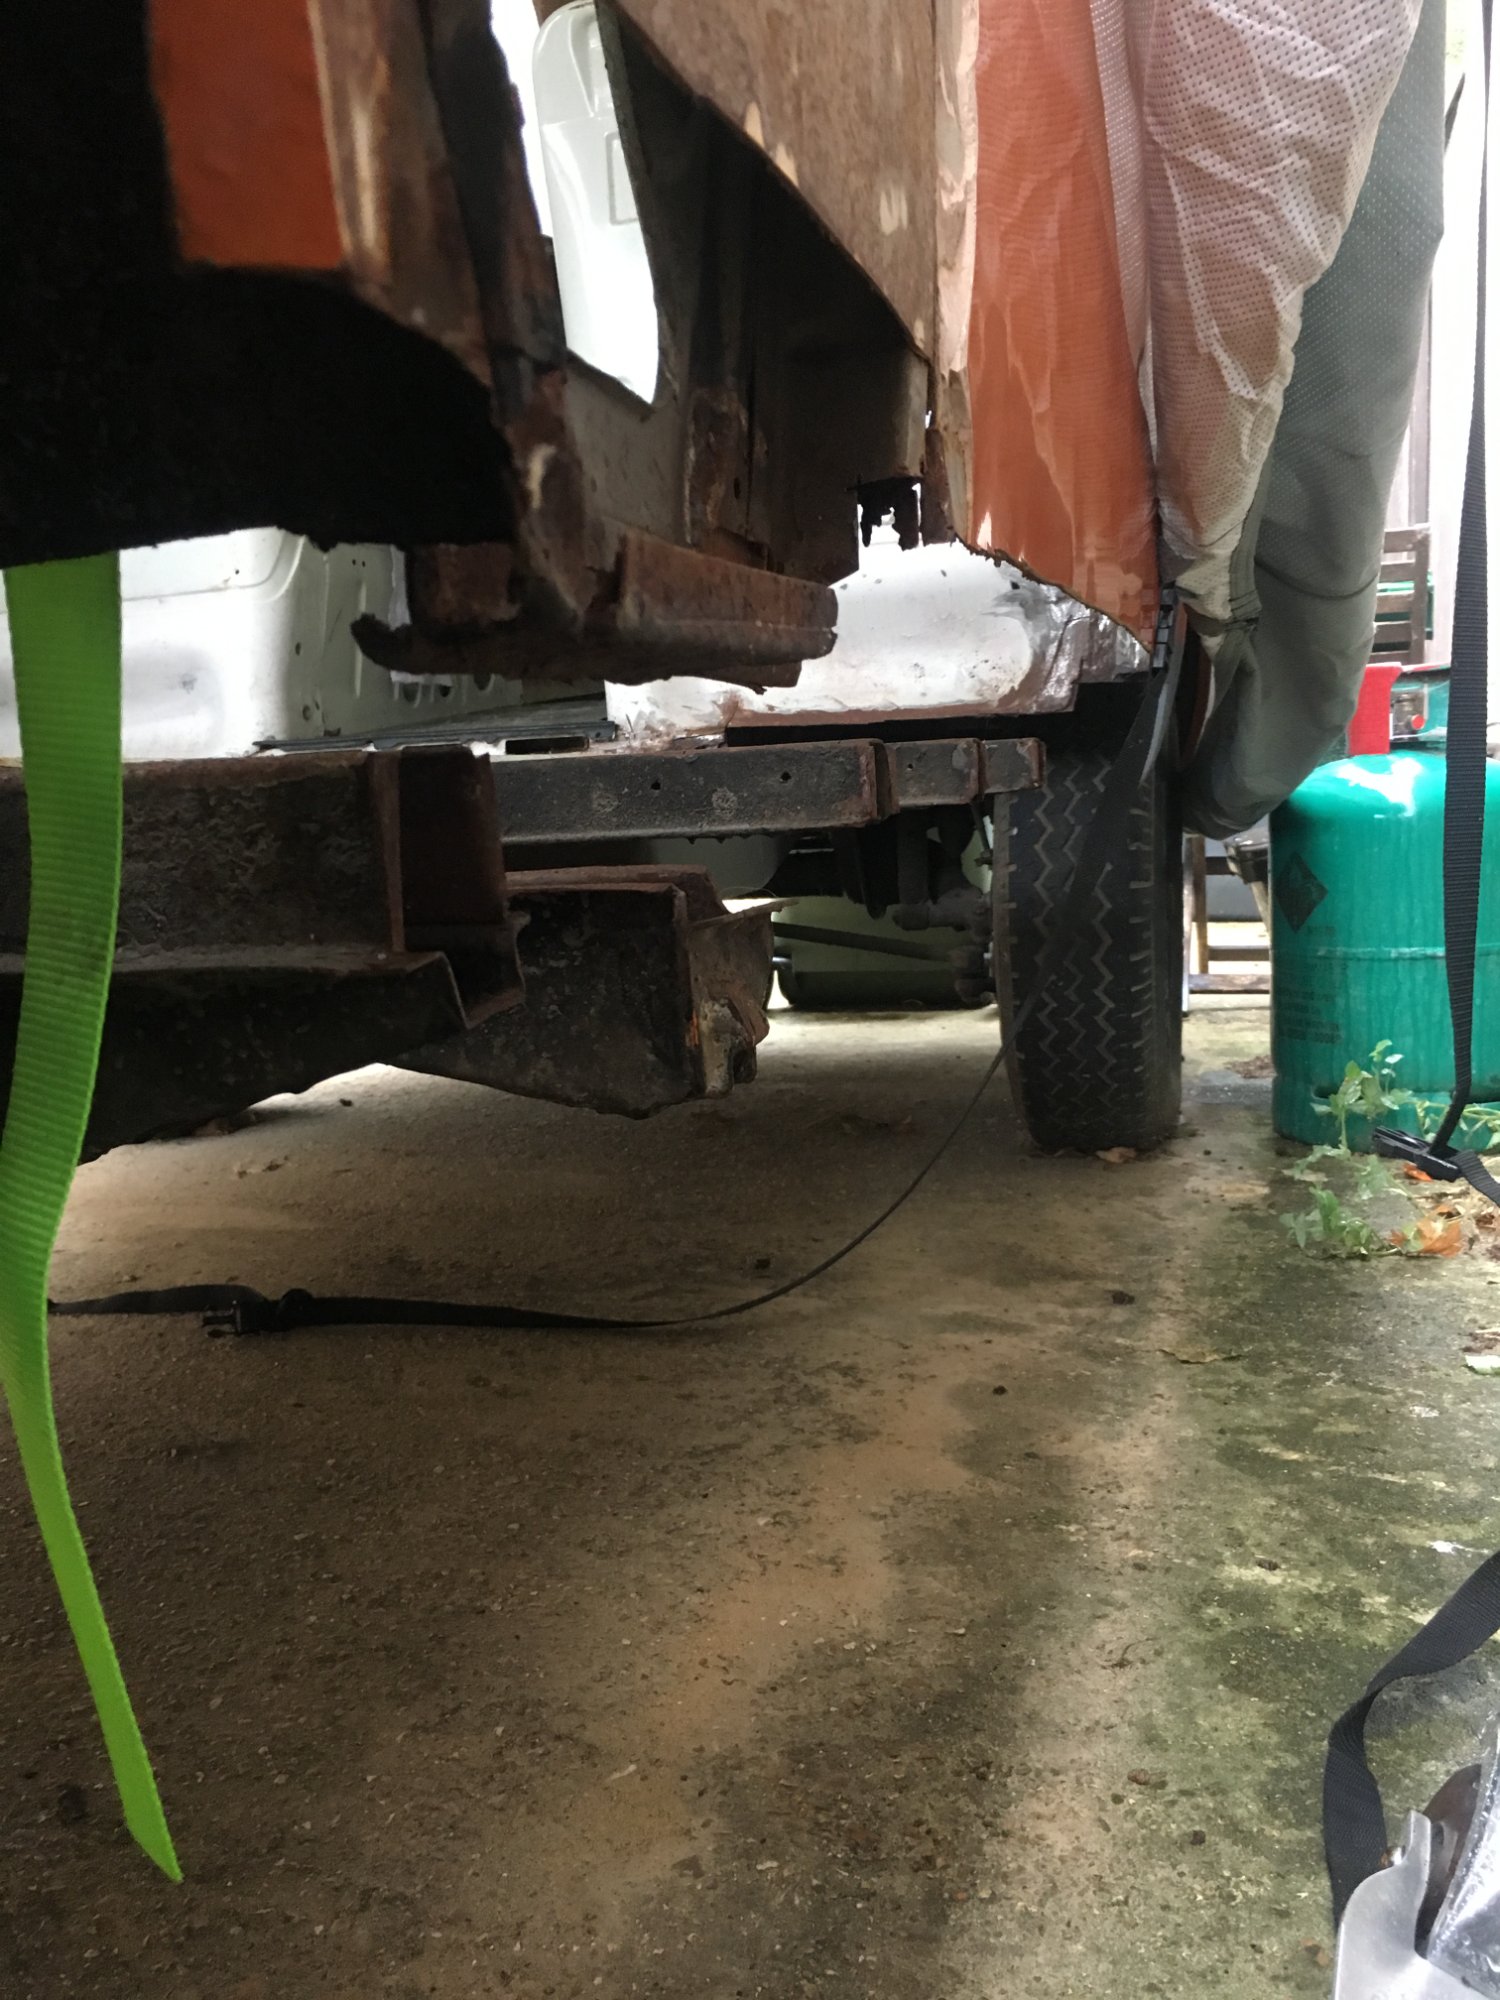
More holes along the outer sills. Structural rust—the expensive kind.
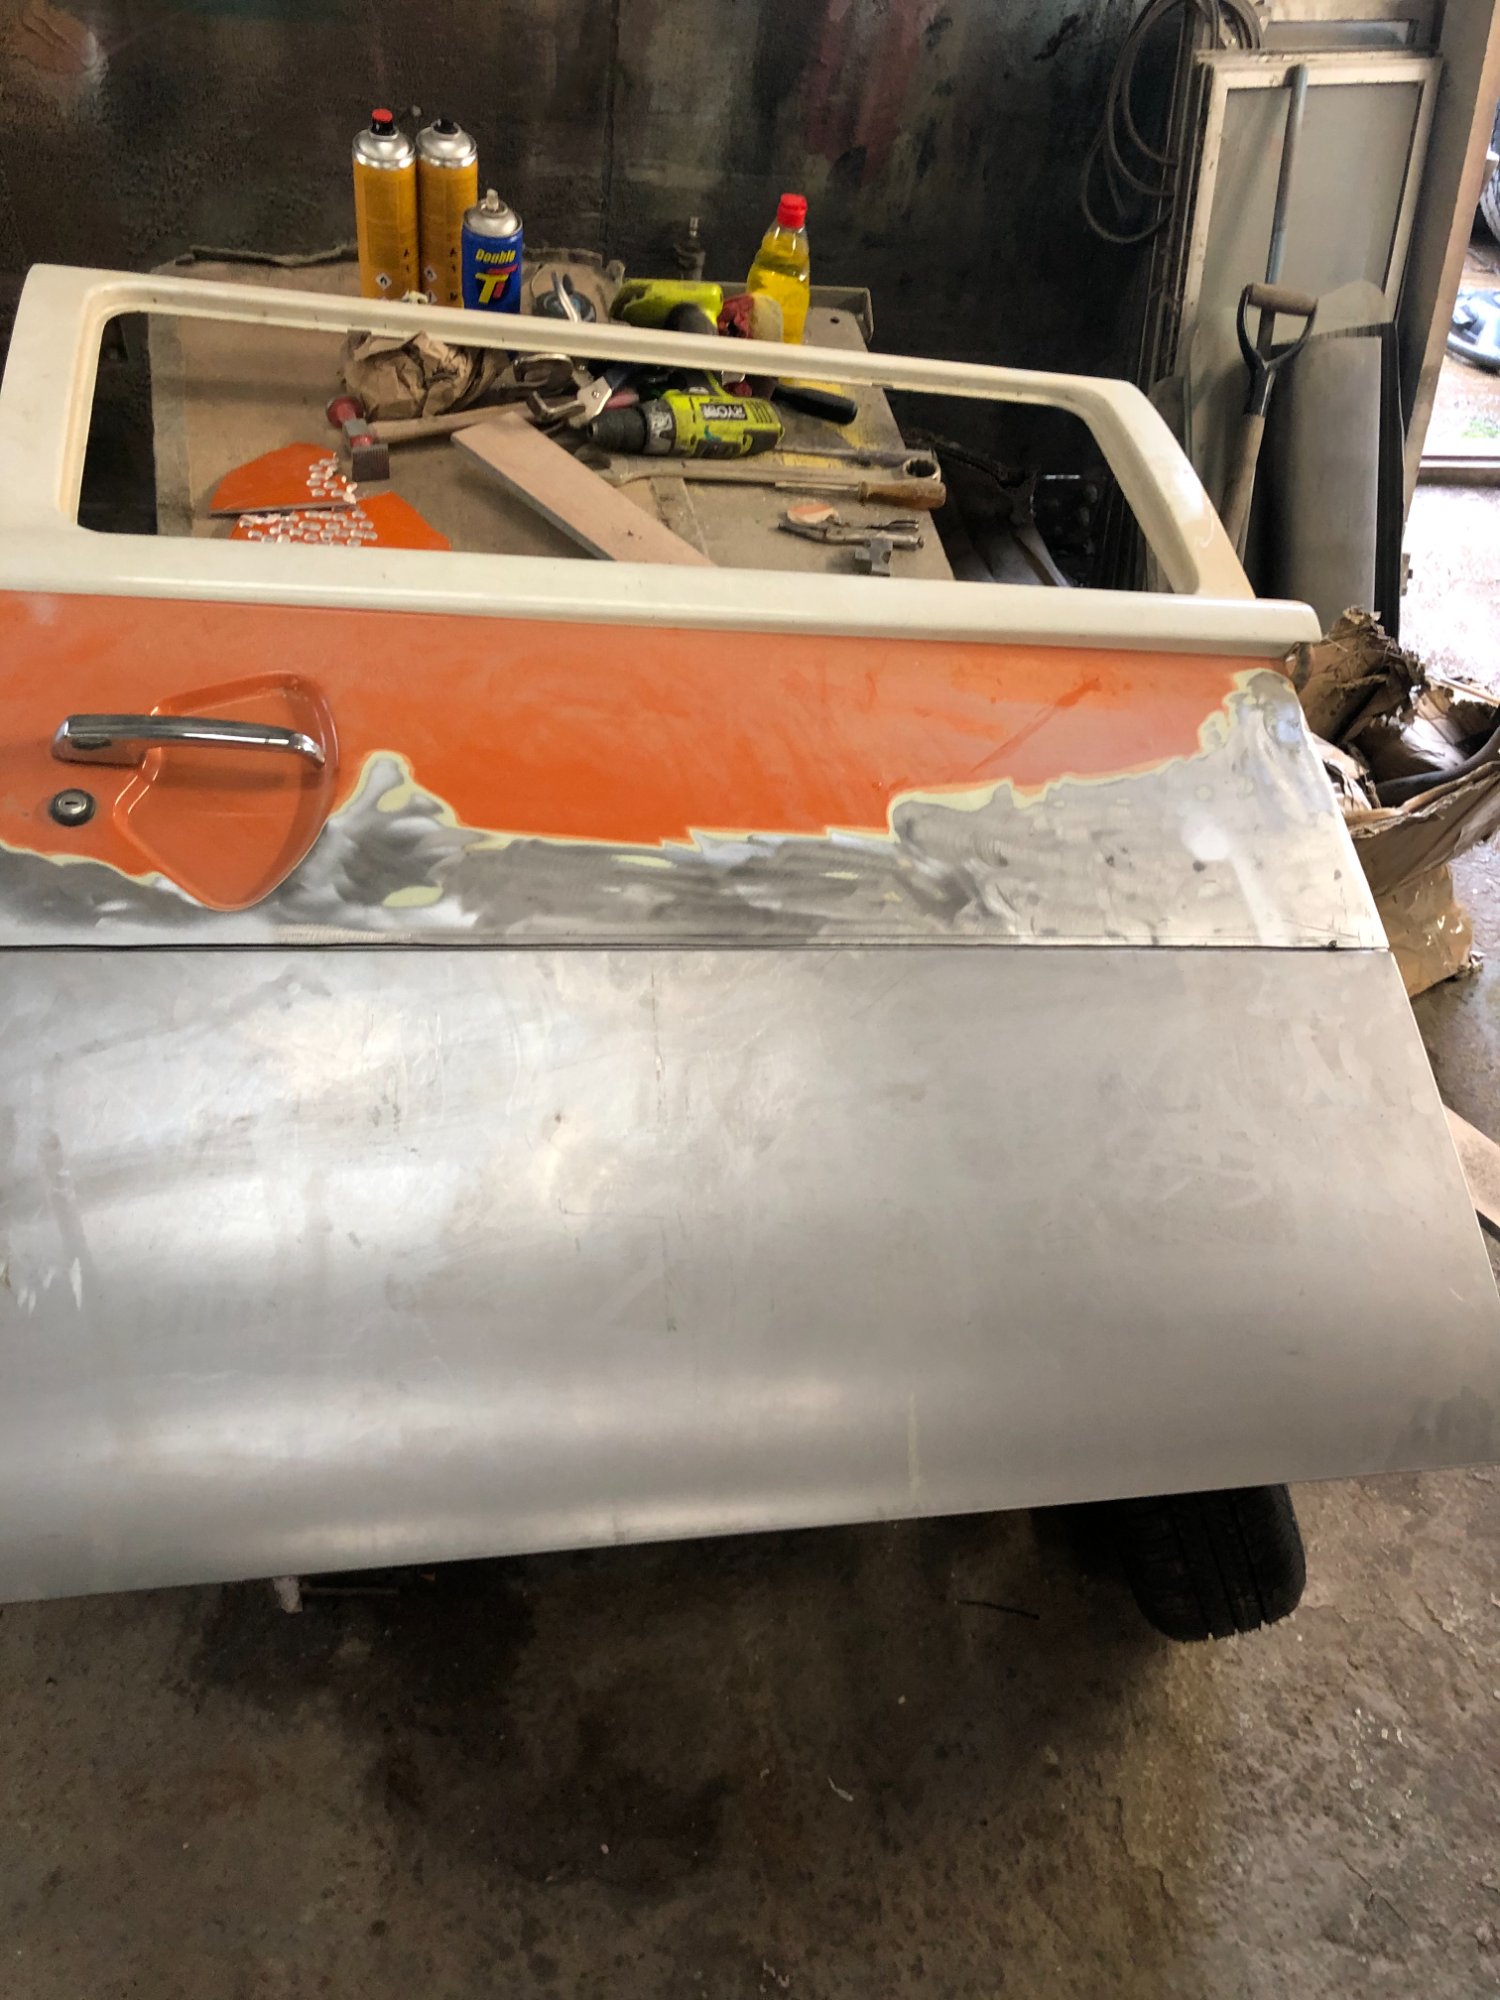
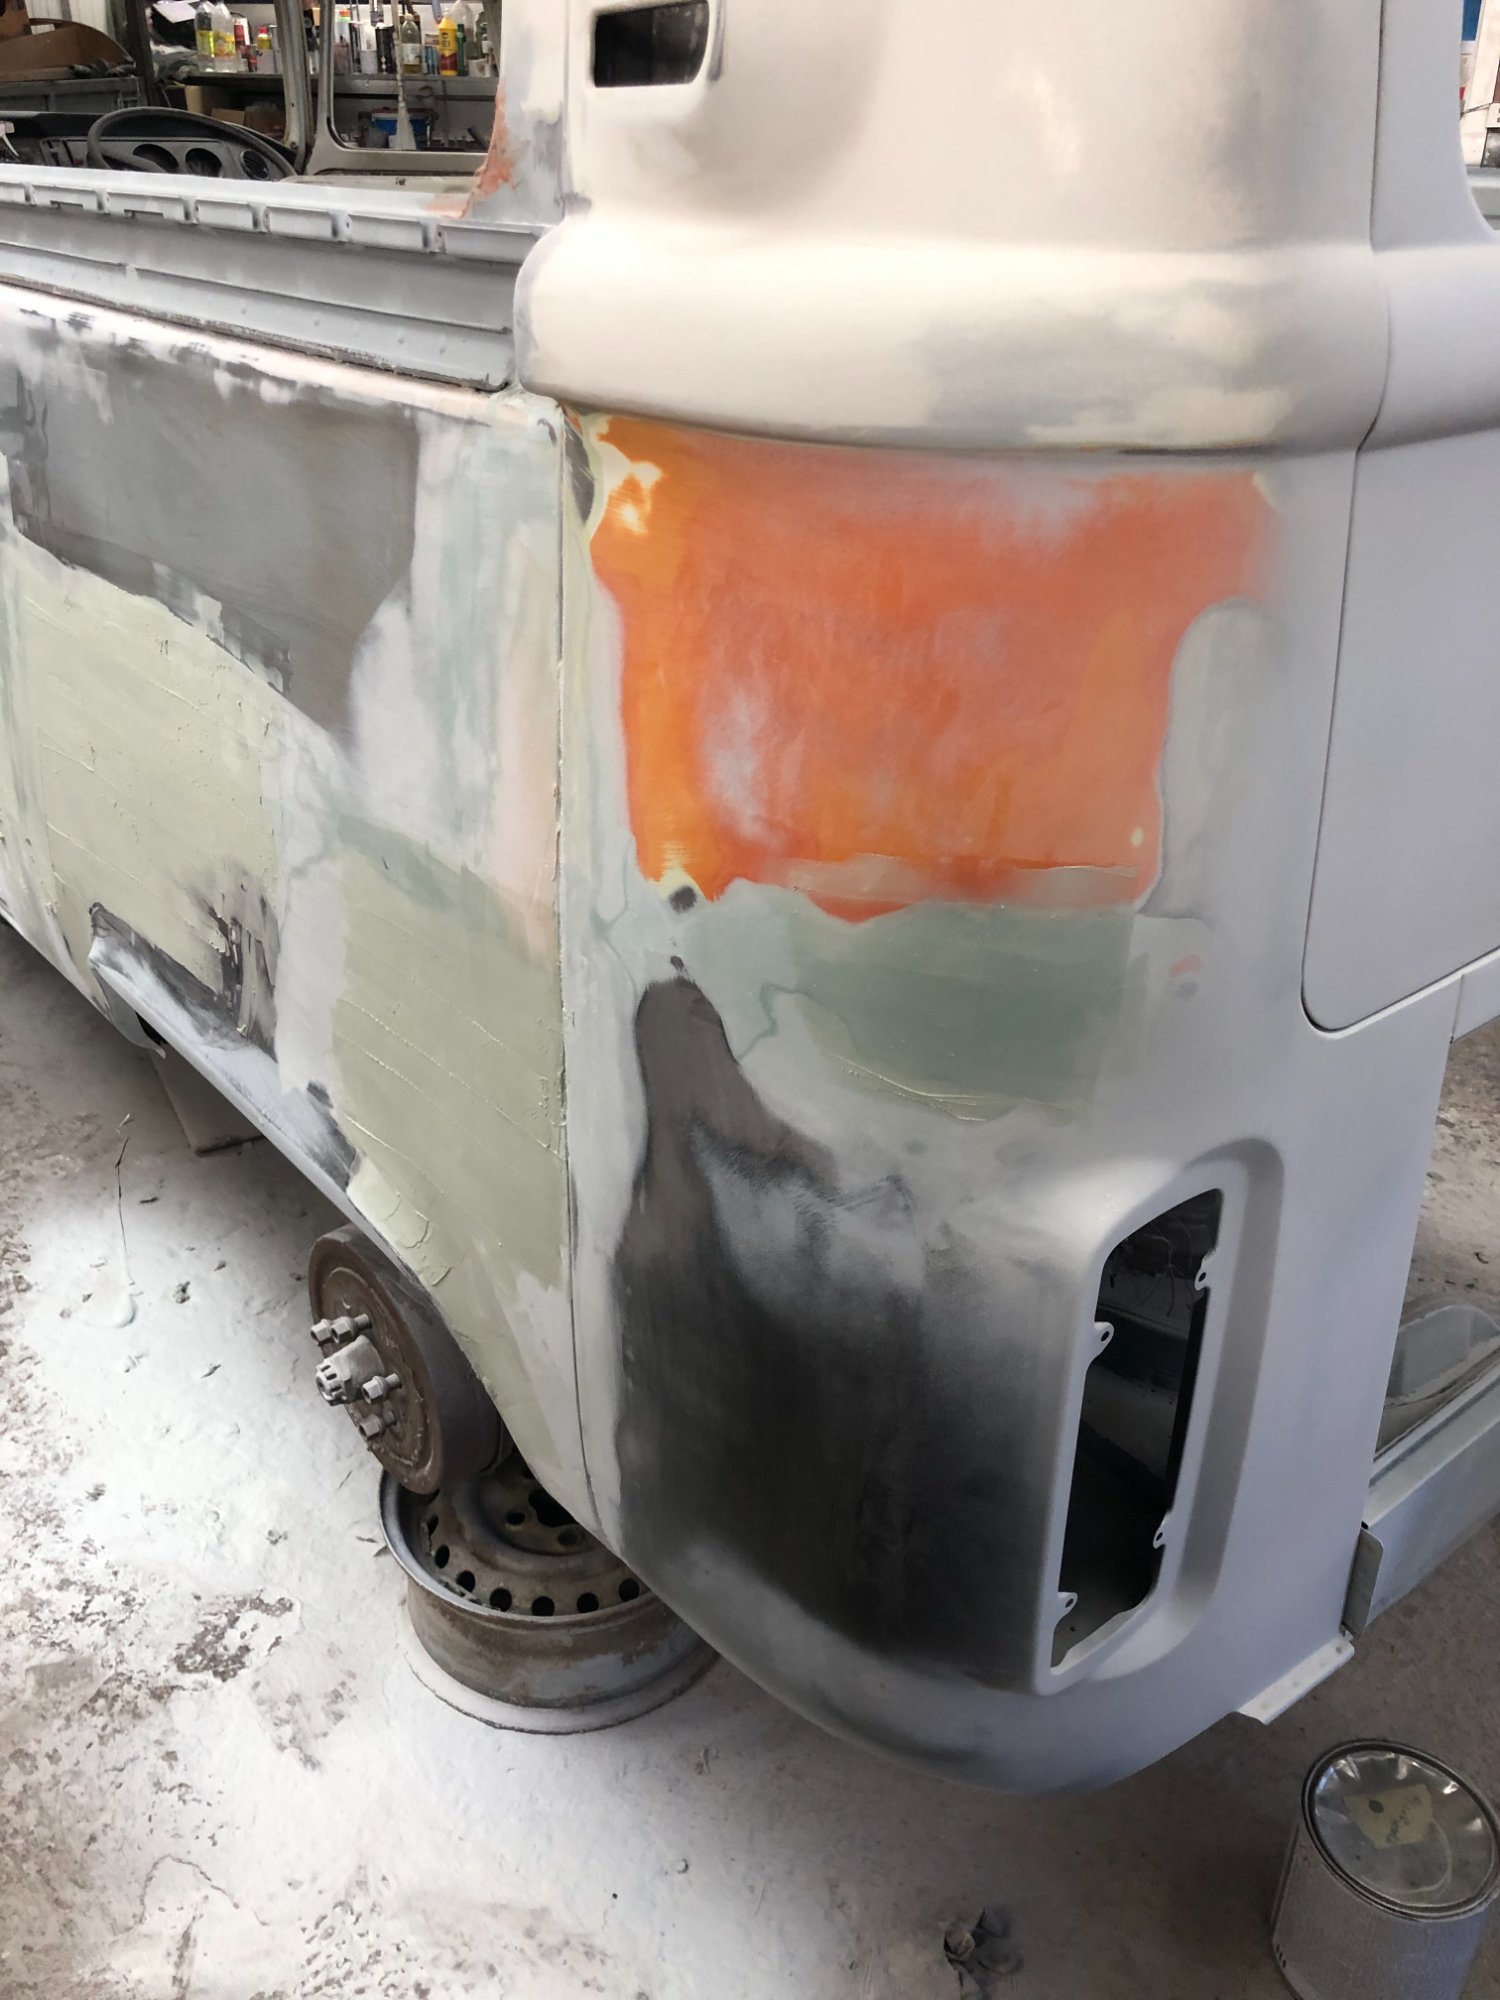
The Filler Discovery
This was the moment that justified everything. Look at how much filler was hiding under what looked like decent paintwork:
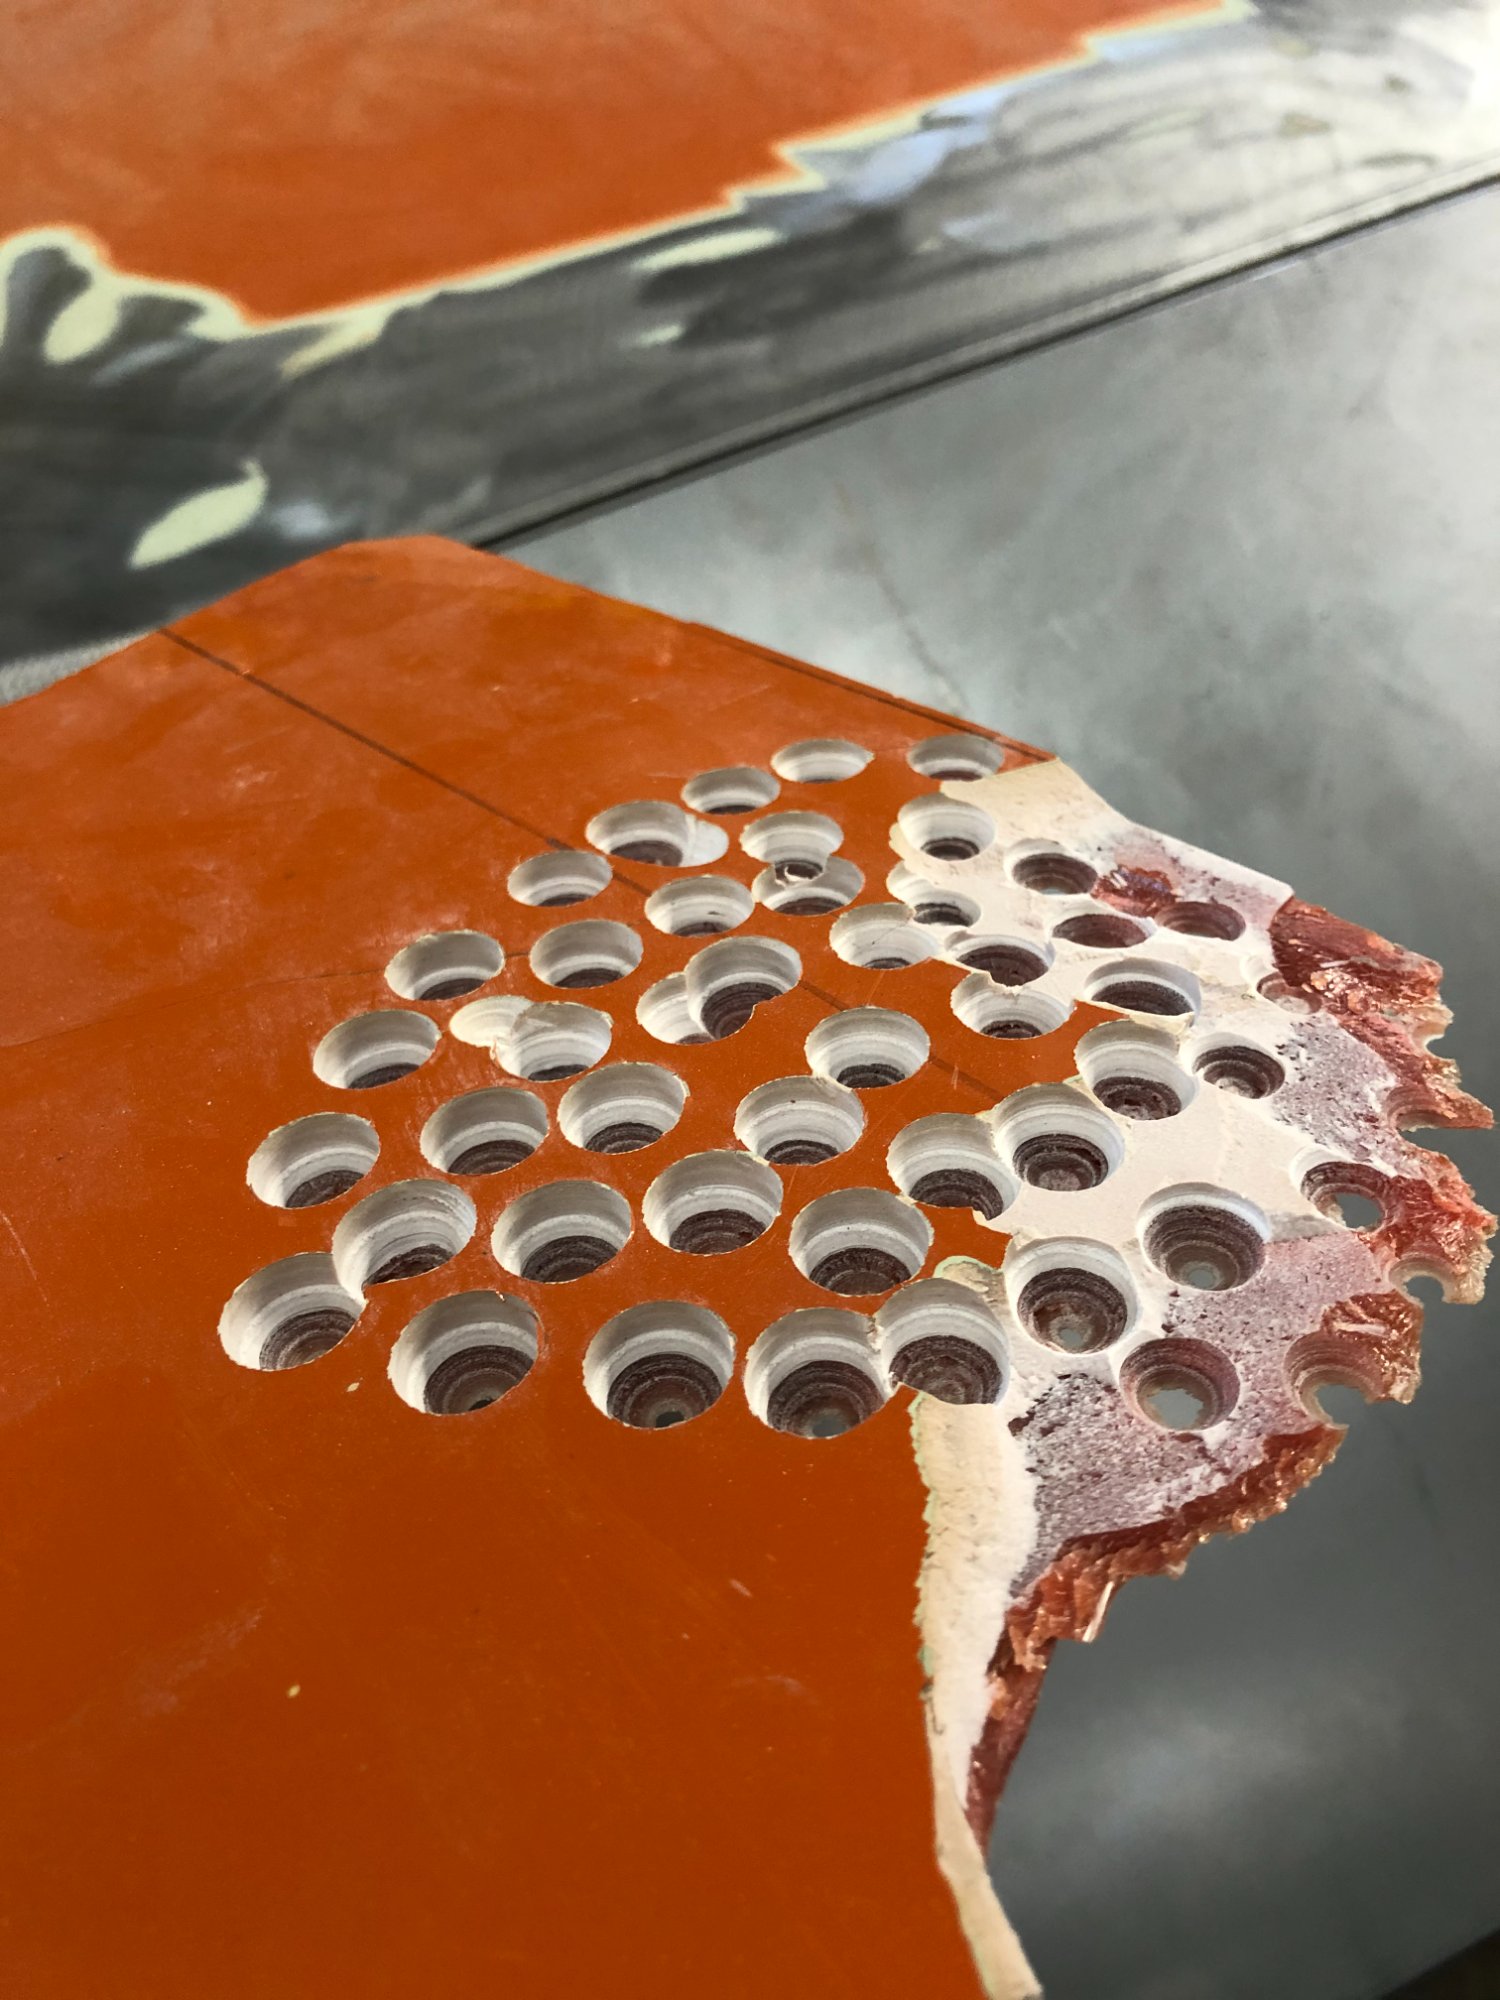
Look how DEEP that filler is. This is what hides under "nice paintwork" on cheap restorations.
This is why you buy a shell. This is why you have it done properly. Because otherwise, you're buying someone else's covered-up rust problem.
The Rebuild: Solid Metal, Proper Welding
Once all the rust was cut away, the real work began: replacing it with solid metal, properly welded.
Adding new metal where rust had been cut away. This is what proper restoration looks like.
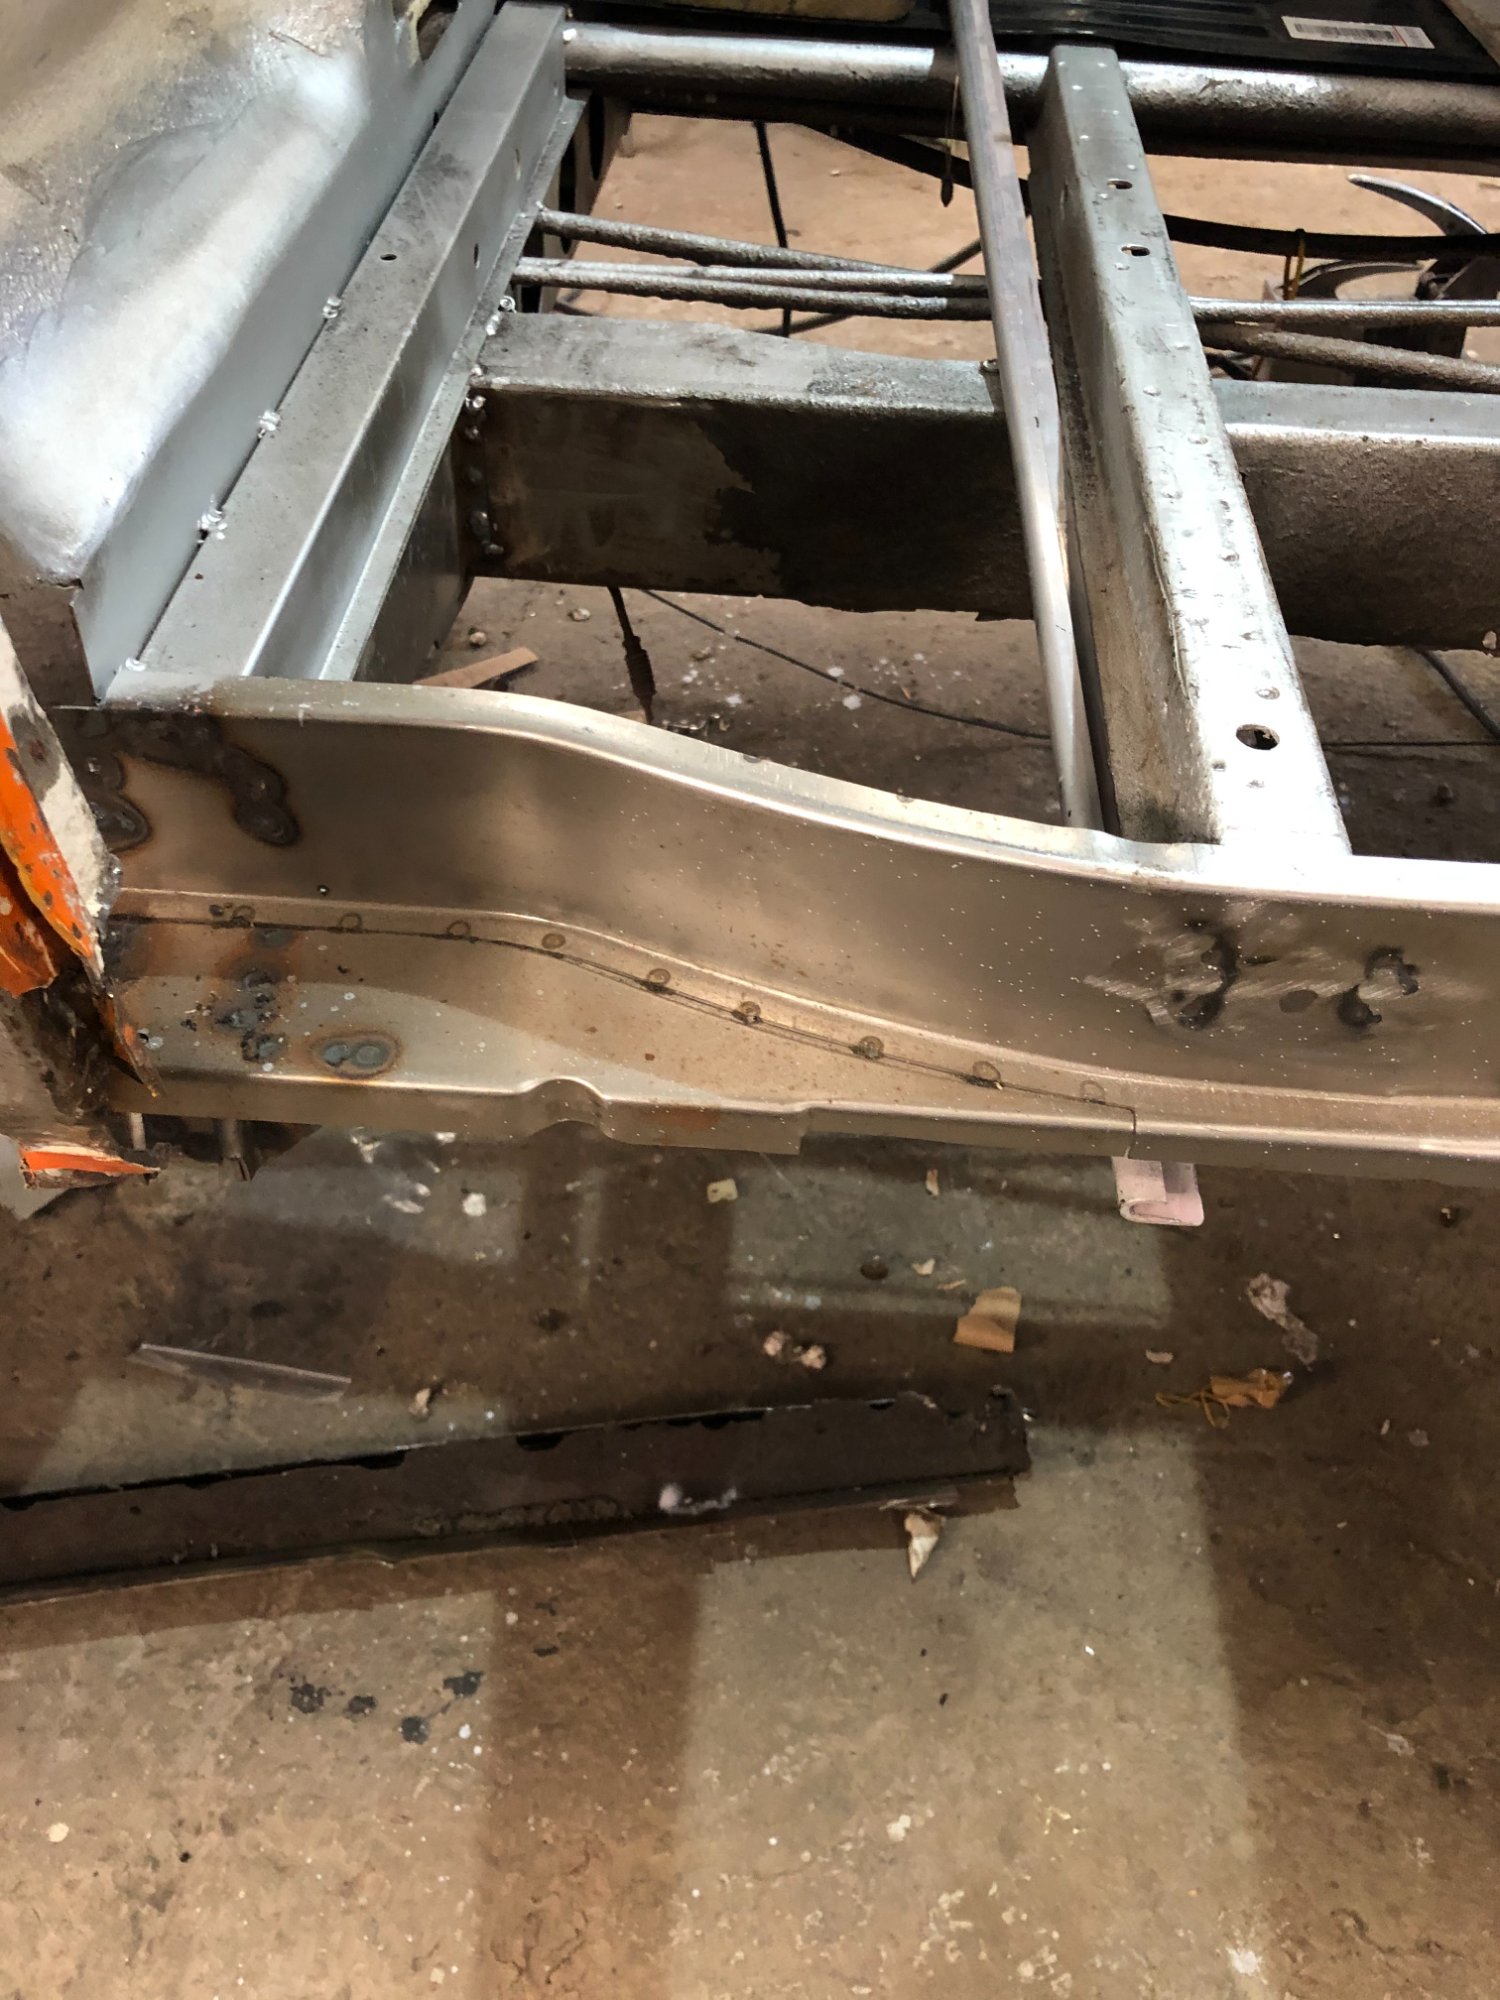
Old flooring cut out, new chassis welding complete. Properly solid now.
The Front End: A Pleasant Surprise
Not everything was bad news. The front end was already solid—one of the few areas that didn't need major work.
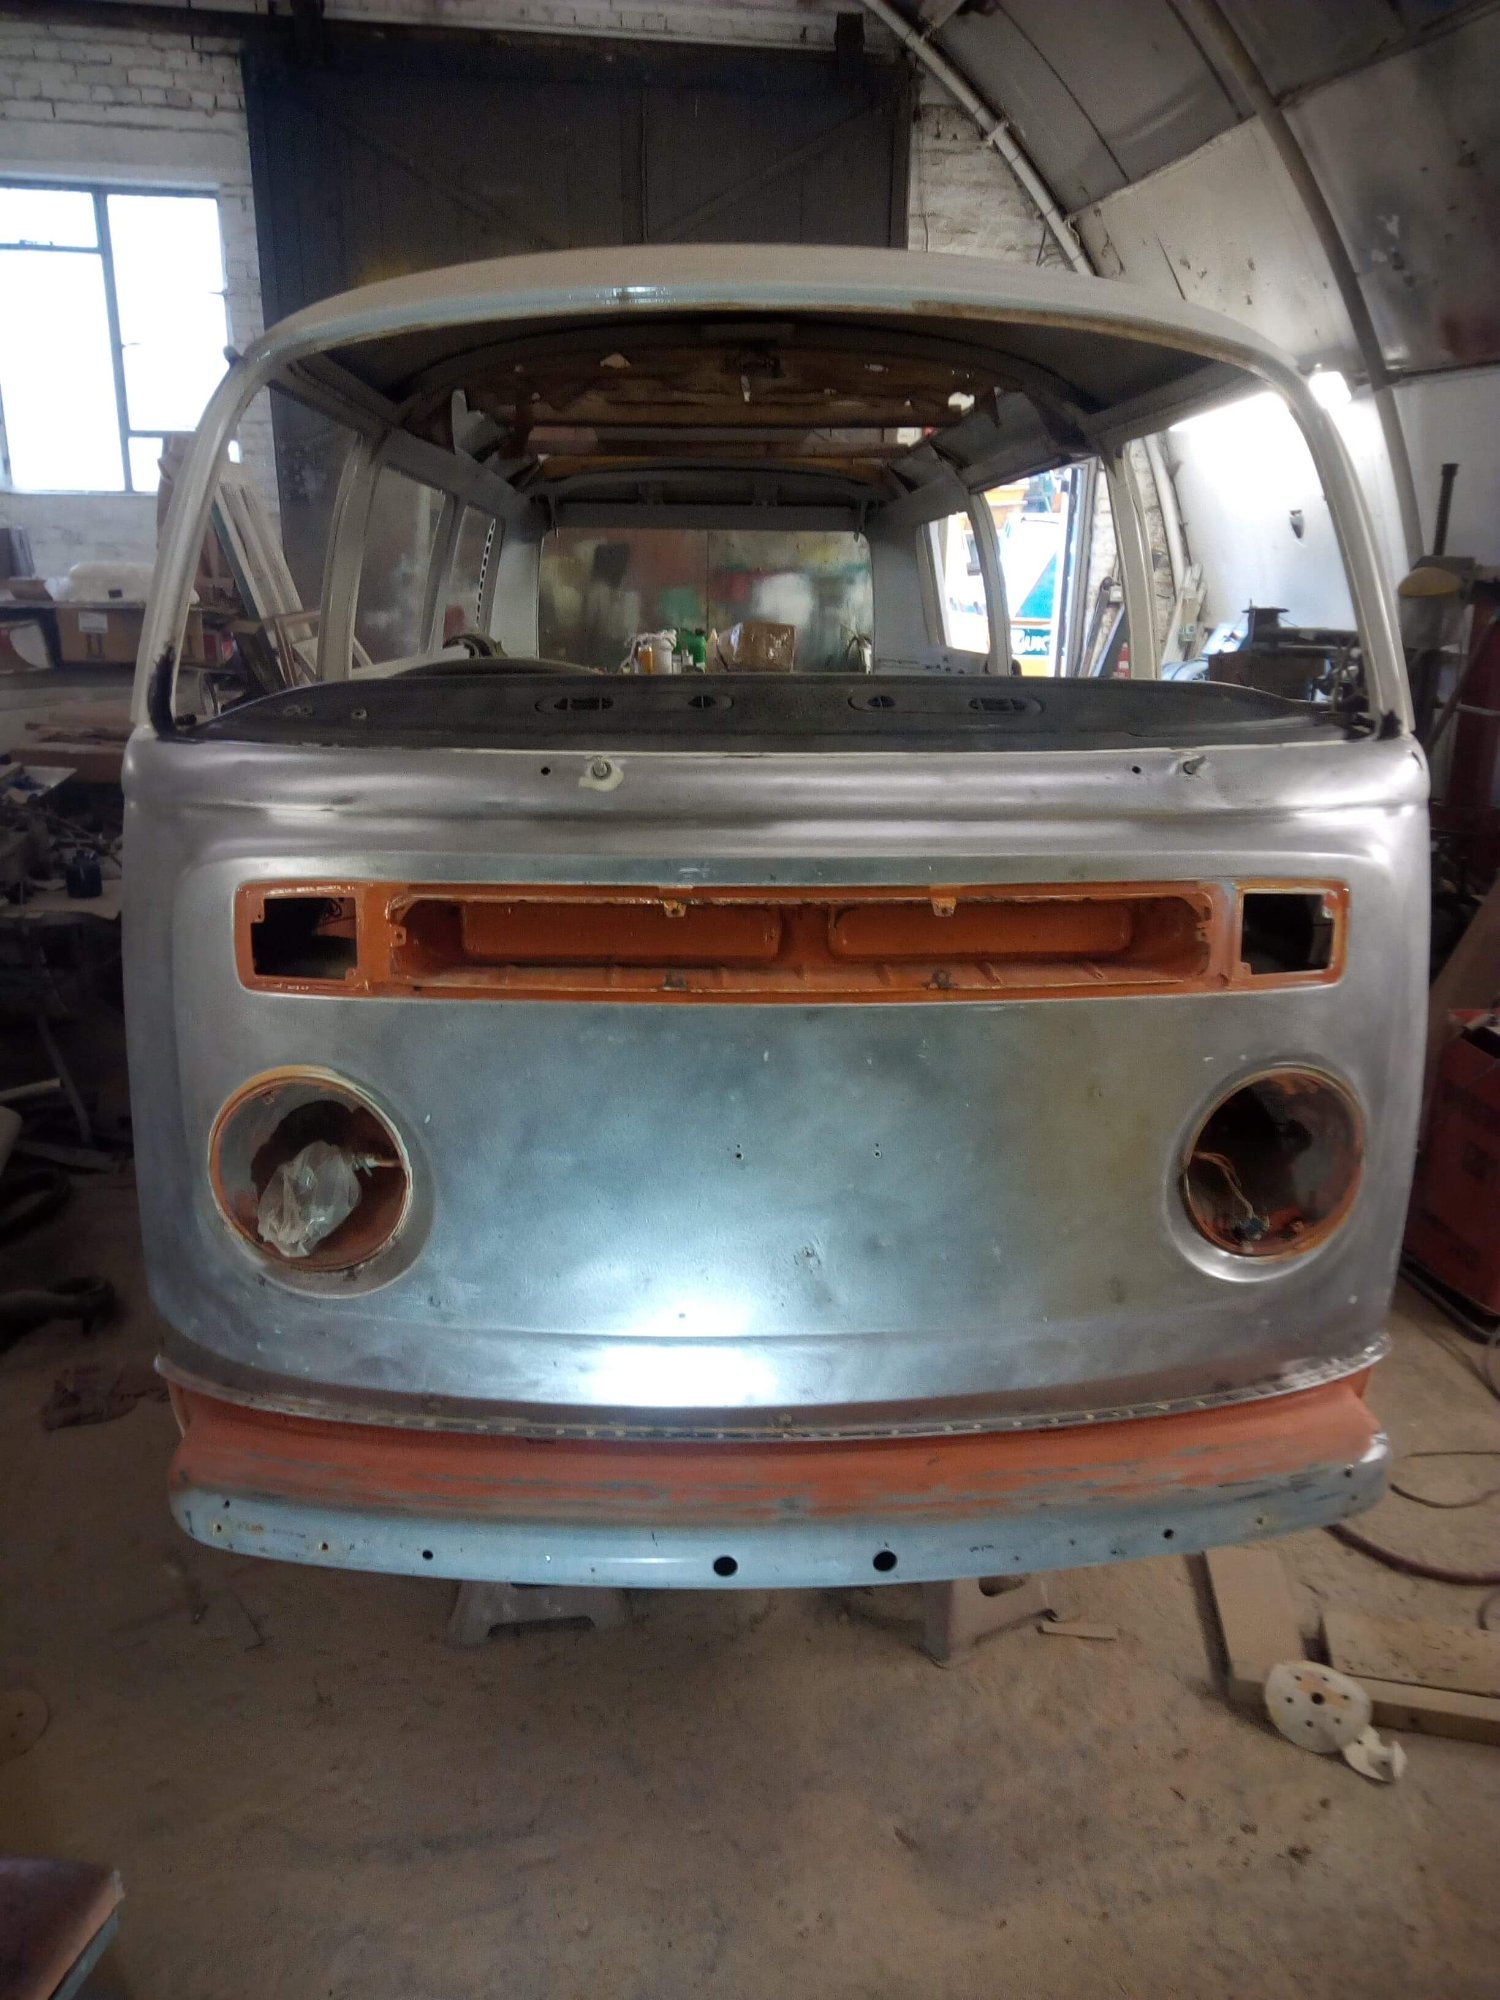
Back to metal. The front end was already solid—a rare bit of good news.
Wheel Arches and Corners
The wheel arches needed significant work. Big chunks of rusty metal had to be removed and replaced.
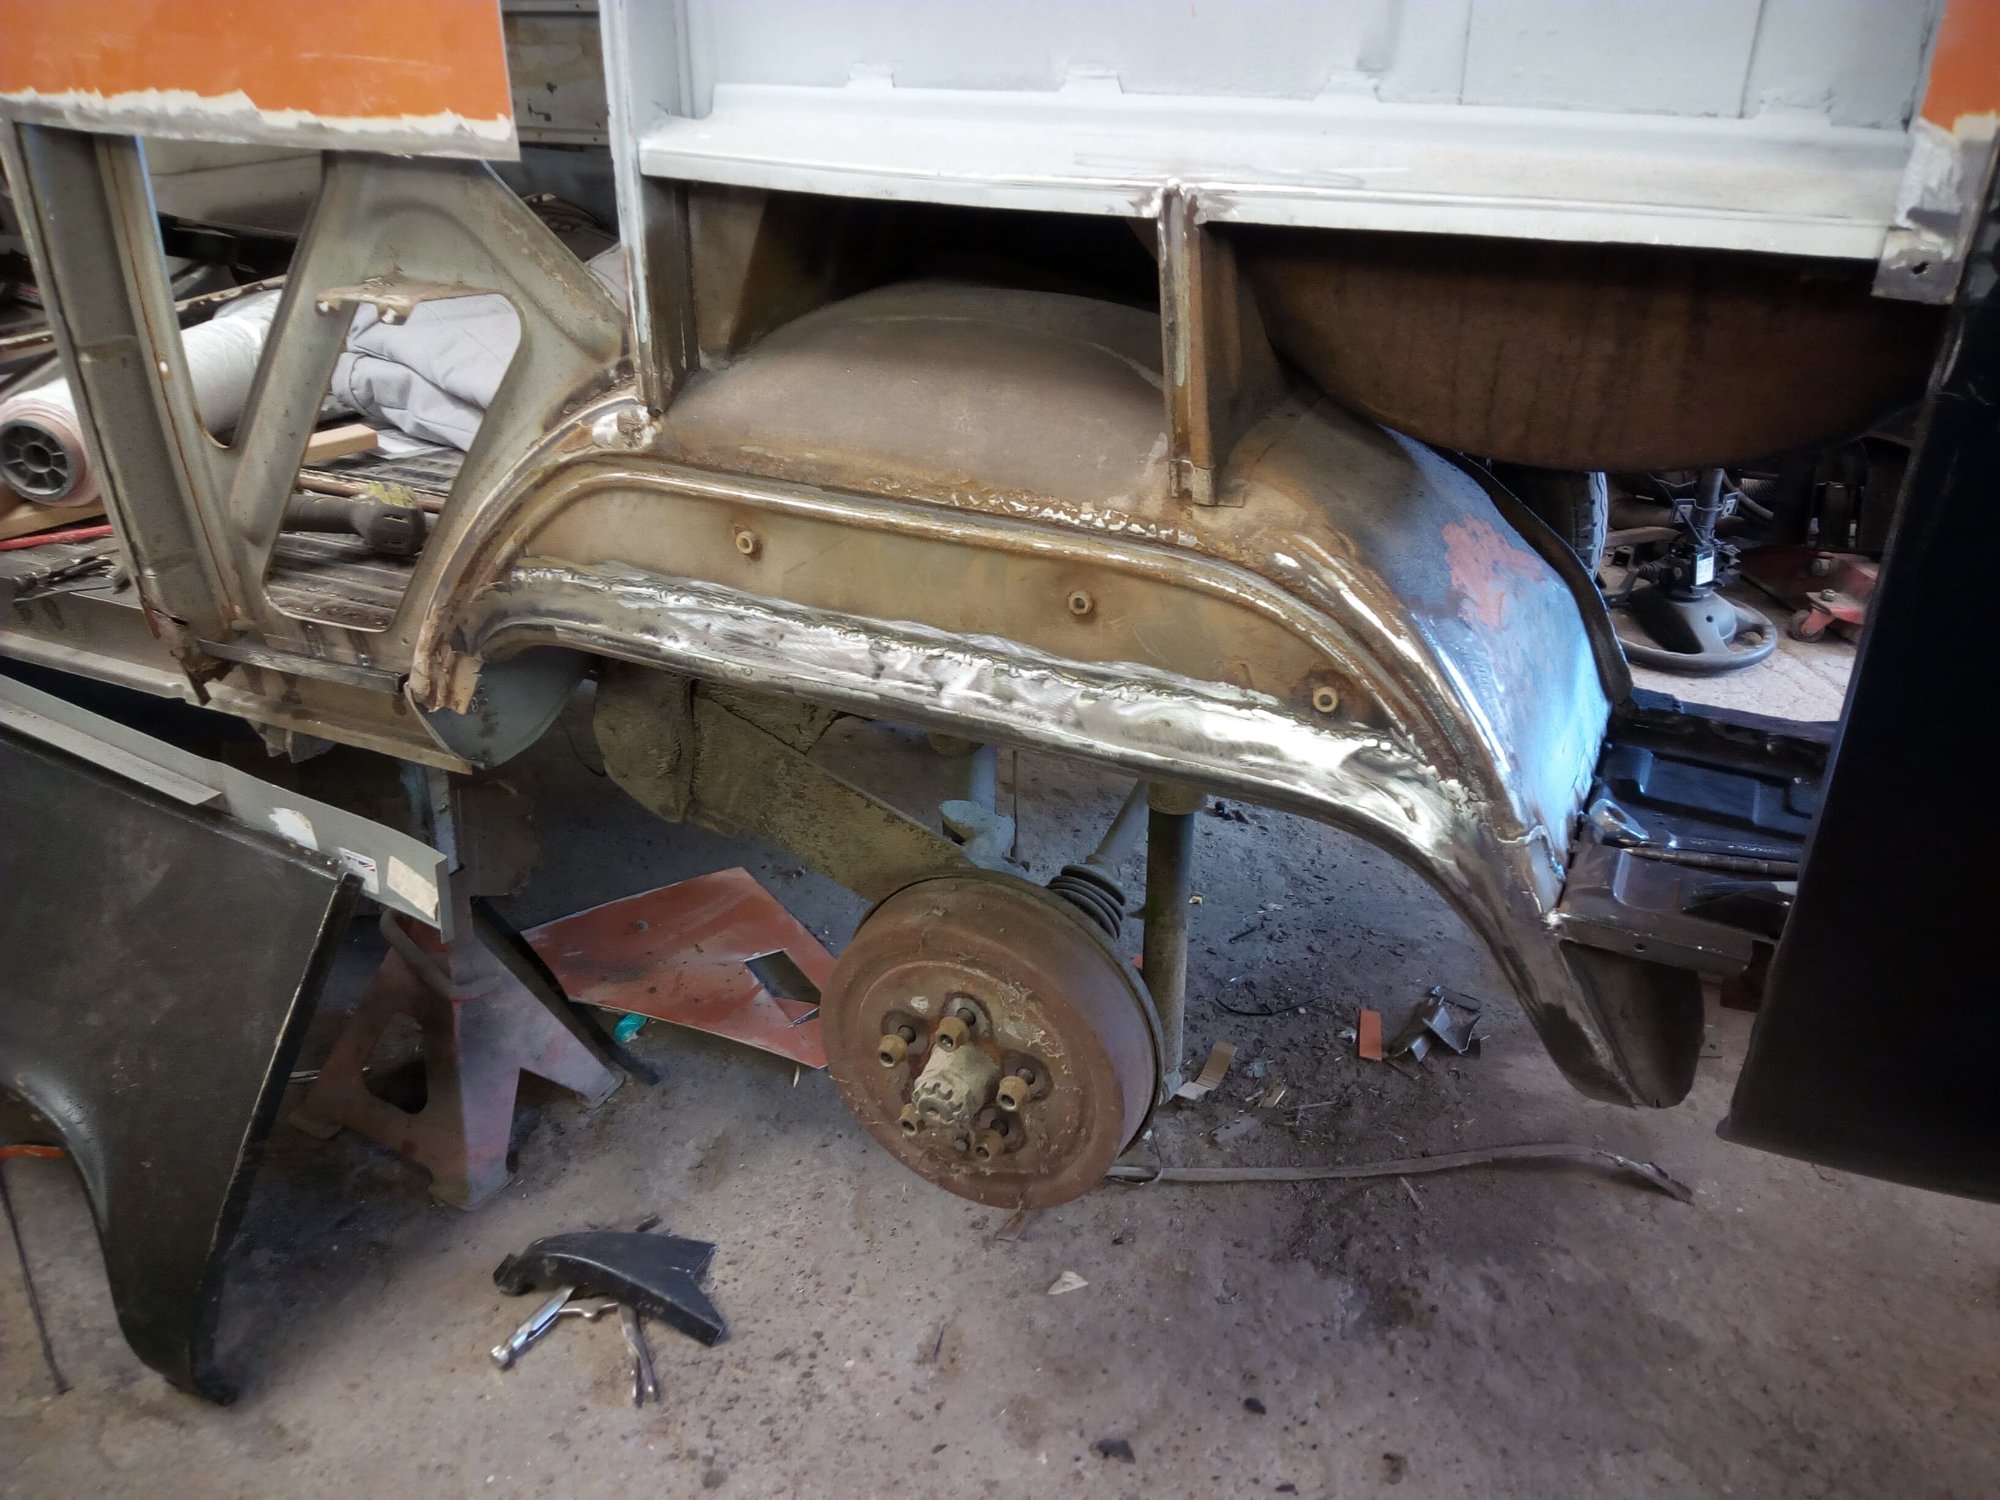
Cutting away big chunks of rusty wheel arch.
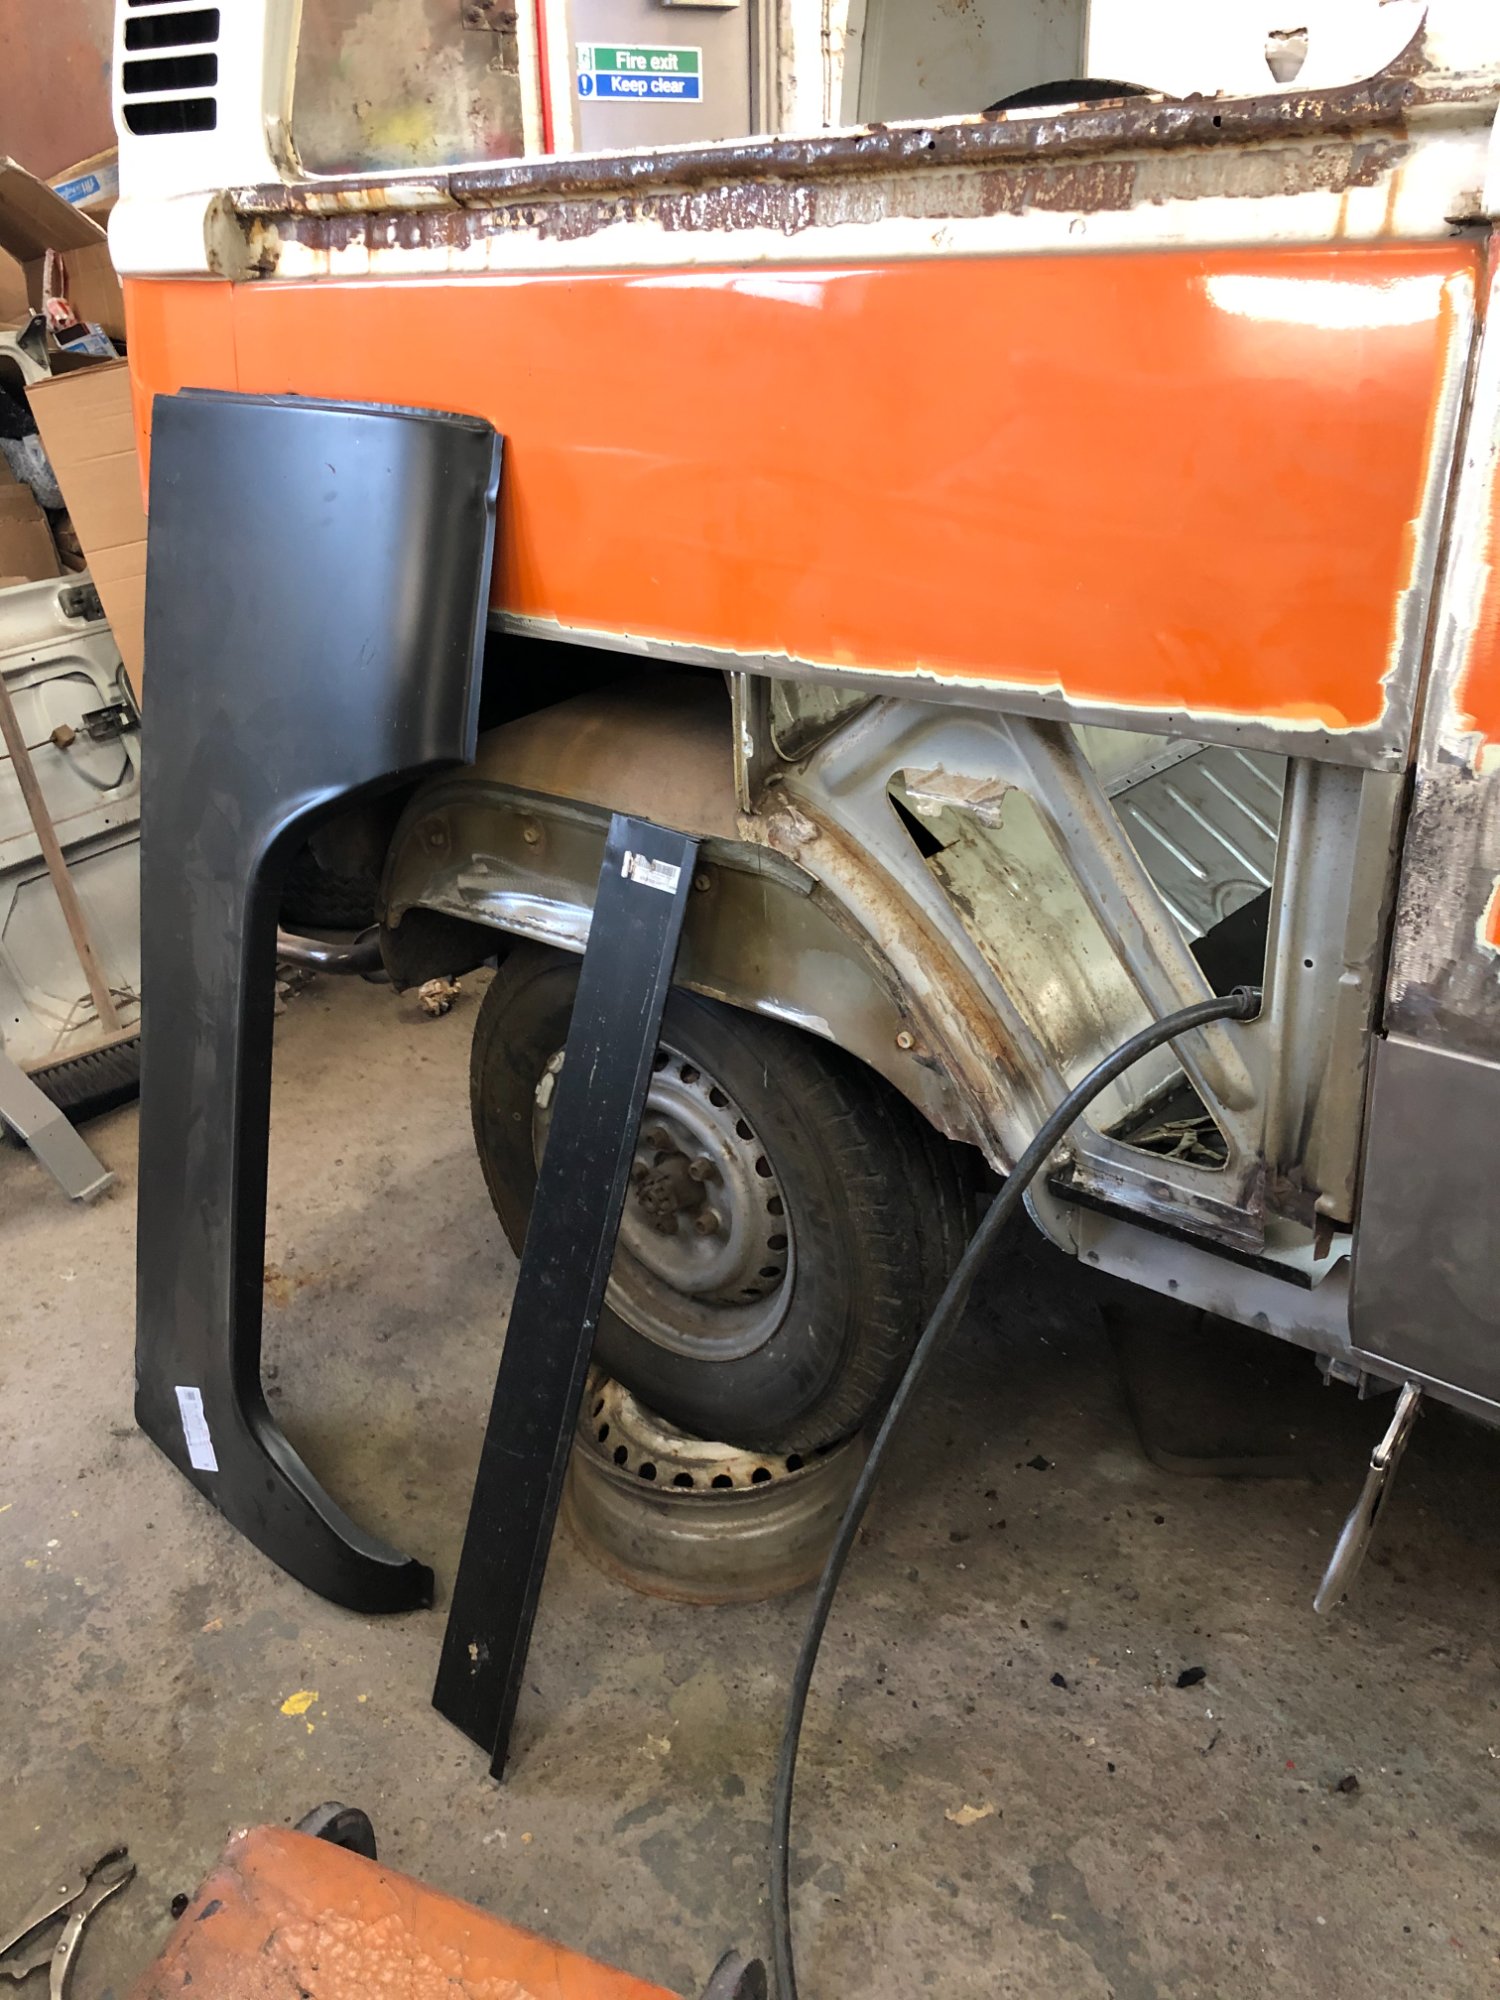
New panel fabricated and ready to go on.
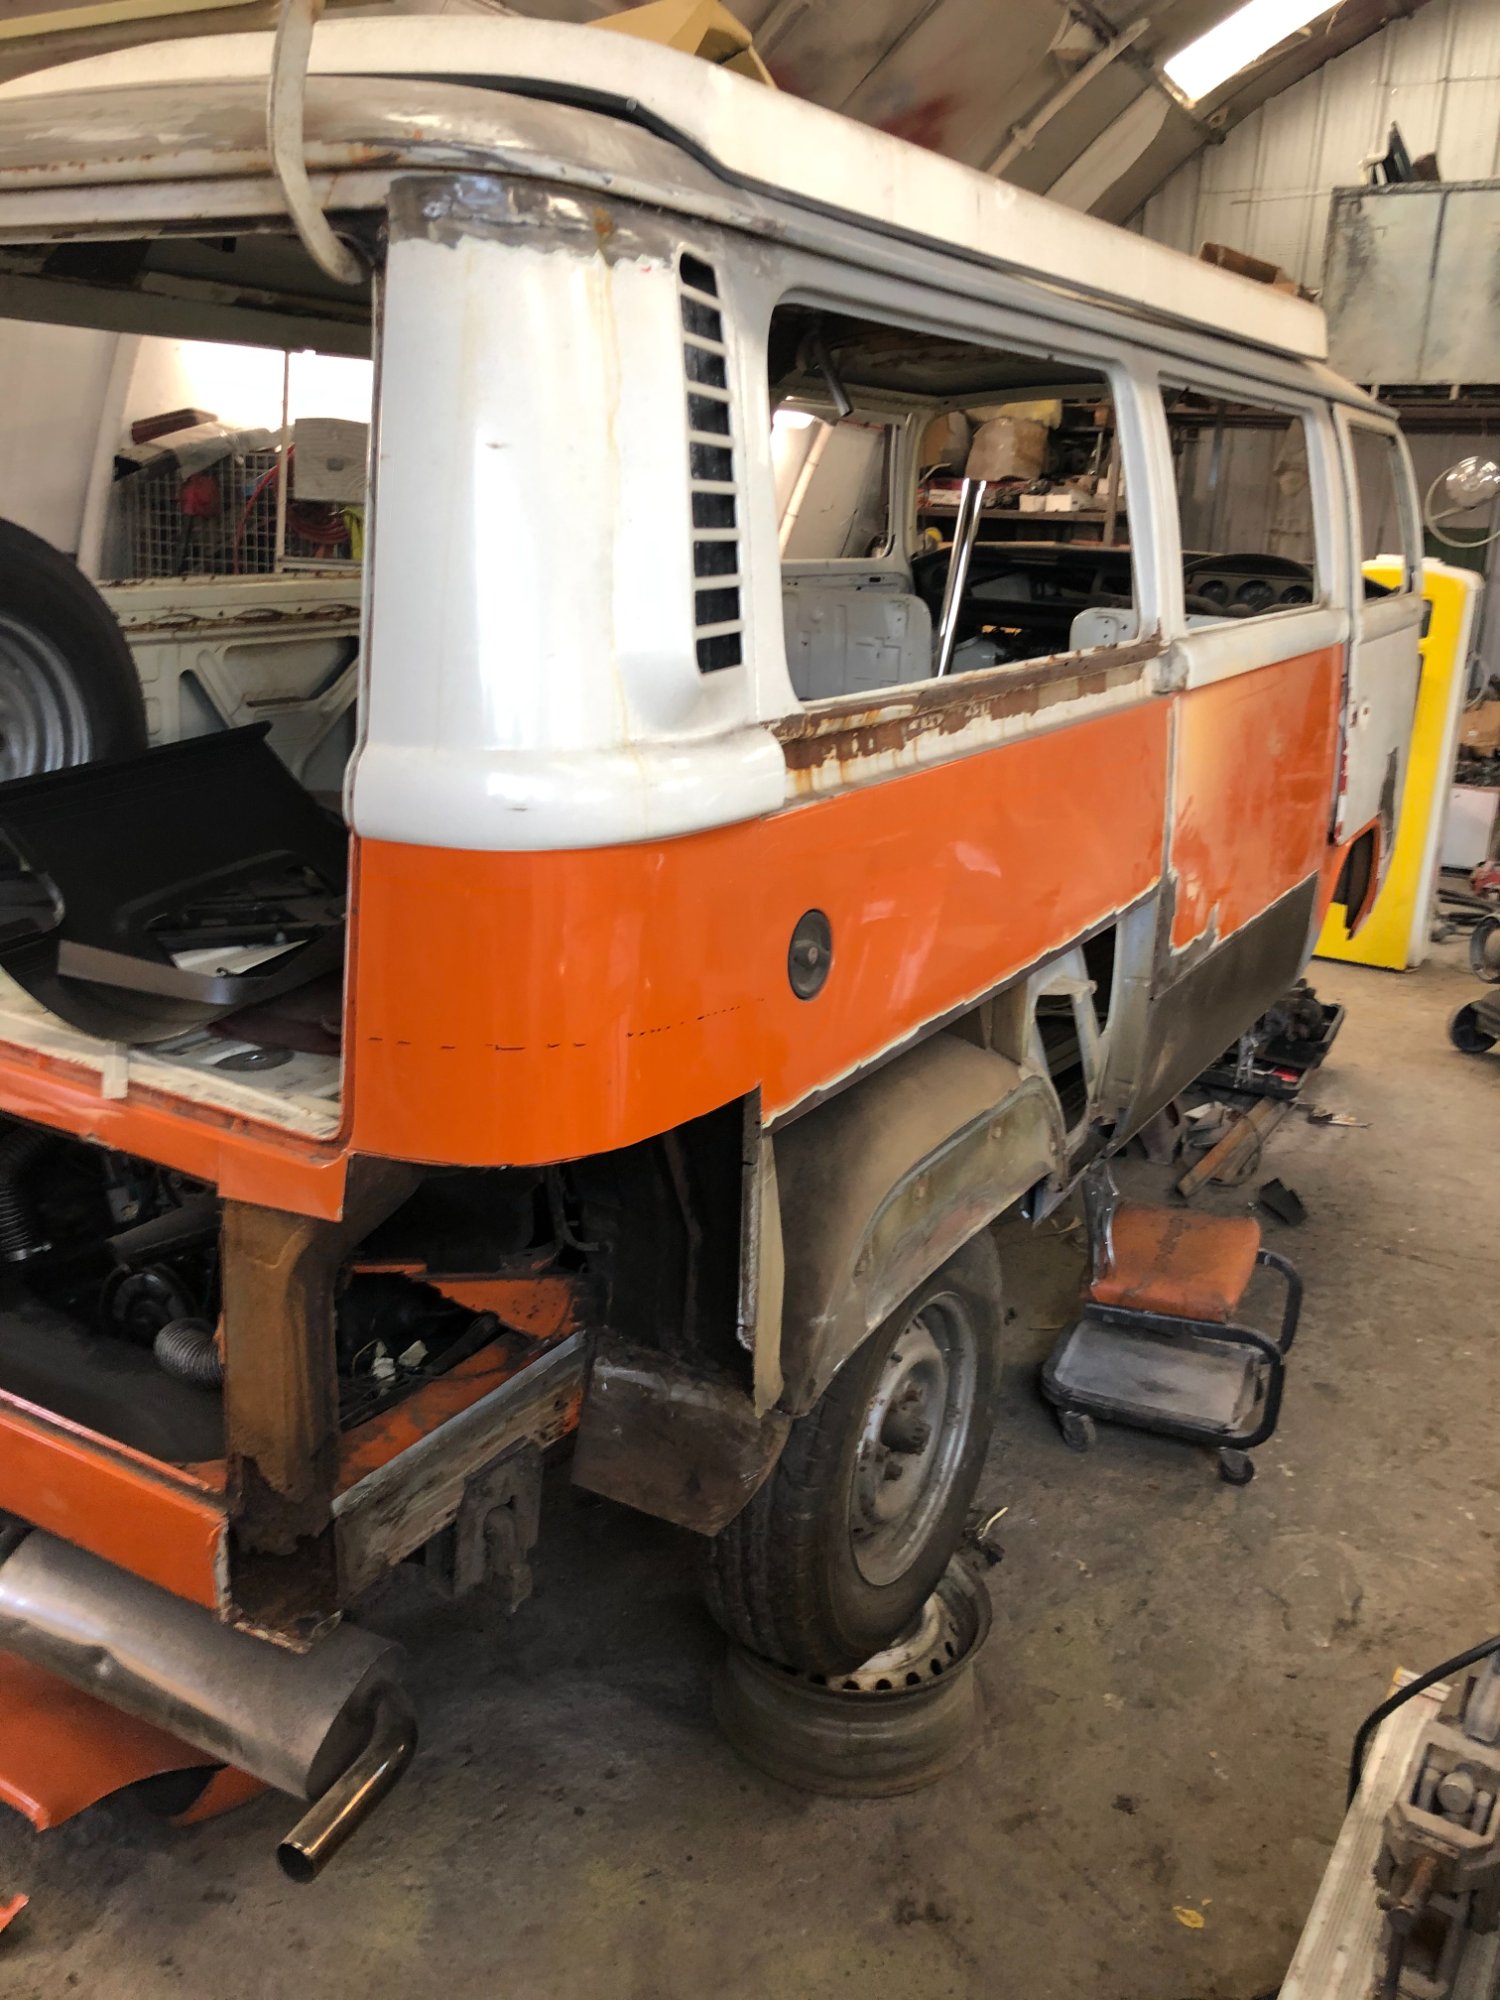
The Lonely Van
There were moments during the restoration when Jenny looked pretty sad, all alone on her stands in the workshop. No doors, no wheels, just a shell being painstakingly brought back to life.
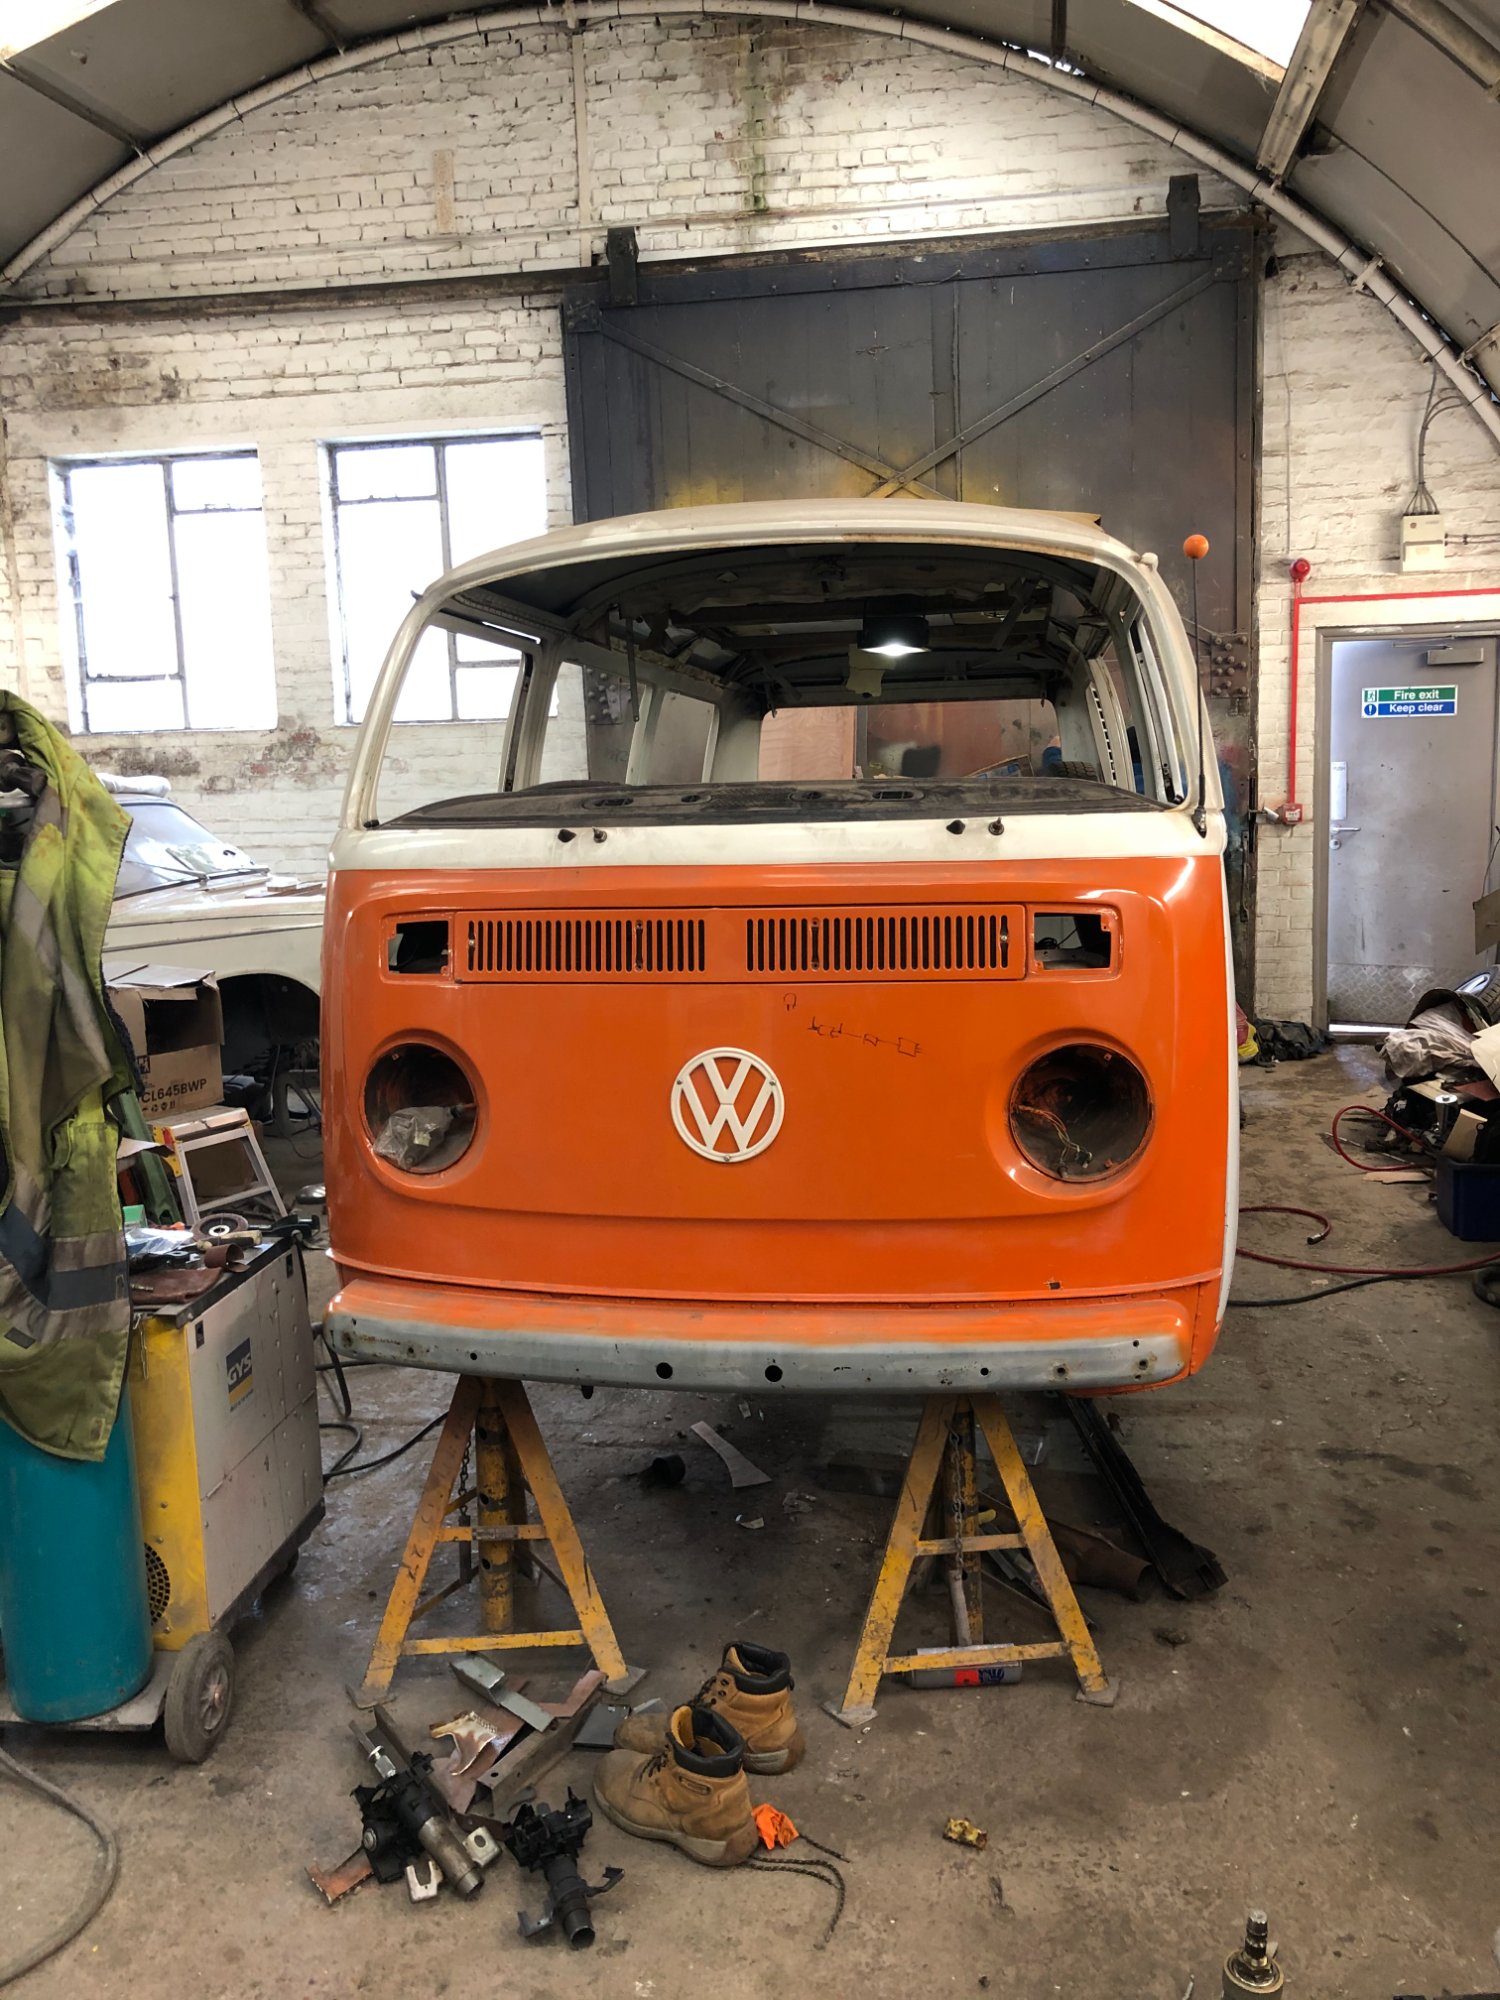
Jenny looking pretty sad, all alone on her stands. But progress was being made.
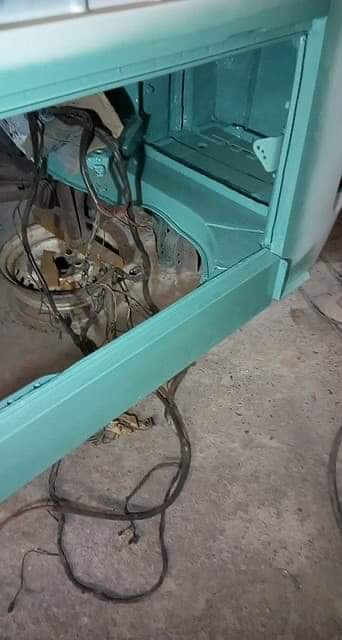
Battery Tray and Rear Corners
The battery tray area is notorious for rust on these vans. Battery acid eats through metal over decades. Jenny was no exception.
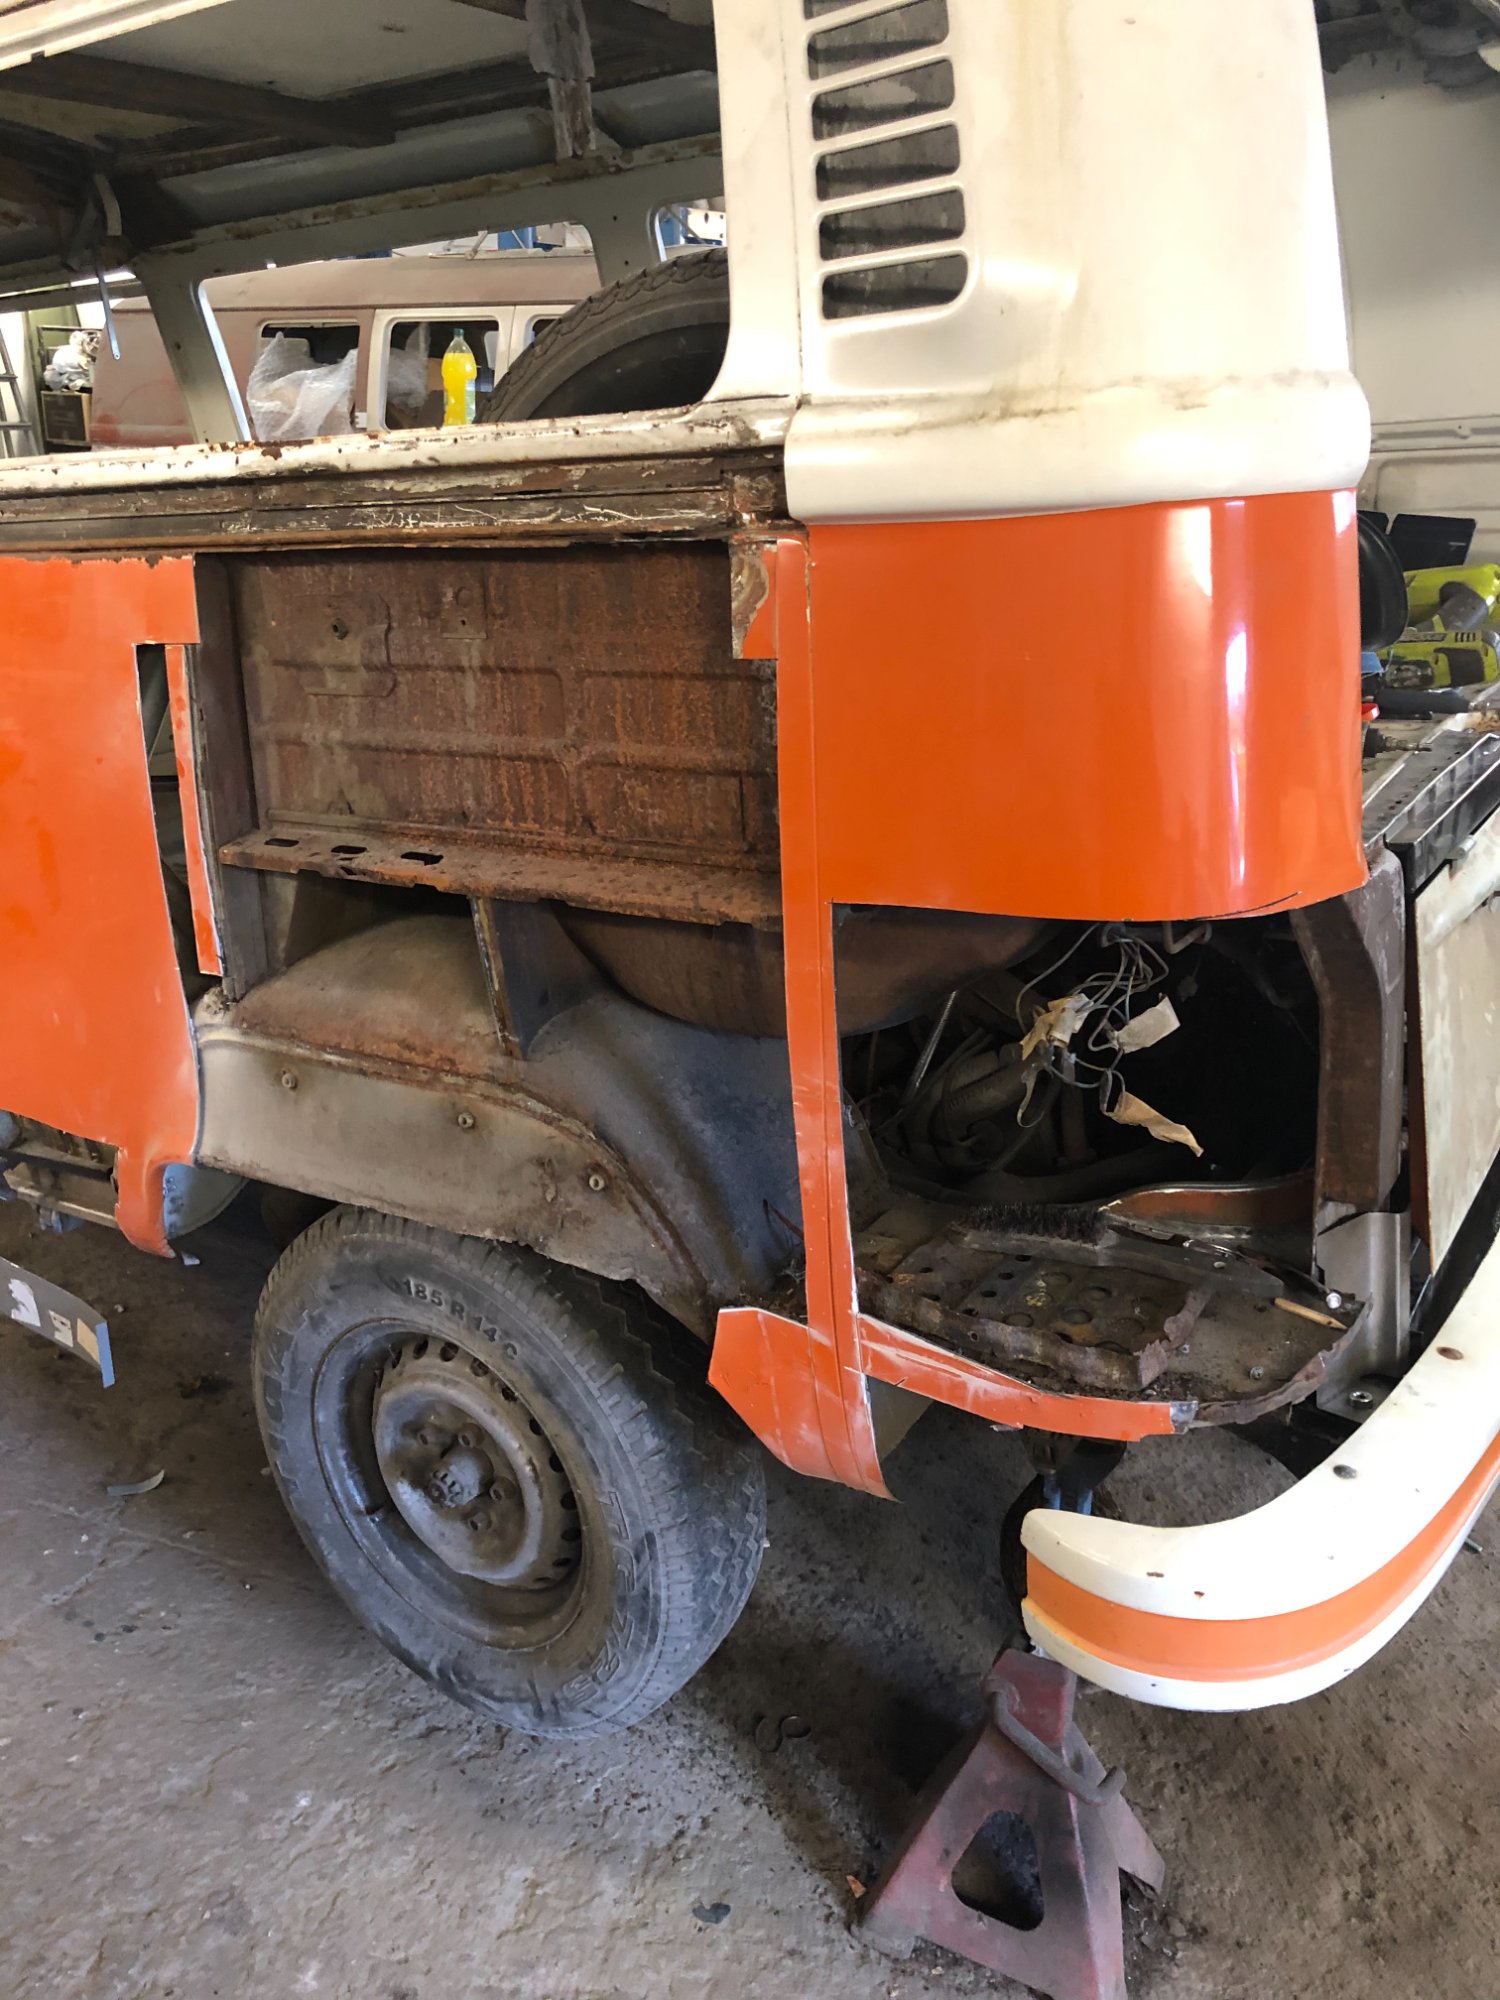
Rear corner cut away and battery tray replaced with solid metal.
An even bigger chunk of metal removed on this side. The rust was everywhere.
The Rear Roof Line: My Biggest Worry
This was the hole that worried me most. Rust in the rear roof line is structural and expensive to fix properly.
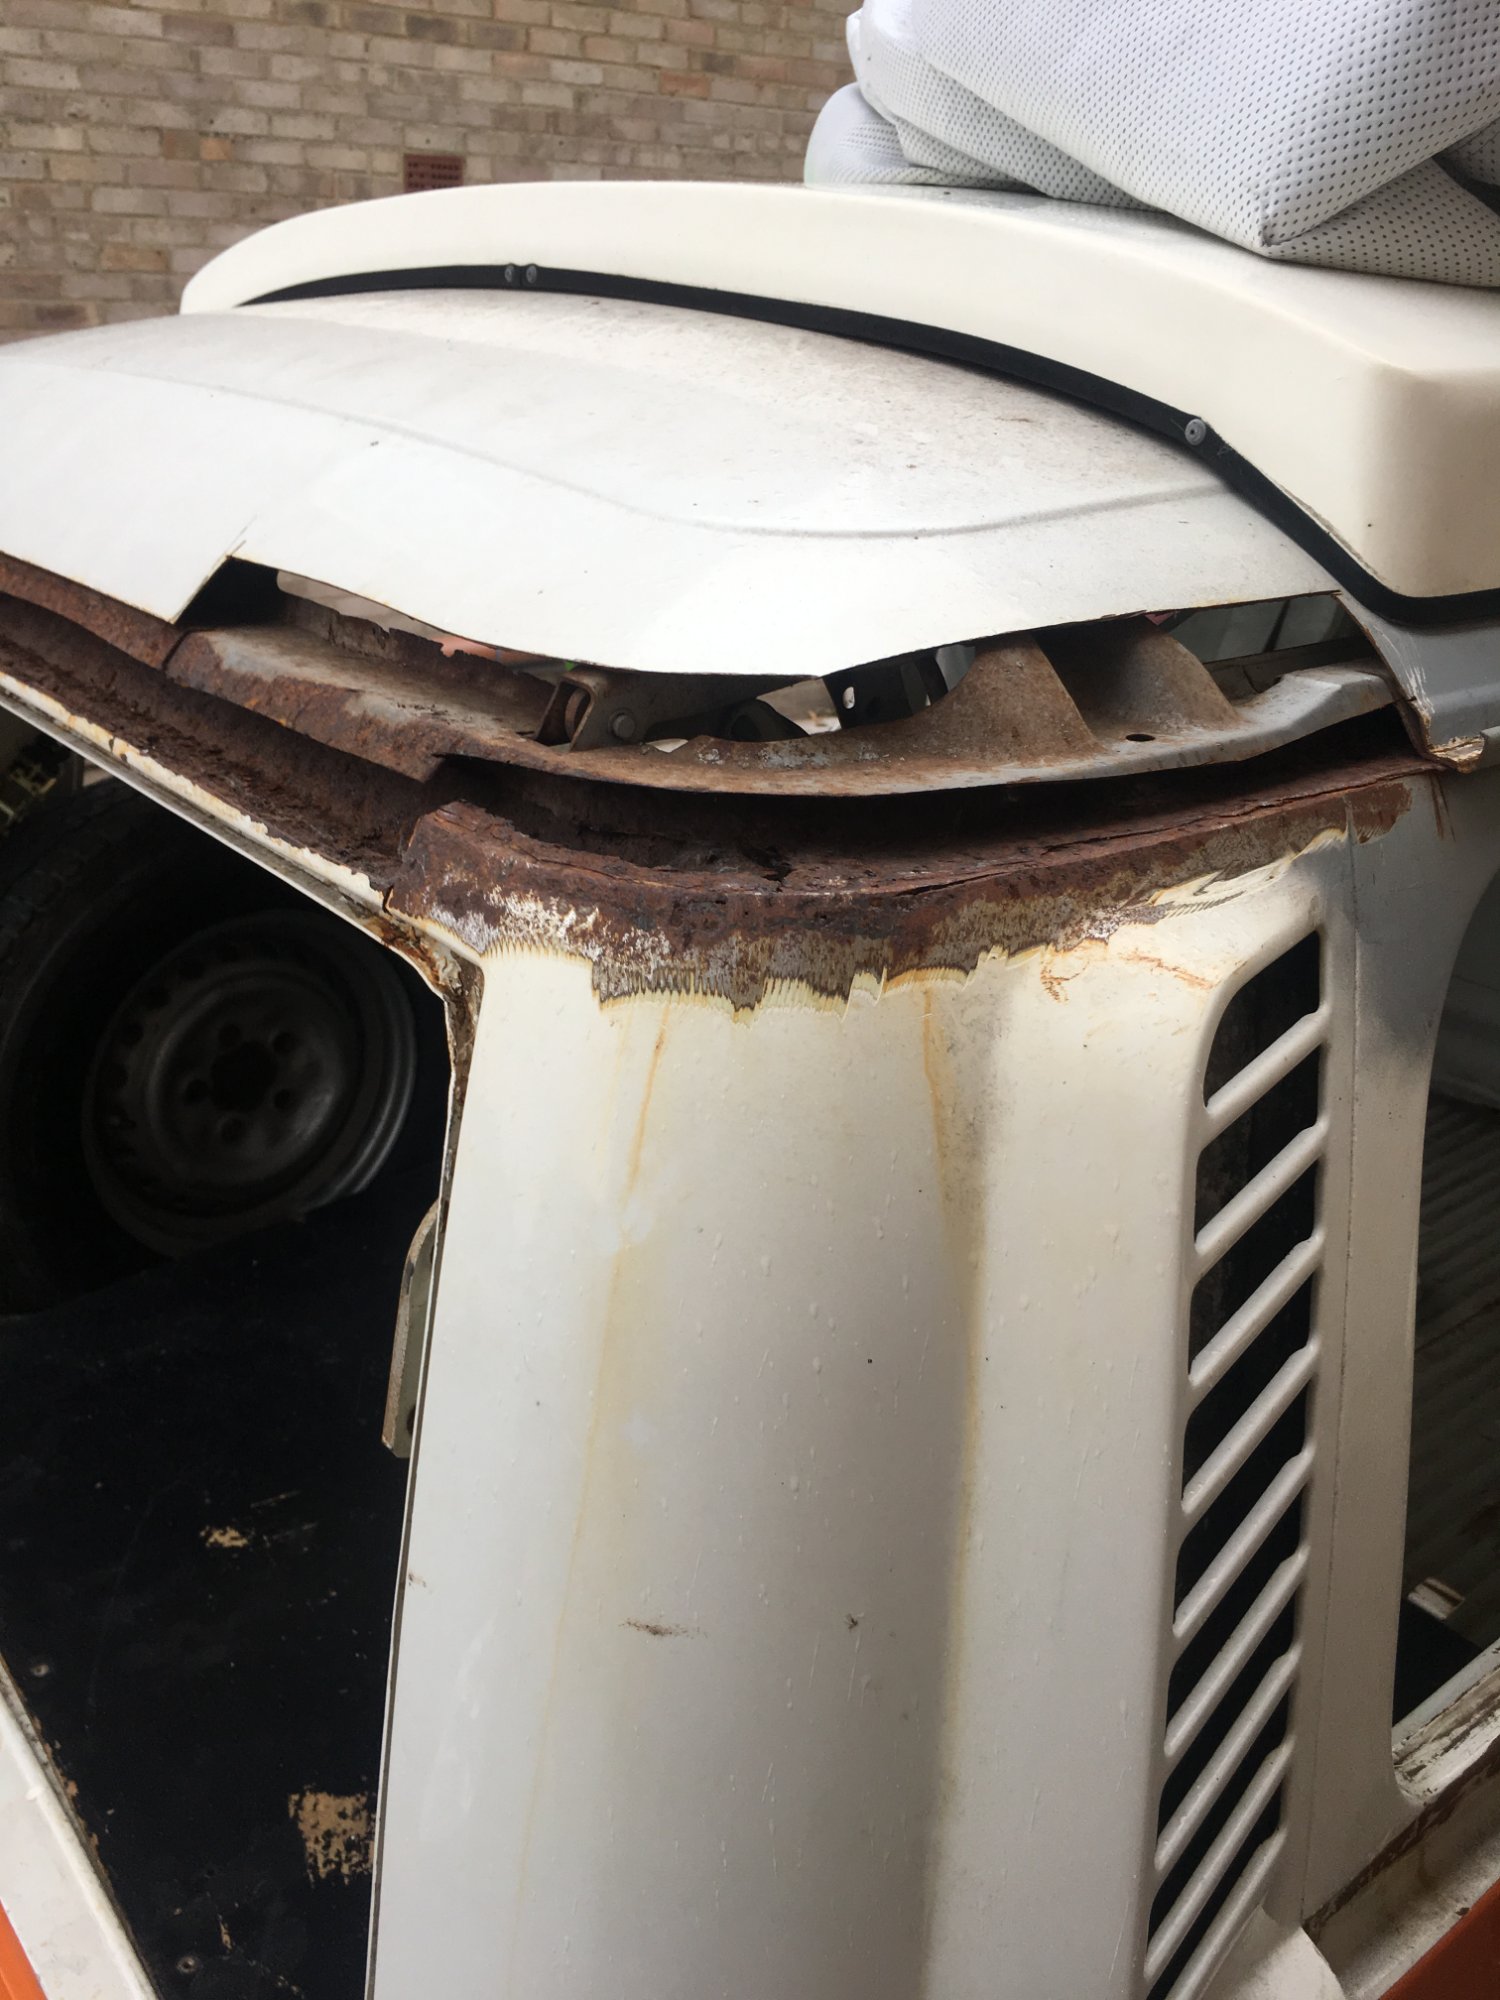
The rear roof line. This hole kept me awake at night.
New Sills: Structural Integrity Restored
The sills are critical structural components. New outer sills were welded in, properly, with no shortcuts.
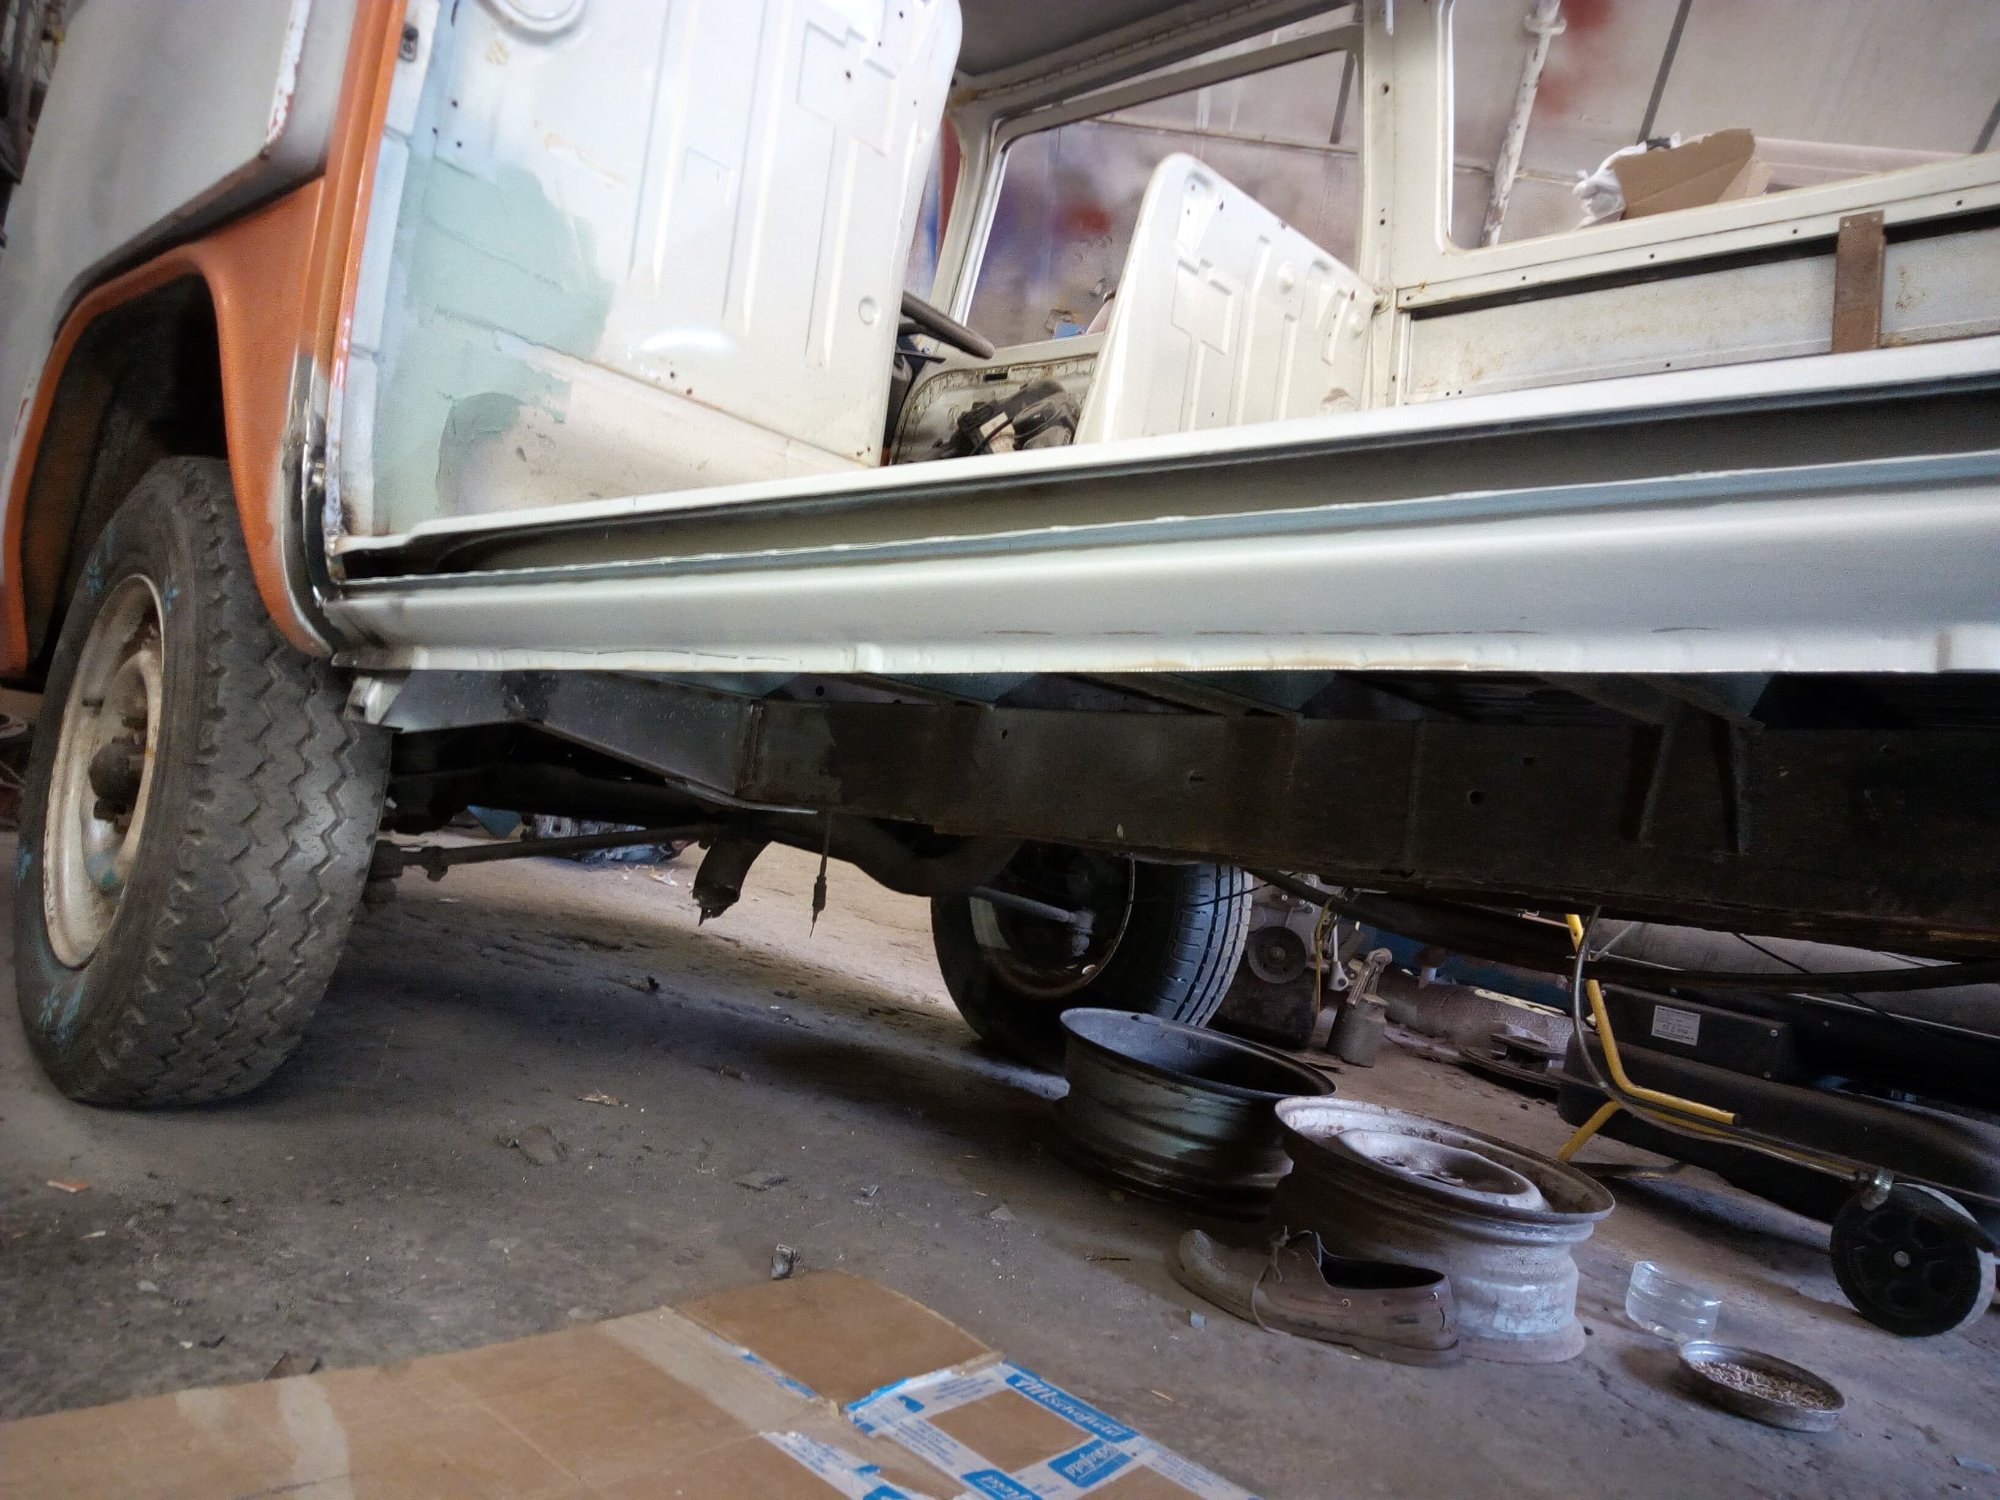
New outer sills welded. Structural integrity restored.
Progress: Solid Metal at Last
After months of cutting, welding, and fabricating, we finally had something solid. The tail end was now more metal than rust for the first time in years.
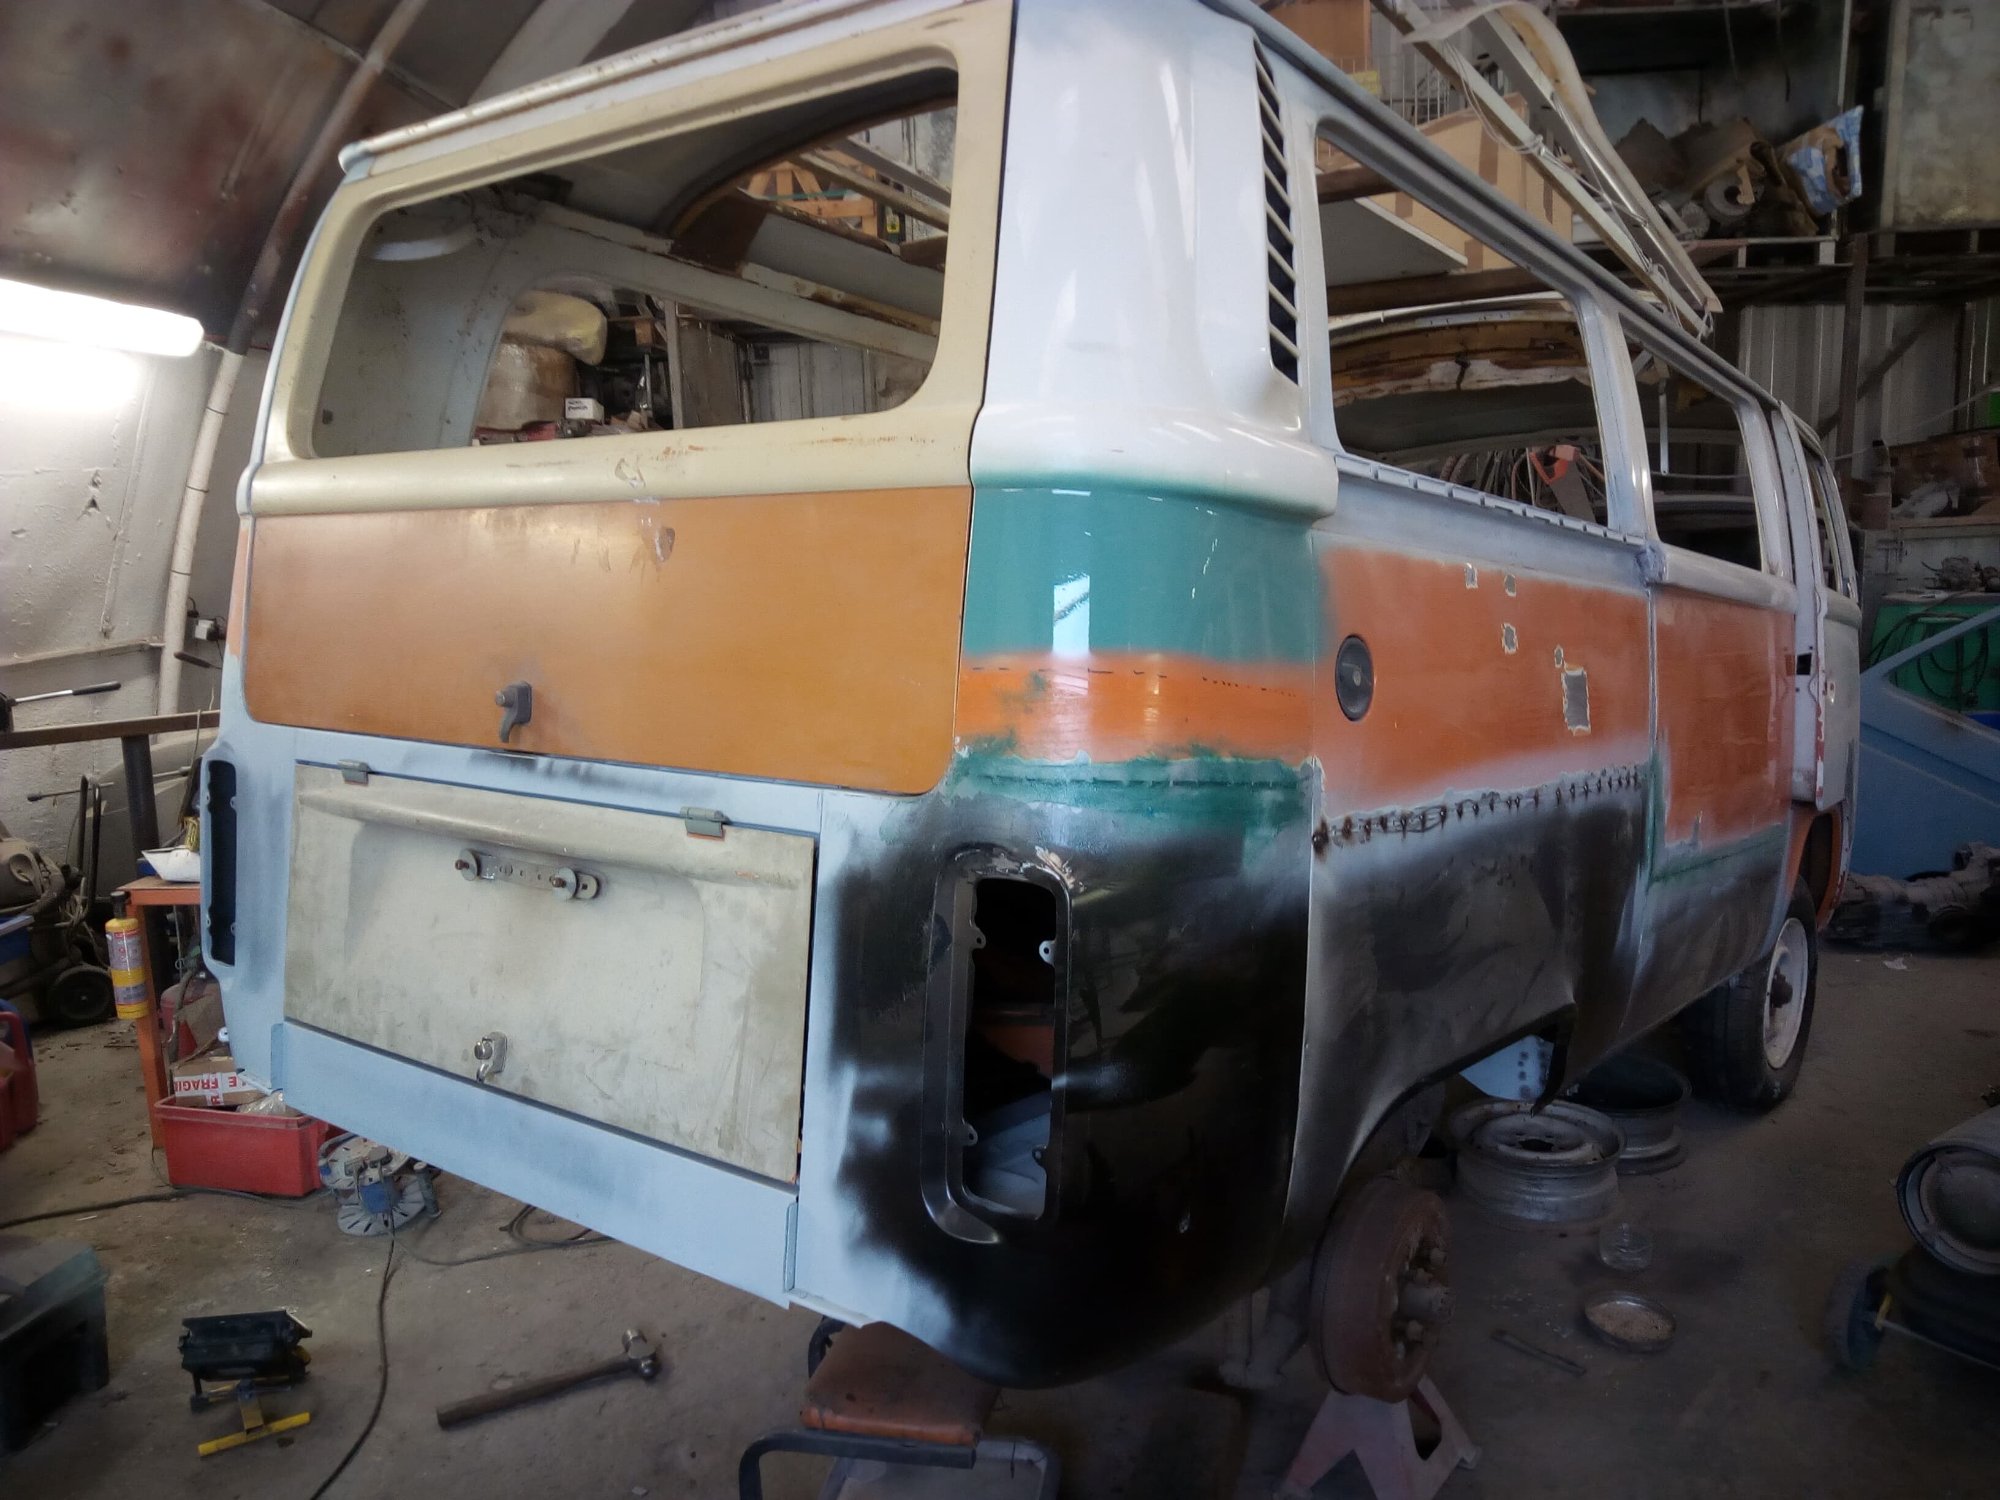
Pretty solid tail end now, with a sample of the turquoise paint we'd chosen.
Rear corners now more metal than rust for the first time. Paint samples showing the transformation ahead.
First Colour: The Beginning of the End
Seeing the first bit of turquoise paint going on was emotional. After all the cutting, welding, and frustration, Jenny was finally starting to look like a proper van again.
First bit of colour going on the battery tray. This is when it started to feel real.
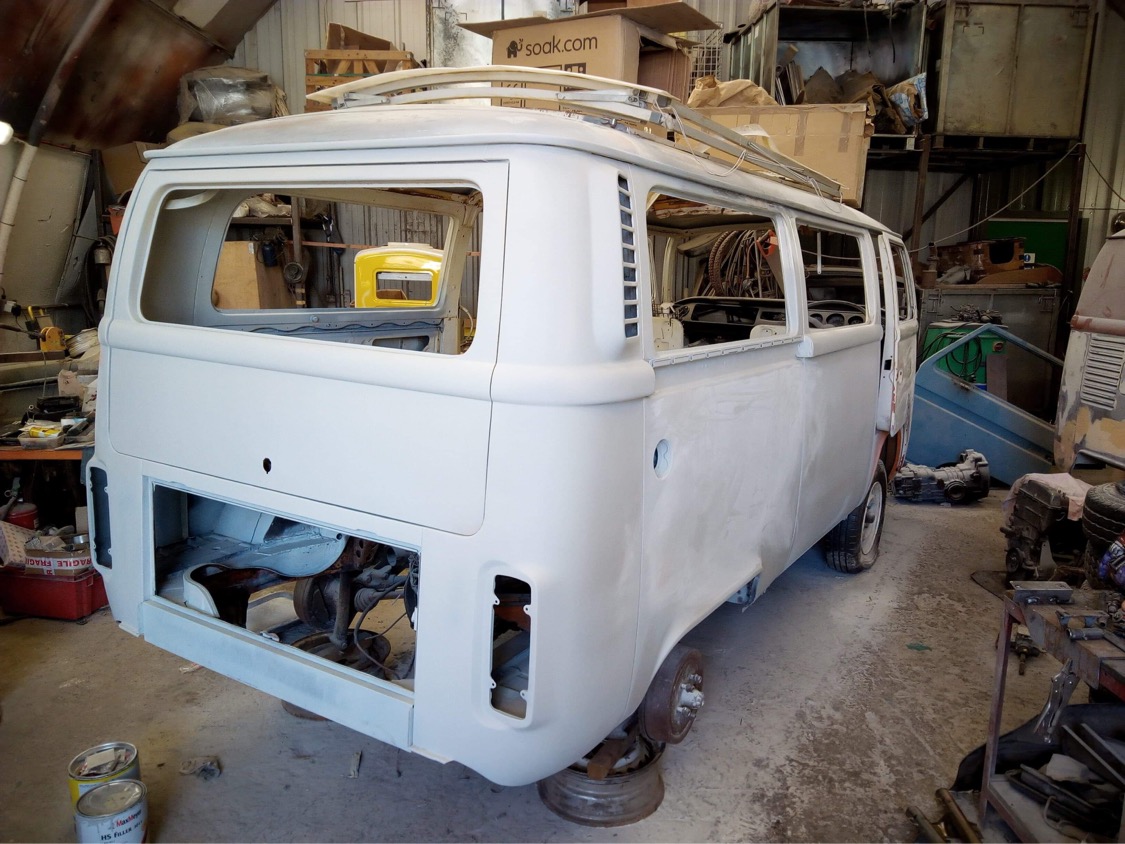
First coat of primer. Finally starting to look like a whole van again.
What I Learned: Top Tips for Finding Your Restoration Company
1. Ask Around for Personal Referrals
A personal referral from someone you know and trust is worth its weight in gold. Join VW forums, Facebook groups, local clubs. Ask who people used and whether they'd use them again.
2. Be Patient—Good People Are Busy
If someone can take your van immediately, that's actually a red flag. The best restoration companies have waiting lists because they're in demand. That's a good sign.
I waited a year for Sunflower Campers. It was worth every day of that wait.
3. Visit the Workshop Before Committing
Go and see where your van will be worked on. Look at other projects they have on the go. Are they organized? Professional? Do they seem to know what they're talking about?
Trust your gut. If something feels off, walk away.
4. Get Everything in Writing
Scope of work, timeline (even if approximate), costs, payment schedule. Everything. In writing.
This protects both you and them. No verbal promises, no "we'll sort it out later." Get it documented.
5. Understand That Costs Will Escalate
They always do. Always. Budget for 50% more than the initial quote because once they start cutting into your van, they'll find things that weren't visible during the initial inspection.
This isn't them trying to rip you off—it's just the reality of working on 50-year-old vehicles.
6. Communication Is Key
You want someone who'll keep you updated, send photos of progress, answer your questions. If they ghost you for weeks at a time, that's a problem.
Sunflower were brilliant at this. Regular updates, photos showing exactly what they were doing, patient explanations when I asked (probably) stupid questions.
7. Specialization Matters
Find someone who specializes in air-cooled VWs. Not just "classic cars" or "general restoration"—actual VW specialists who know these vehicles inside out.
VWs have quirks. You want someone who knows those quirks intimately.
The Bottom Line
Finding the right restoration company is possibly the most important decision you'll make in your VW restoration journey. More important than which parts you choose, more important than paint color, more important than anything else.
Get this right, and you'll end up with a solid, properly restored van you can trust.
Get it wrong, and you'll waste years, thousands of pounds, and potentially end up with a van that's worse than when you started.
Was It Worth It?
Yes. Absolutely yes.
Two years of searching, nine months in the workshop, and significantly more money than I'd initially budgeted. But now I have Jenny, properly restored, with solid metal throughout, and I know the quality of work that went into her.
I can drive her with confidence. I'm not wondering what's hiding under the paint. I'm not worried about structural integrity.
That peace of mind? Priceless.
More Restoration Posts:
Complete Engine Rebuild Guide →
Weber Carb Installation →
Bilstein Shocks Upgrade →
VW Camper Buyer's Guide →
Questions about restoration companies or the process? Drop me a message on Instagram @jennythebus!