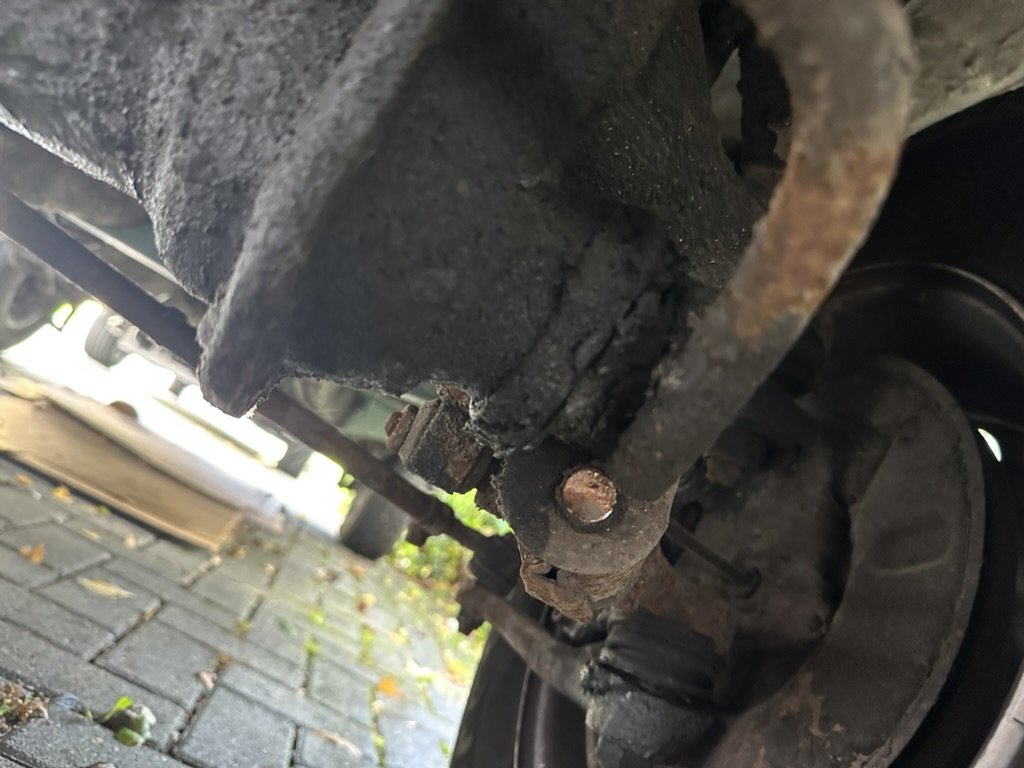
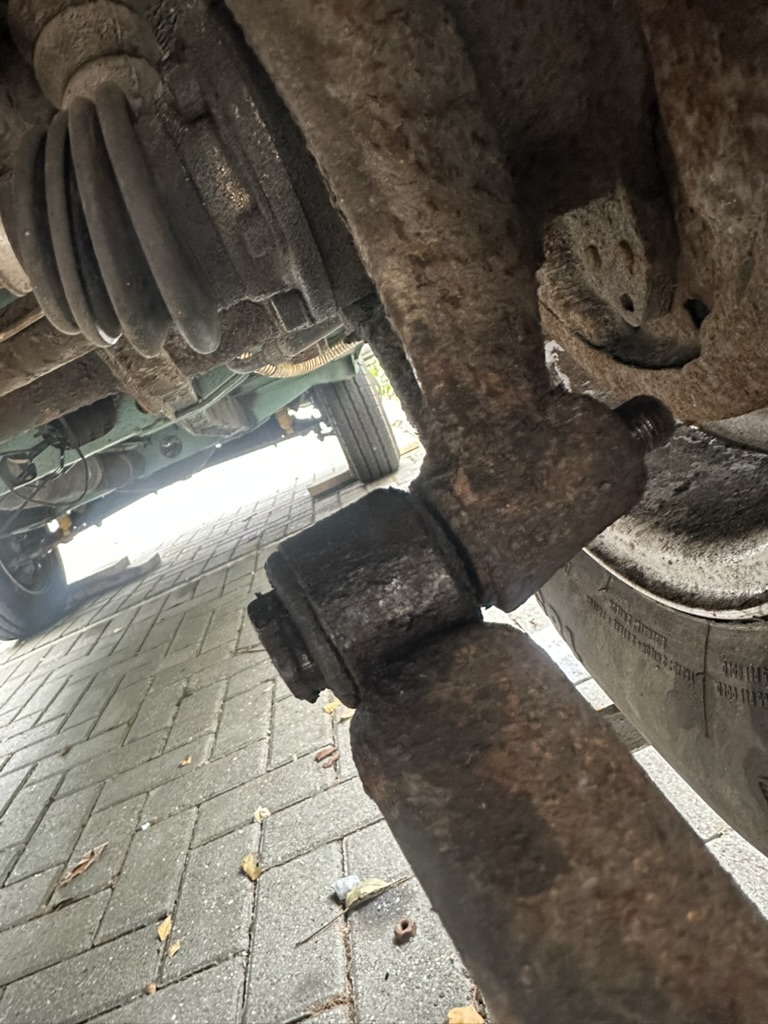
The moment everything changed—my anti-roll bar, completely snapped.
The Bang That Changed Everything
About two weeks after getting the engine back in and running beautifully, I took Jenny to get some petrol. Half a mile up the road: BANG.
Massive noise. Then continuous knocking. Every pothole made it worse. I knew immediately something serious had broken.
Turned out the anti-roll bar had completely snapped. More money. Sad times.
Chassis view of where the anti-roll bar sits—and where mine had just failed spectacularly.
The Conversation I'd Been Ignoring
My mechanic friend Rich had been saying for months: "You should update those shock absorbers." I'd largely ignored him on that point.
Why? Because I had nothing to compare them to. I just assumed that driving a VW camper should feel like you're driving on jelly. That's just how old vans drive, right?
Turns out... I was wrong.
But now, with the anti-roll bar needing replacement anyway, it felt like a good time to revisit the subject of shock absorbers. If I'm going under there to fix the roll bar, might as well do the shocks too.
Research Overload
There are so many shock absorber options out there. Budget ones, mid-range ones, adjustable ones, gas ones, oil ones—the choices are overwhelming.
I spent weeks reading forums, watching YouTube reviews, asking in Facebook groups. Everyone had strong opinions. Nobody agreed on anything.
Finally, I decided: if I'm doing this, I'm doing it properly. Treat Jenny to the best. Get Bilstein shocks (front & rear) → — these shocks are incredible and make such a huge difference to the ride.
The £400 Question
Bilstein shocks are not cheap. £400 for a set of four. That's serious money, especially after already spending on the engine rebuild.
I questioned whether it was worth it. Could I get away with cheaper ones? Would I really notice the difference?
Spoiler: Yes. You absolutely notice the difference. More on that shortly.
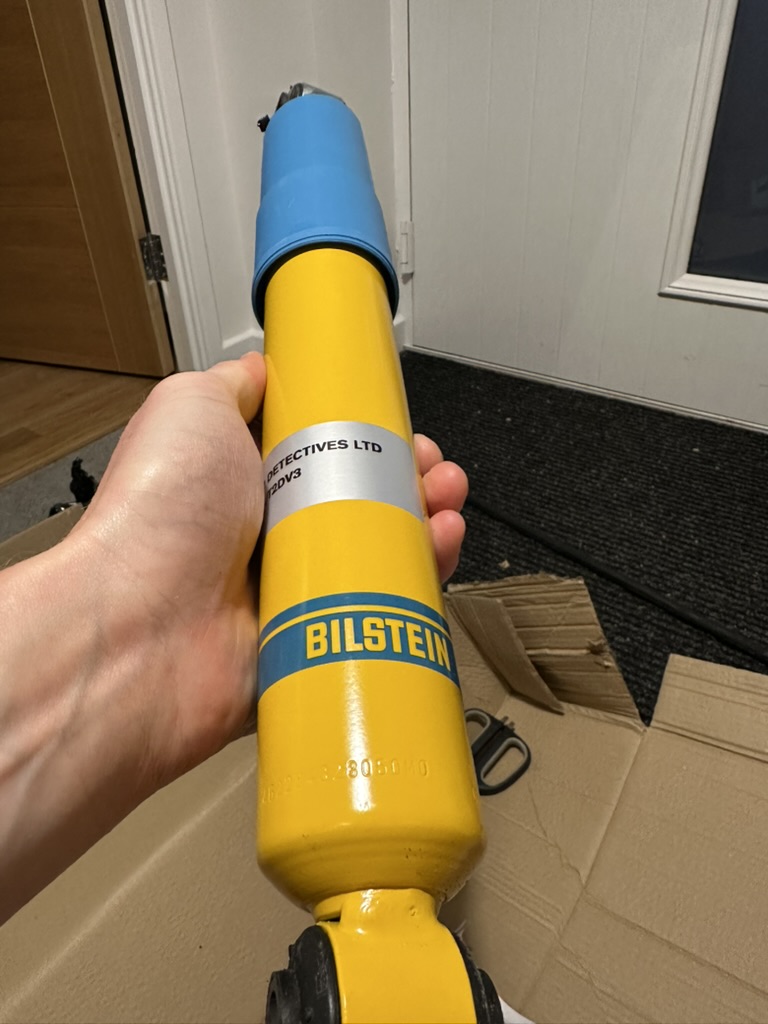
New Bilstein shock absorbers have just arrived—£400 worth of yellow German engineering.
Removing the Old Ones: A Battle
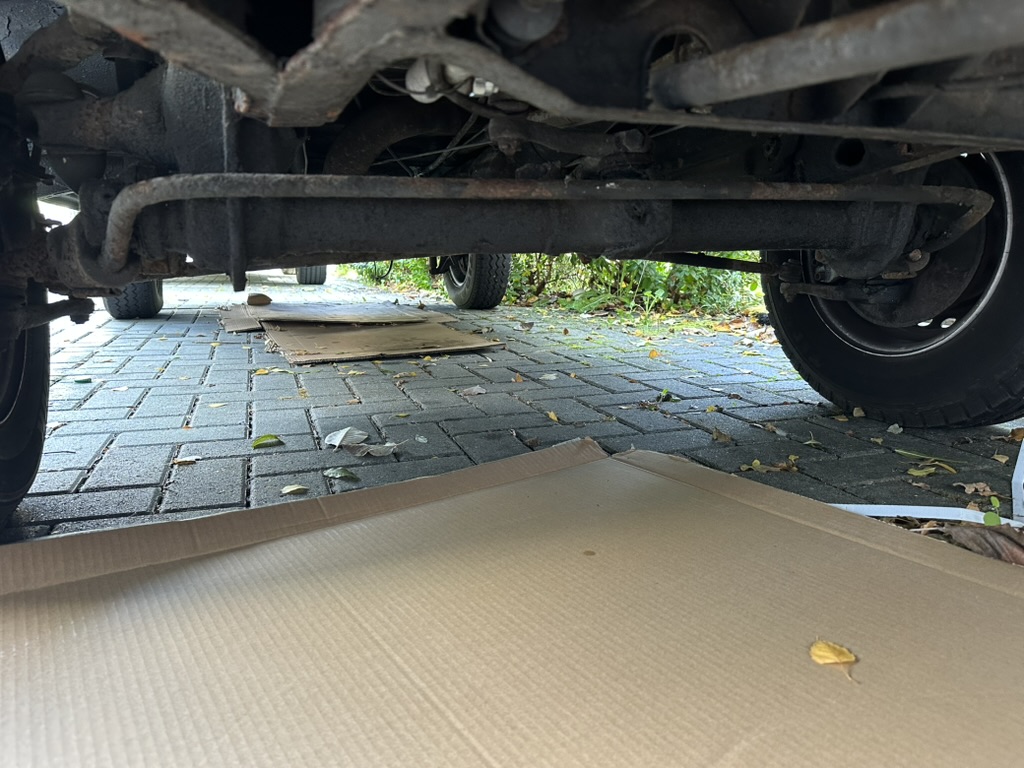
Changing the anti-roll bar and shock absorbers isn't difficult as such. The process is straightforward. But it took a fair bit longer than I'd planned for.
Why? Because the old ones were so rusted on that it took forever to get some of the old bolts undone. This is where you'll need penetrating lubricant → (trust me, you'll need it) and ideally a blow torch → to heat stubborn bolts.
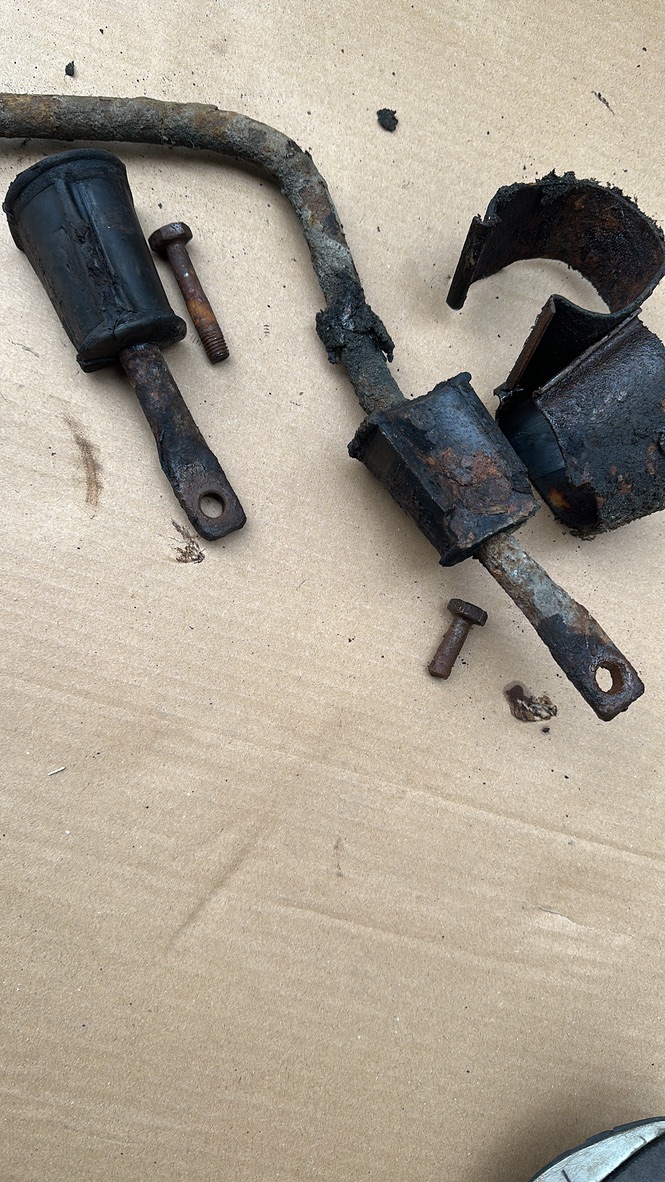
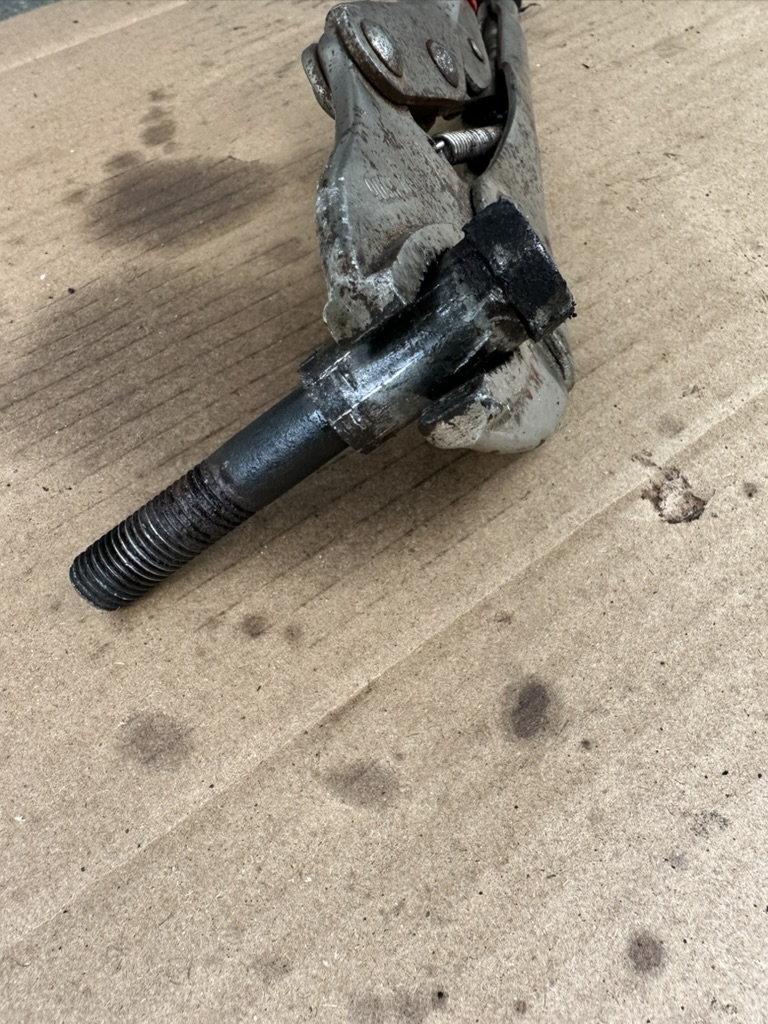
Snapped anti-roll bar and fitting kit off—finally! This took way longer than expected.
The Stubborn Shock Absorber
One shock absorber in particular really didn't want to be removed. The bolt was seized solid. Decades of rust had basically welded it in place.
Very stubborn shock absorber that really didn't want to be removed.
Top Tip for Seized Bolts:
- Get a blow torch →
- Heat the bolt until it's glowing
- Hit it with a hammer
- Spray with penetrating lubricant →
- Hit with hammer again
- Repeat until it comes off
- A little bit of swearing at them usually helps too
Victory! Very stubborn shock absorber bolt now removed after much persuasion.
The Old Shocks: A Reality Check
Once I finally got them all off, I could see just how useless the old shocks were. Completely worn out. No damping left whatsoever.
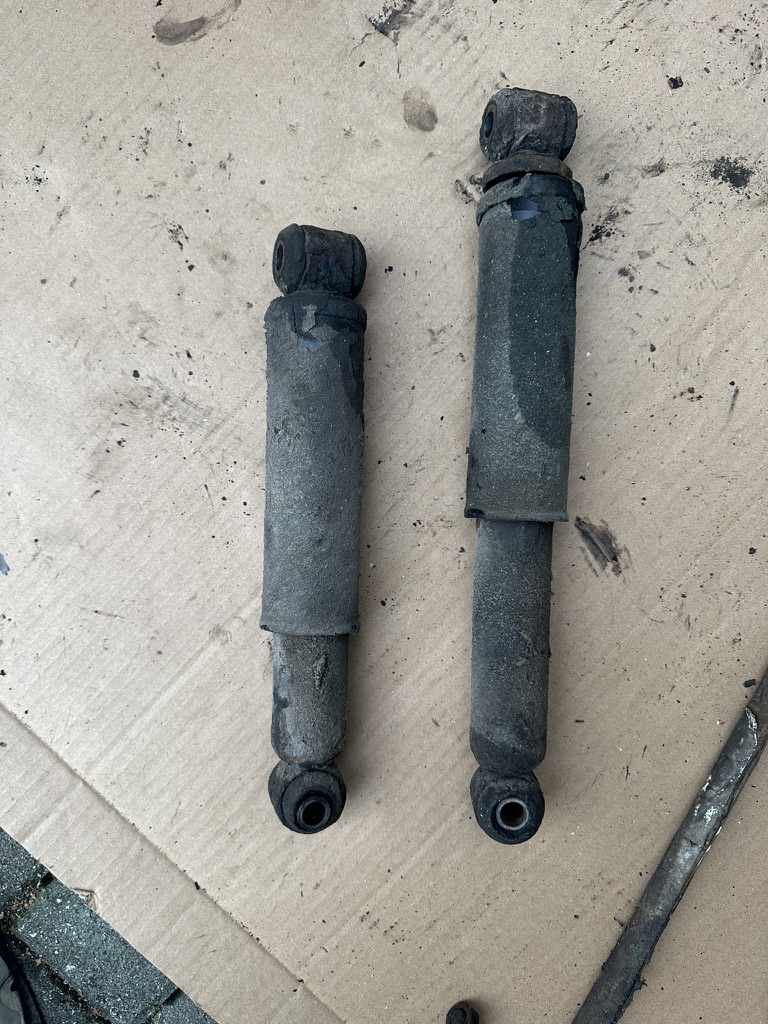
Very old, very useless shock absorbers. No wonder Jenny drove like a bouncy castle.
Looking at them side by side with the new Bilsteins, the difference was obvious. The old ones were leaking, corroded, and doing essentially nothing. I'd been driving around with basically no suspension damping for who knows how long.
I should have replaced these long ago. But I had no comparison and just assumed that's how VW campers drive. Bouncy, wallowy, vague steering—all "normal."
The difference is stark—old, leaking, corroded shocks next to the new Bilsteins. No wonder it was wallowing around.
Fitting the Bilsteins
With the old shocks finally removed (after much swearing and blow torch action), fitting the new Bilsteins was refreshingly straightforward.
For this job, you'll want axle stands → for safety and a trolley jack → to get under the van. A mechanic's creeper → will make the job much more comfortable too.
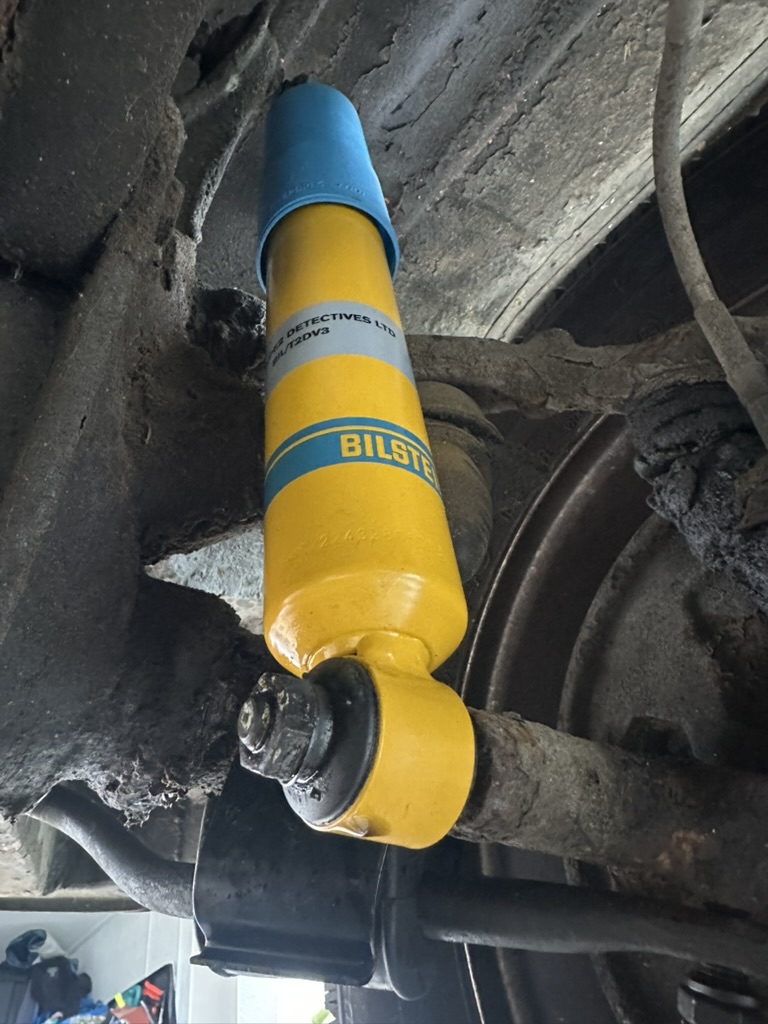
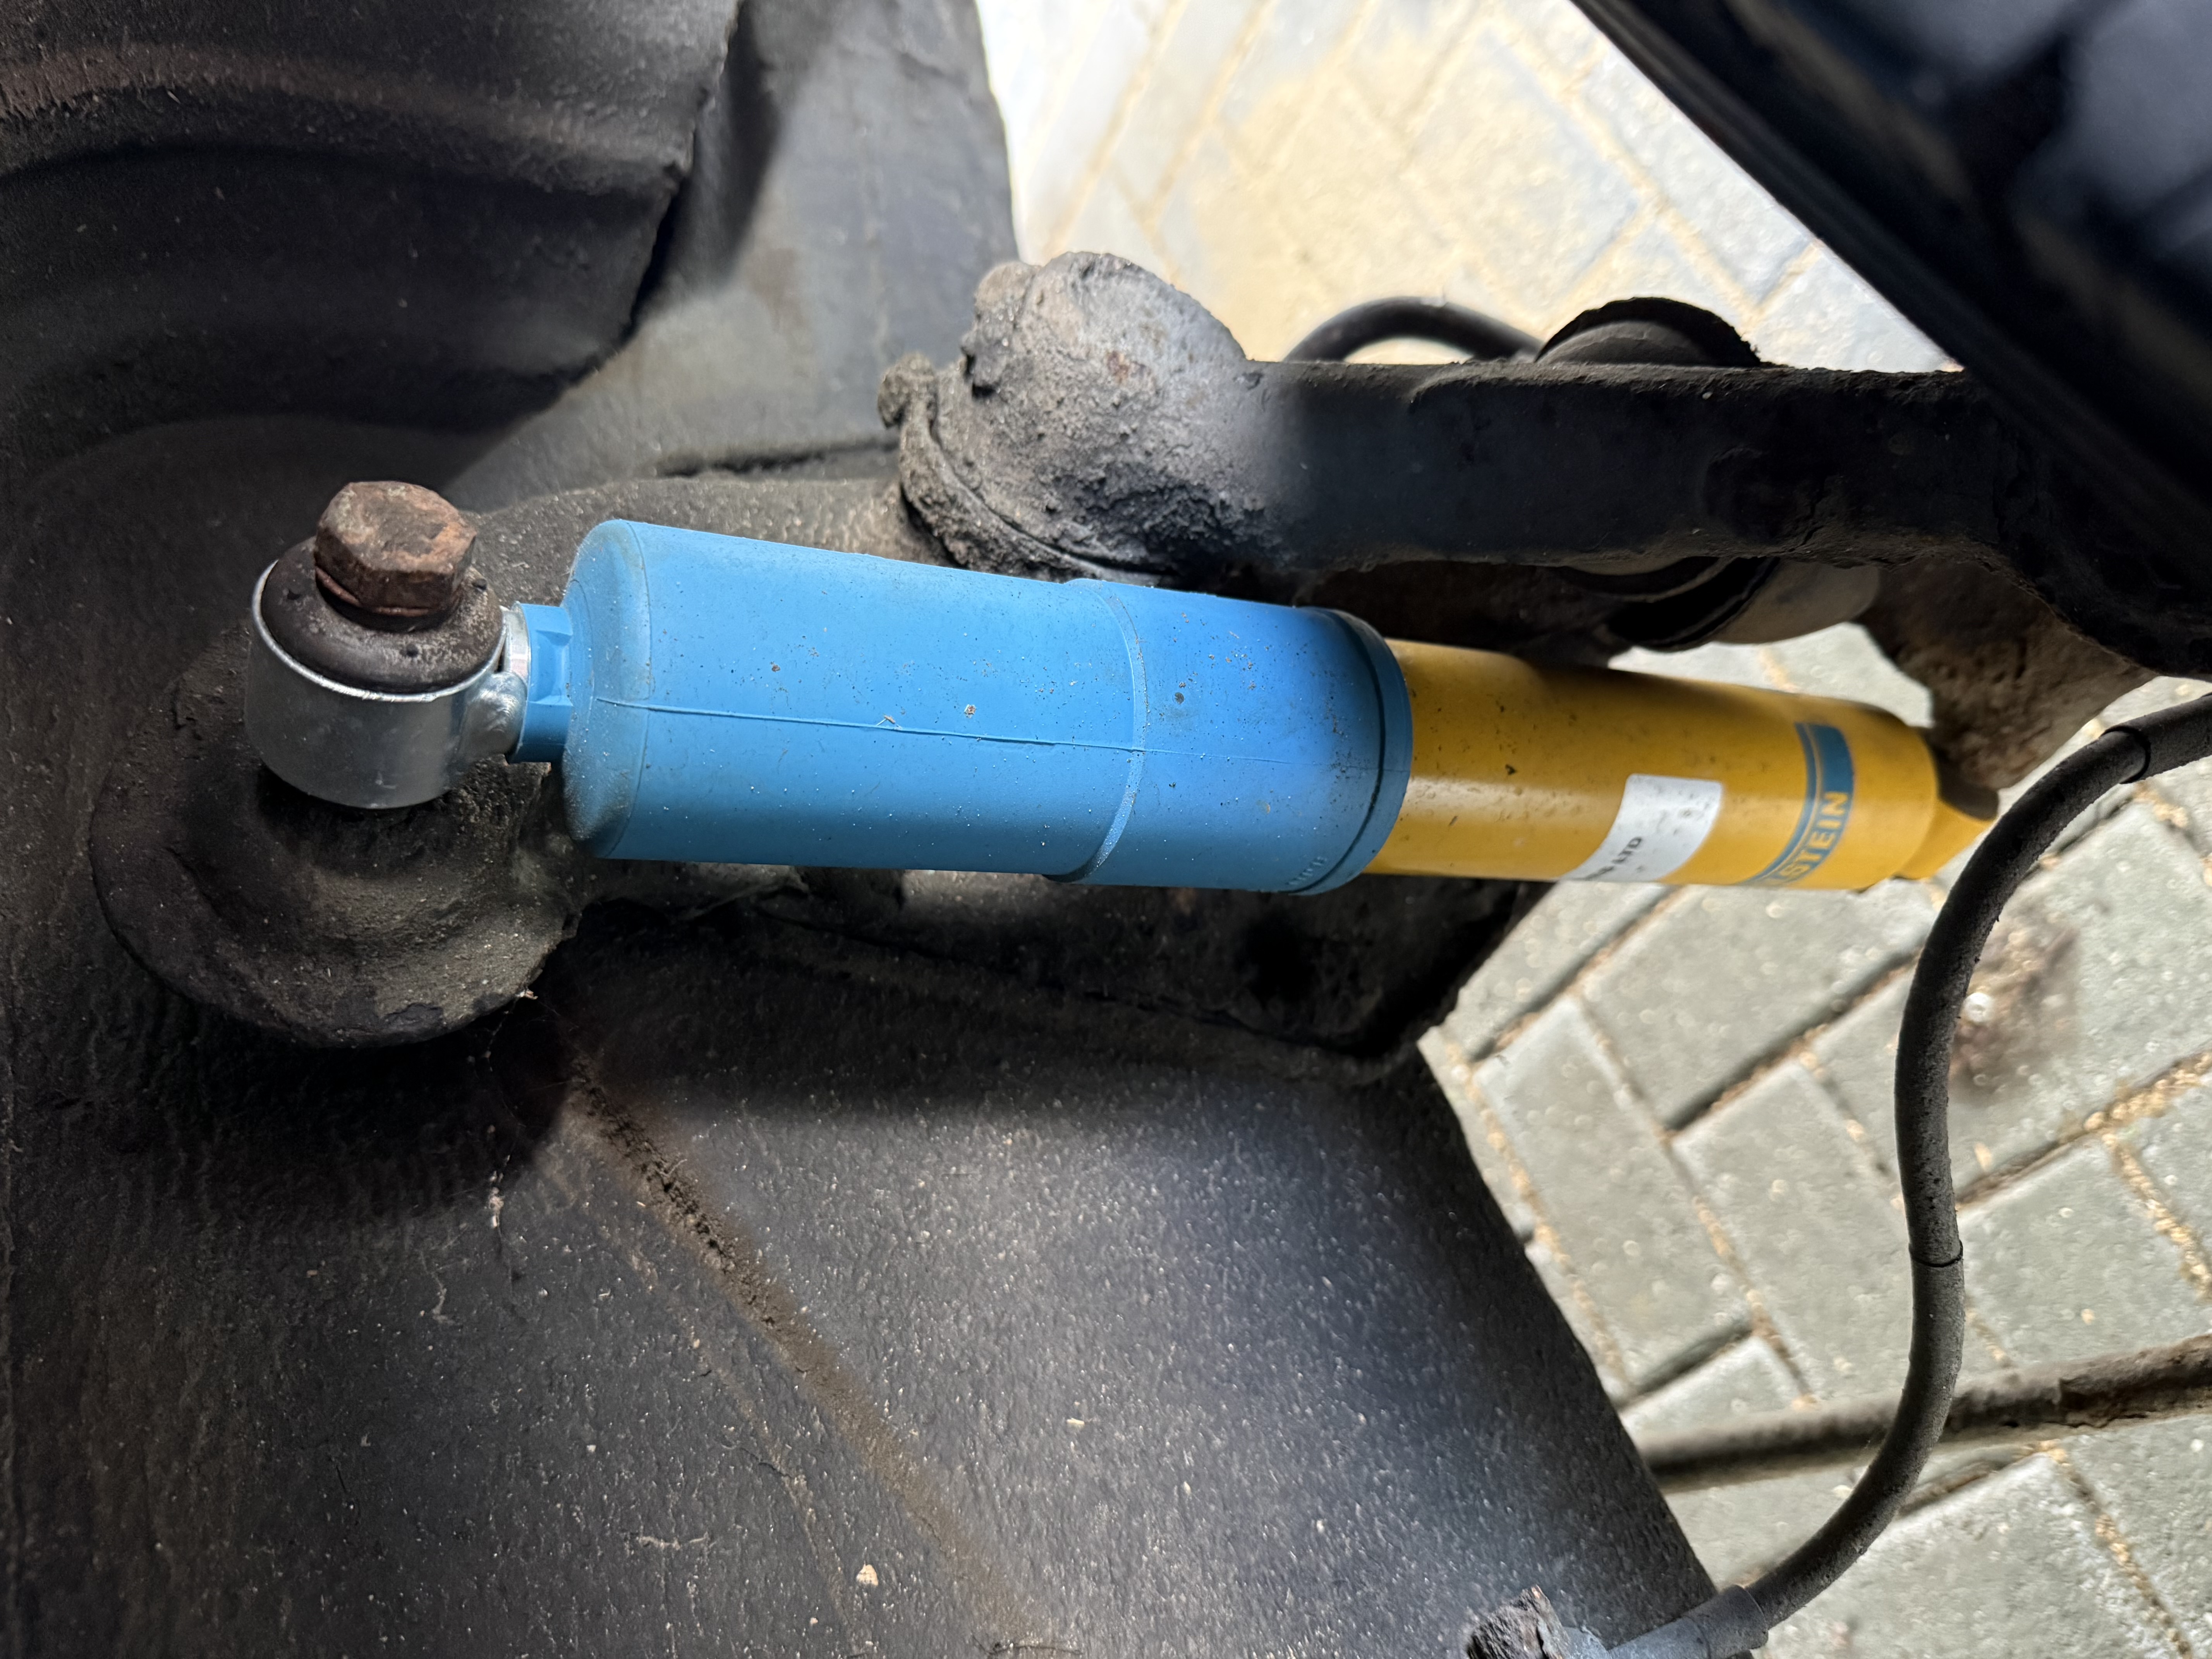
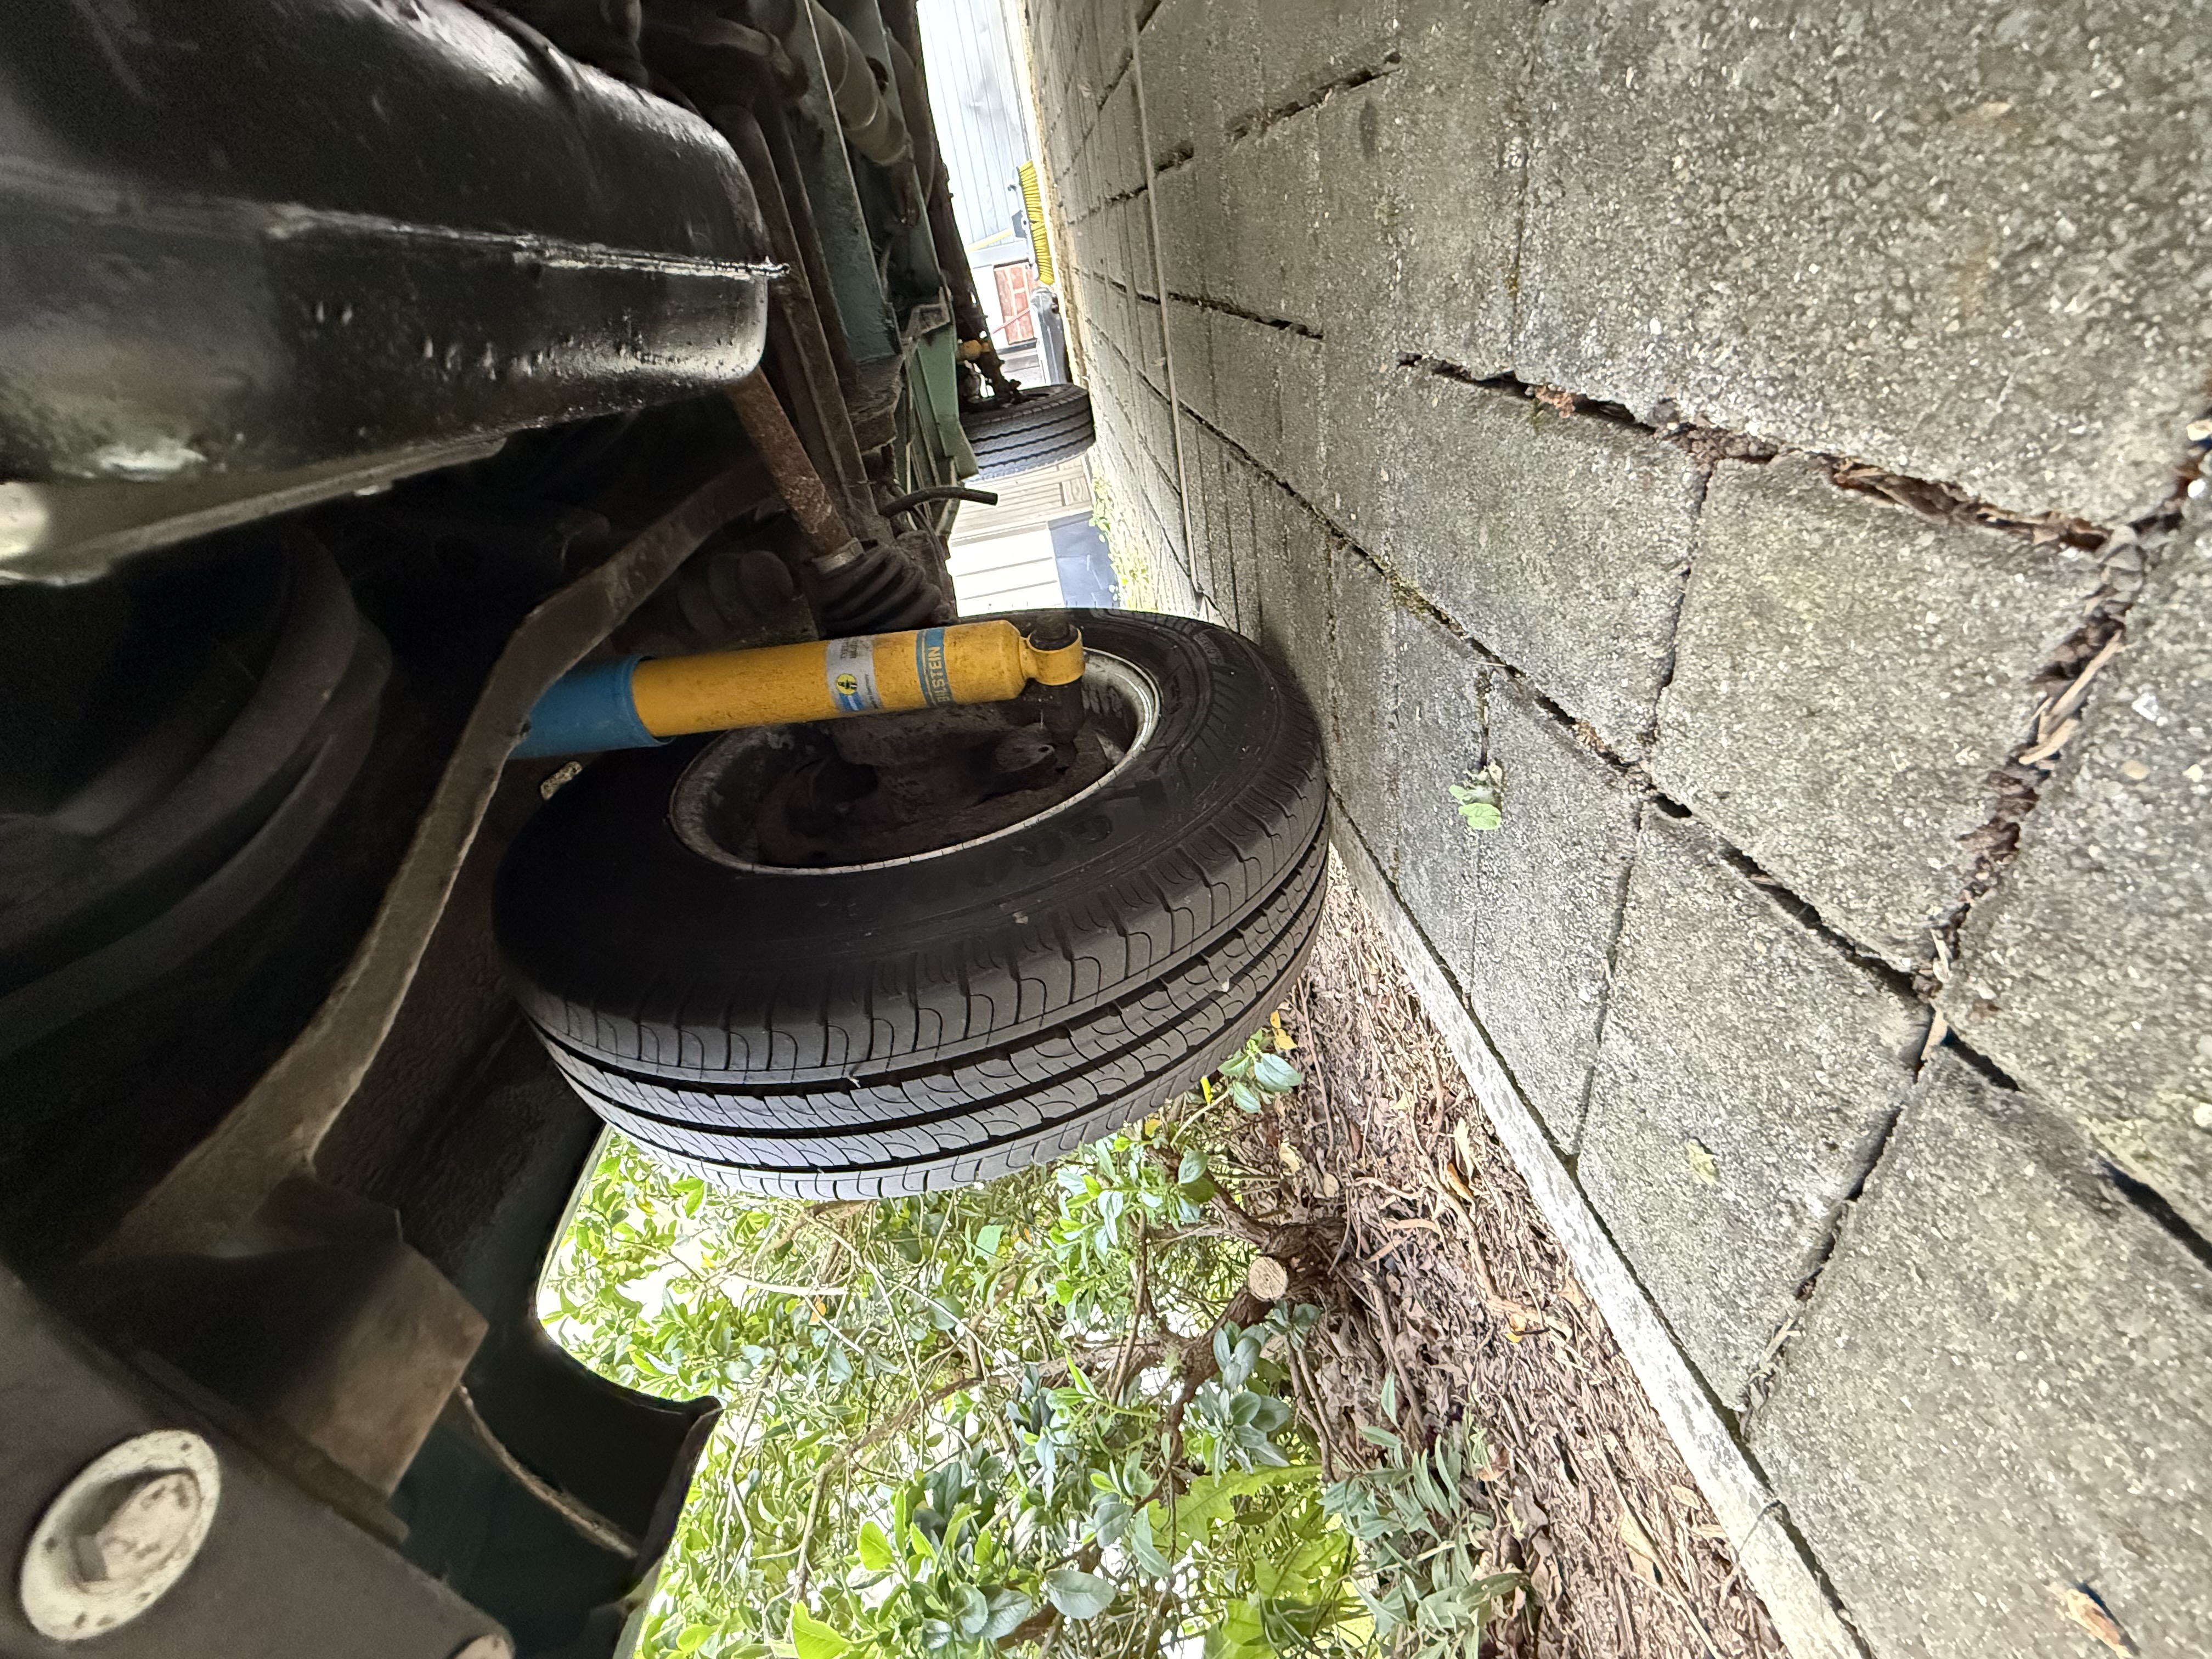
New Bilstein shock absorbers now fitted. That yellow paint means quality.

Close-up of a fitted Bilstein shock—properly mounted with correct brackets and ready to do its job.
The Nut Problem
One small hiccup: the nuts that came with the Bilsteins were too short for my setup. Not a major issue—super easy to get hold of the correct longer nuts from any decent fastener supplier.
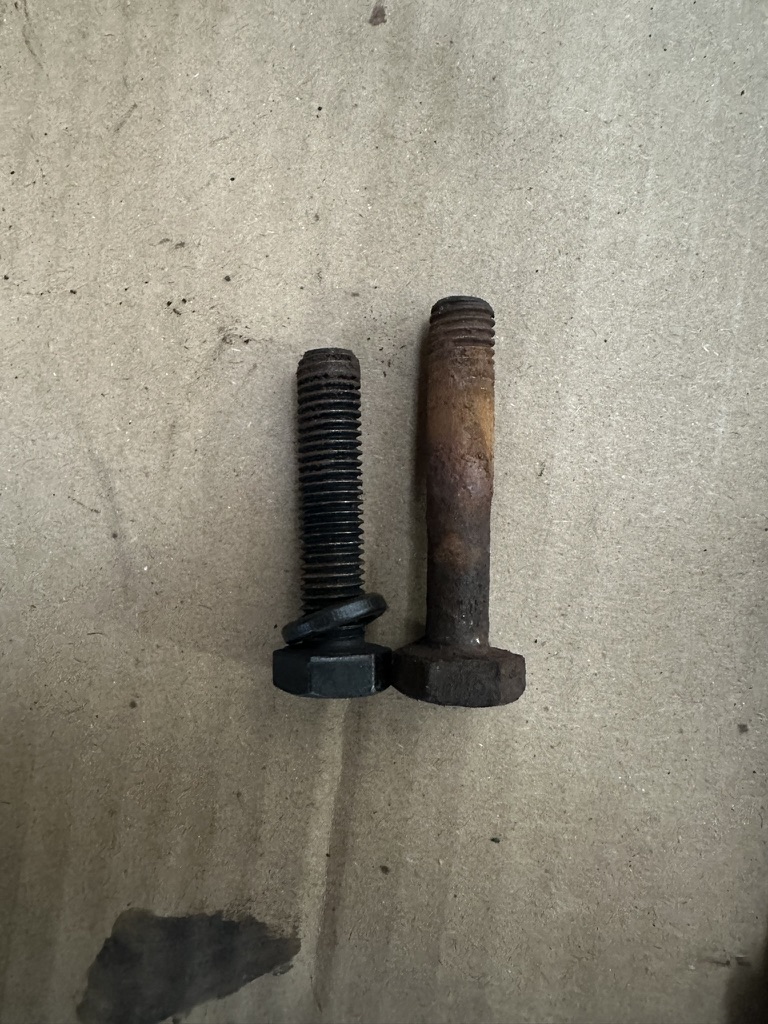
The nuts that came with them were too short—but super easy to get hold of longer ones.
The First Drive: Unbelievable
I'd been conservative in my expectations. Better handling, sure. A bit more control, maybe. Slightly less bouncy, hopefully.
The reality? The drive after fitting is unrecognisable to how it was before.
Jenny doesn't bounce anymore. The steering actually feels connected to the road. Going over bumps doesn't launch everything around inside. Corners feel safe instead of terrifying. The whole van feels planted and stable.
It drives like a completely different vehicle. Like new. And critically: it feels so much safer.
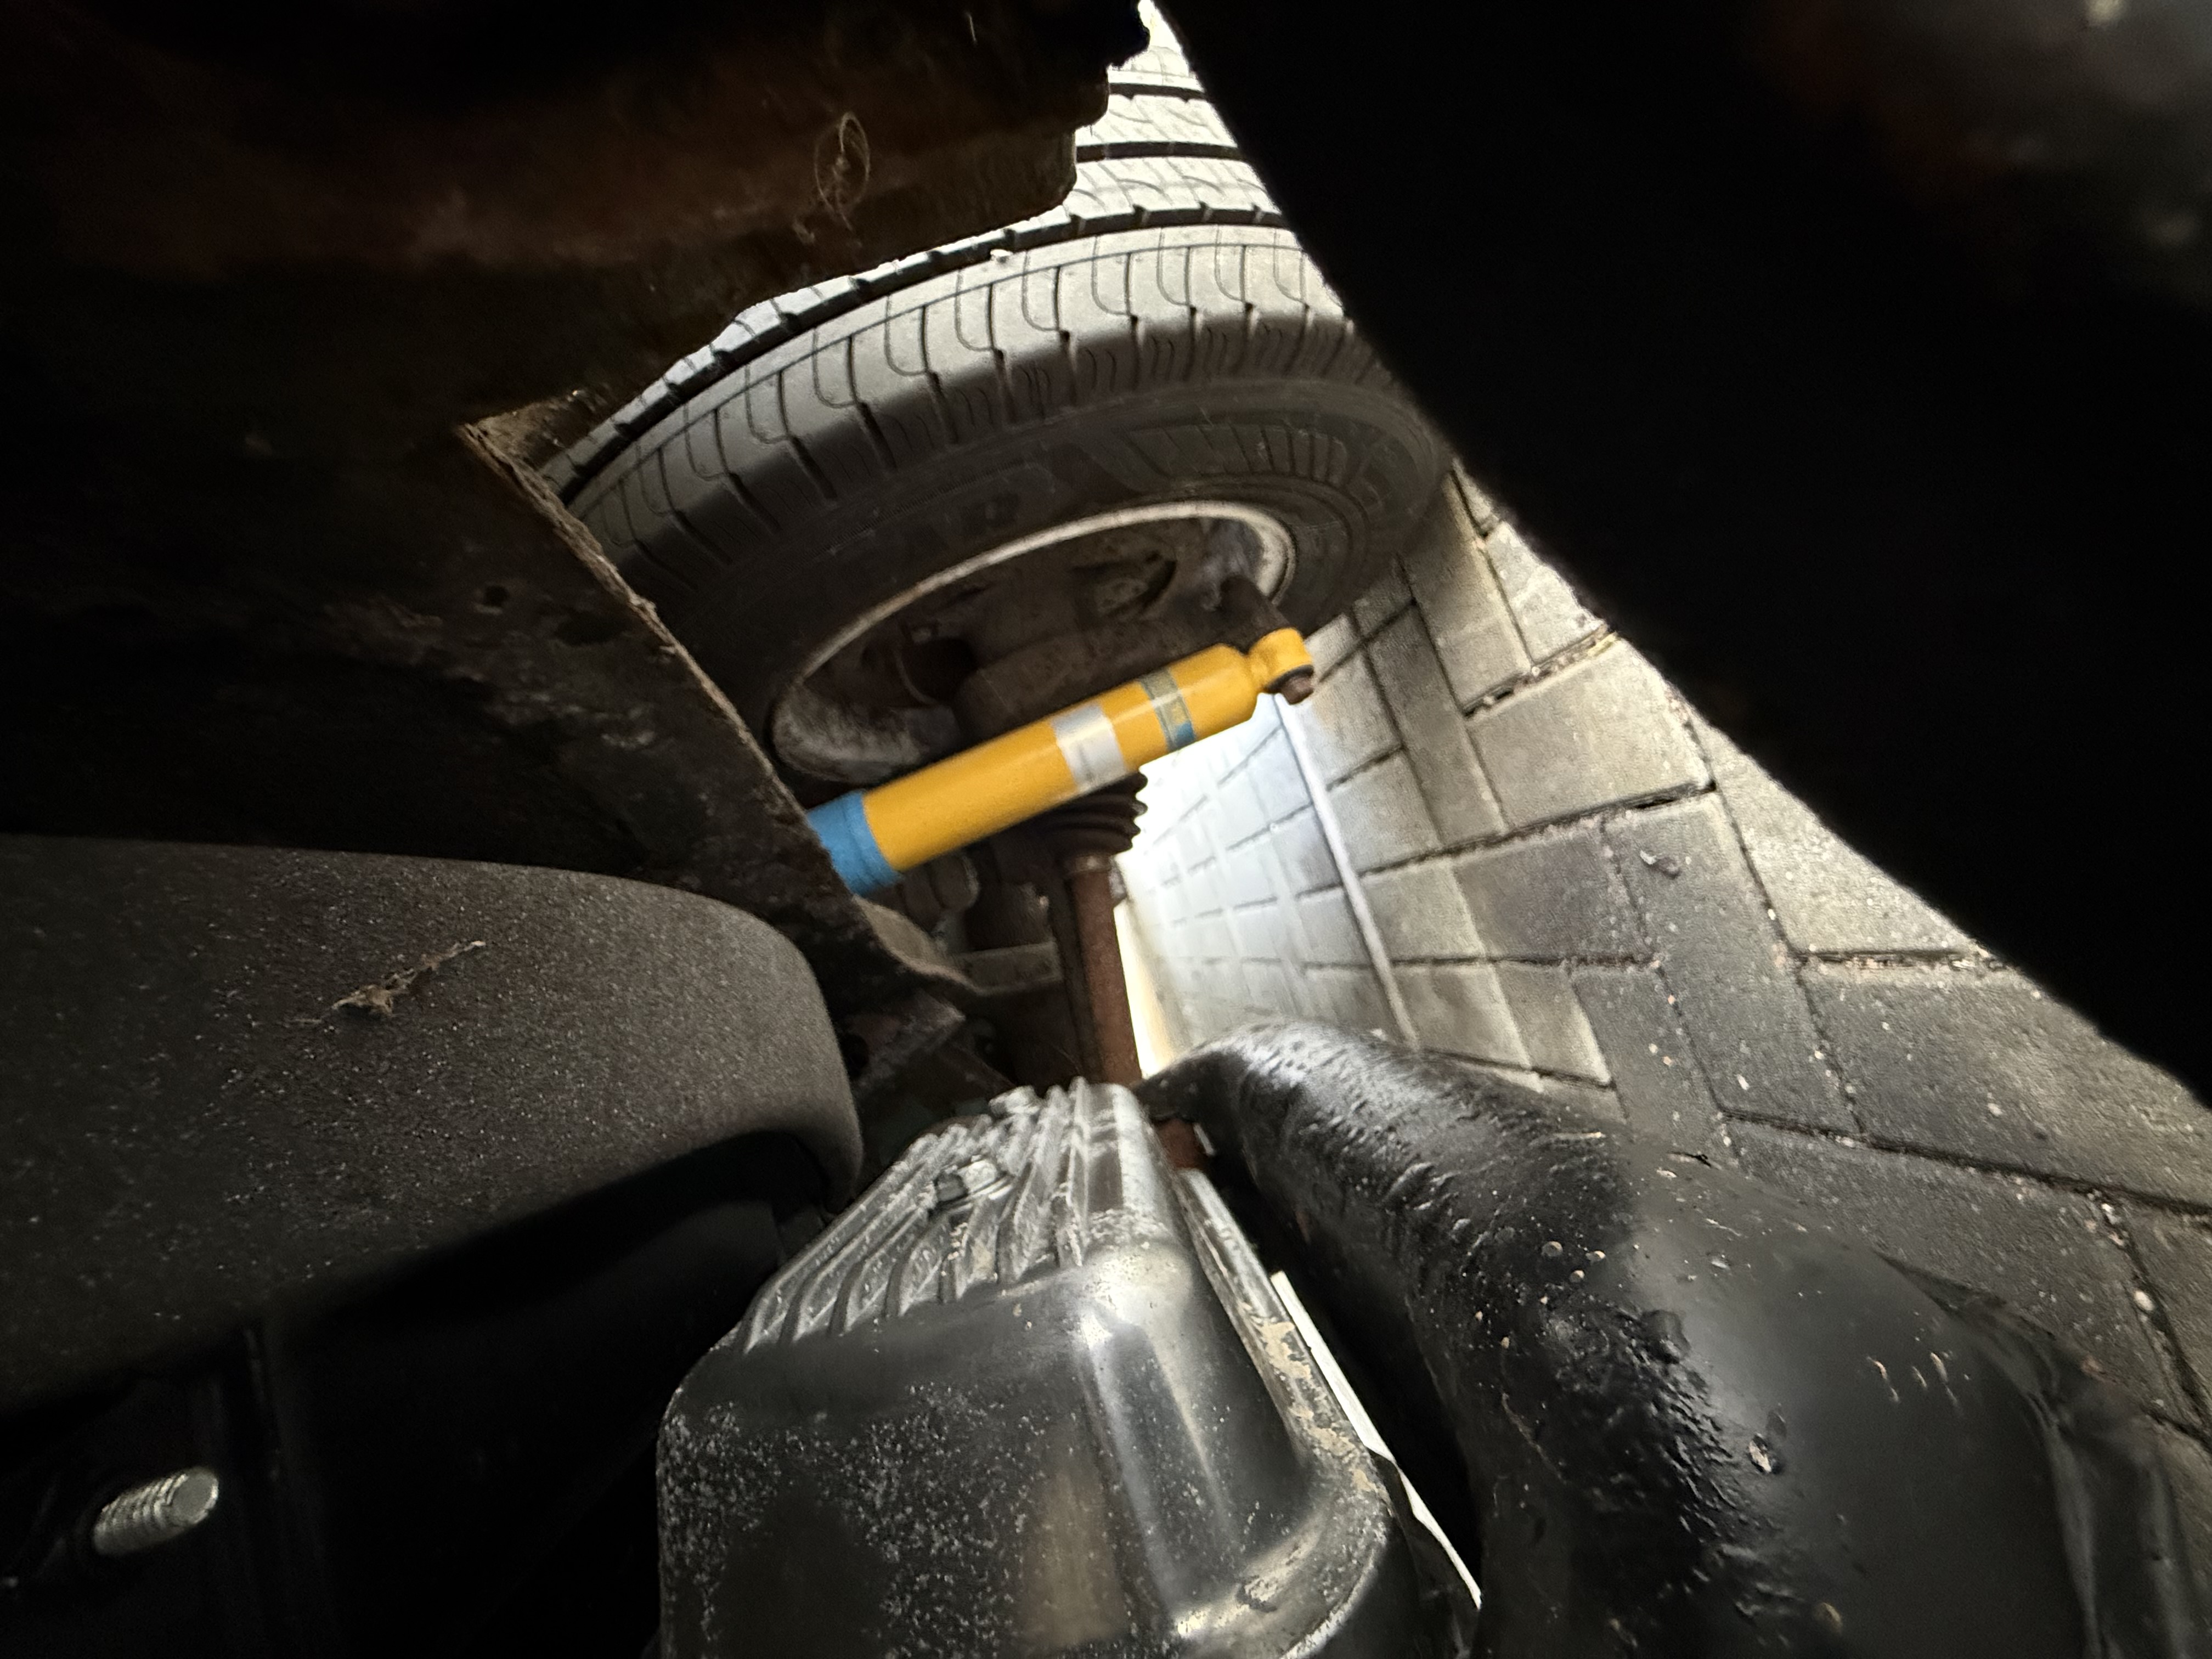
The difference is visible too—with the Bilsteins, Jenny sits properly on the road instead of wallowing around.
The Honest Verdict
I'd be very confident in saying this: pound for pound, the Bilstein shocks are probably the best money I've spent on the van.
Yes, £400 is a lot of money. But the transformation in how Jenny drives, handles, and feels on the road is dramatic. These are unbelievably good products.
What Changed:
Before (Old Shocks):
- Bounced endlessly over bumps
- Wallowed and rolled in corners
- Vague, disconnected steering feel
- Everything rattled around inside
- Felt unsafe at motorway speeds
- Driving on jelly (I thought this was normal!)
After (Bilsteins):
- Bumps absorbed properly—no more bouncing
- Corners feel planted and stable
- Steering feels connected to the road
- Smooth, controlled ride
- Confidence-inspiring at any speed
- Feels like a modern vehicle!
Hero Products — The Complete Bilstein Suspension Upgrade
⭐ HERO PRODUCTS - Best Suspension Upgrade
Bilstein Shock Absorber Set (Front & Rear):
These shocks are incredible. They make such a huge difference to the ride. This is what I use in Jenny—reliable, affordable, and genuinely transform how your van drives.
- Front Bilstein Shocks (pair) - View on eBay UK →
- Rear Bilstein Shocks (pair) - View on eBay UK →
Total cost: Around £400 for the complete Bilstein setup
Should You Upgrade?
If you're driving around on old shock absorbers (and most Bay Windows are), you probably don't realize how bad they are because you've got nothing to compare them to. Just like me.
You think "this is just how old vans drive." But it isn't. Old vans with working suspension actually drive really nicely.
How to Tell If Your Shocks Are Gone:
- Van bounces excessively after hitting bumps
- Nose dives heavily under braking
- Body rolls dramatically in corners
- Steering feels vague and disconnected
- Visible oil leaks on the shock body
- The van generally feels wallowy and imprecise
If you recognize any of these (I had all of them), your shocks are probably done. And upgrading to Bilsteins will transform your van.
Tools & Supporting Products You'll Need
Safety Equipment (Essential):
- Axle Stands (3 Ton Pair) → — Safety essential! Never work under a van on just a jack.
- Trolley Jack (2.5 Ton Low Profile) → — For getting under van safely.
Seized Bolt Removal:
- Penetrating Lubricant → — If the old ones have been on as long as mine.
- Blow Torch → — For heating stubborn bolts (you WILL need this).
Comfort & Convenience:
- Mechanic's Creeper → — Make the job easier on your back.
- Socket Set → — If you're going to work on your own van (essential).
- Torque Wrench → — If you don't have one, you'll need one for this job.
Installation Tips
Tip #1: Budget Extra Time
The actual fitting isn't complicated, but getting the old seized bolts off will take way longer than you expect. Budget at least double the time you think you'll need.
Tip #2: Heat + Penetrant + Patience
For seized bolts: heat them red hot with a blow torch, hit them with a hammer, soak with penetrating lubricant, let it sit for 10 minutes, repeat. Don't rush this or you'll snap bolts and create bigger problems.
Tip #3: Check Your Nuts
The mounting nuts that come with Bilsteins might be too short depending on your setup. Don't panic—replacement nuts are cheap and easy to find. Just check before you start so you're not stuck halfway through.
Tip #4: Replace the Anti-Roll Bar Too
If you're doing the shocks, inspect your anti-roll bar. Mine snapped—yours might be on its way out too. Replace it now while everything's apart rather than having it fail later.
Final Thoughts
I wish I'd listened to Rich sooner. I drove around for years thinking the bouncy, wallowy handling was just "how Bay Windows drive." It isn't. They drive beautifully when the suspension actually works.
The Bilstein shocks aren't cheap, but they're worth every penny. The transformation in how Jenny drives is dramatic. She feels safer, more stable, more enjoyable to drive, and honestly—more like a vehicle built this century.
If you're still driving on old, worn-out shocks (and most of us are), do yourself a favour: upgrade to Bilsteins. You won't regret it. In fact, you'll wonder why you waited so long—just like me.
The detail you get for your money—precision German engineering with quality seals, damping technology, and construction that will last 10+ years.
More Restoration Guides:
Complete 1600cc Engine Rebuild →
Weber Carb Installation & Tuning →
Choosing a VW Restoration Shop →
Questions about suspension upgrades? Message me on Instagram @jennythebus!
🔧 Bilstein vs. Budget Shock Absorbers: Complete Comparison
Before you spend £400 on Bilstein shocks, here's how they stack up against cheaper alternatives:
- Budget shocks (£100–150): 2–4 year lifespan, basic steel, bouncy, poor warranty
- Mid-range (£200–250): 4–6 year lifespan, decent quality, fair handling, 2-year warranty
- Bilstein (£400): 10–15 year lifespan, premium German engineering, excellent handling, 3–5 year warranty
- Premium coilover (£800+): 10–20 year lifespan, adjustable, race-spec, track performance
Cost per year (10 years): Budget: £60/year, Bilstein: £40/year. Bilstein actually saves money long-term.
💷 Shock Absorber Cost Breakdown: All-In Price
Parts Cost (DIY Installation): £362–474 (Our spend: £419)
- Bilstein shocks (set of 4): £400
- Replacement lock nuts (bolts seize): £8
- Anti-seize compound: £6
- Penetrating oil: £5
Labour Cost (If Paying Mechanic): £200–420
- Remove old shocks (all 4): £80–180
- Install new shocks (all 4): £80–180
- Alignment check (optional): £40–60
Total Installed Cost: DIY £420, Professional £620–840
⏱️ DIY Difficulty Rating & Time Breakdown
Overall Difficulty: ⭐⭐⭐☆☆ (3 out of 5 — Moderate)
The process itself is straightforward, but old vans are the problem. Decades of rust can turn a 2-hour job into a 4-hour battle.
Realistic Time Breakdown (DIY): 4–5 hours total
- Jack up van & support on stands: 20 mins (Easy, safety-critical)
- Remove old shocks (all 4): 30–60 mins per corner = 2–3 hours (Medium - bolts seized)
- Install new shocks (all 4): 20 mins per corner = 1.5–2 hours (Easy)
- Install wheels: 15 mins total (Easy, torque to spec)
Required Tools:
Essential: Socket set (metric), spanners, screwdrivers, axle stands, trolley jack, torque wrench
Highly Recommended: Penetrating oil, blow torch, impact wrench, wire brush
🏎️ How Shocks Affect Handling & Safety
What Good Shocks Do
- Control rebound (dampen spring's return motion)
- Reduce body roll (keep van level in corners)
- Maintain tire contact (tires stay pressed to road)
- Improve braking (vehicle stops straighter)
- Prevent excessive lean (feels planted, not wallowy)
Before vs. After Bilstein
Before (Worn shocks): Bounces over bumps, body sways in corners, nose-dives under braking, steering feels disconnected, tires lose contact, unsafe on motorway
After (Bilstein): Bumps absorbed smoothly, flat corners, controlled braking, responsive steering, constant tire contact, solid and predictable
Real Safety Impact
- Better braking (tires stay gripped to road)
- Reduced tipping risk (flat through corners)
- Predictable emergency handling
- Reduced passenger fatigue on long drives
🔧 Shock Types & Maintenance
Types: Twin-tube (gas) = smooth, monotube (performance) = responsive, oil-filled (budget) = cheap but fades, coilover (adjustable) = expensive
What we use: Bilstein gas-pressurized shocks — best balance for campervans.
Annual Inspection Checklist
- Visual: Check for oil weeping (small drops OK, streams = worn)
- Rubber bushings: Look for cracks (hardens over 10 years)
- Corrosion: Surface rust cosmetic, deep rust weakens internals
- Bounce test: Push van down at each corner — should return smoothly
- Handling: Notice any new wallowing, nose-dive, or body roll
Signs Your Shocks Are Dying
- Van bounces multiple times after bumps (damping failing)
- Oil visible on shock body (internal seal broken)
- Clunking sounds over bumps (mounting bolts loose)
- Uneven ride (one side lower = shock failed)
- Excessive body roll (multiple shocks failing)
- Vague steering (shocks can't control suspension)
When to replace: Factory shocks on 50-year-old van = definitely now. Bilstein at 10 years = still good. At 15 years = plan replacement.
❓ Frequently Asked Questions
Can I just replace two shocks instead of four?
Not recommended. Shocks wear evenly. Replacing just two creates imbalance — one side firmer than the other. Always replace all four for consistent handling.
How much does professional shock replacement cost?
Parts only (DIY): £400–450 for 4 Bilstein. Professional: £600–850 total. Budget shocks are cheaper upfront but fail faster.
Do I need to align the van after replacing shocks?
Not strictly necessary if only replacing shocks. Alignment (camber, caster, toe) is separate. If handling feels off, alignment check (£50–100) might help.
Can bad shocks cause a flat tire?
Indirectly. Bad shocks = excessive bouncing = uneven tire pressure = accelerated wear and punctures. Good shocks extend tire life.
Why do Bilstein shocks cost so much more?
German engineering, better materials, tighter tolerances, superior seals, longer lifespan, and warranty. You're paying for durability. Over 10 years, they're cheaper than budget shocks.
Will new shocks improve my fuel economy?
Slightly. Better damping = less bouncing = smoother ride = slightly less engine strain. Expect 2–3% improvement at best. Main benefit is handling and comfort.
How often should I replace shocks on a campervan?
High-quality (Bilstein): 10–15 years. Budget shocks: 3–5 years. Plan replacement every 10 years or 100,000 miles, whichever comes first.
Can I hear a difference with new shocks?
Yes. New shocks eliminate clunking sounds over bumps. You'll hear less rattling and creaking. Quieter ride = better seals and bushings.
Do shocks affect ride height?
No. Springs support the van's weight; shocks only dampen motion. If your van sits lower, you need new springs, not shocks.