So, you’ve got a leisure battery setup in your camper. You’re loving the freedom of having power on tap for lights, phone charging, and all the creature comforts. But here’s the problem: that battery only charges when you’re driving.
What if you want to park up for a few days? What if you’re wild camping in a stunning spot and you don’t want to move the van just to charge the battery? Enter solar power. And before you think “that sounds complicated and expensive,” let me stop you right there. Adding a basic solar setup to Jenny was honestly one of the easiest upgrades I’ve done.
Why Solar Makes Sense for Campers
- Battery stays topped up without driving — Perfect for long weekends parked up
- Stay off-grid longer — No need to find campsites with electric hookups
- Free energy — After the initial cost, the sun doesn’t send invoices
- Peace of mind — Even if you’re only using a bit of power, it’s being replaced all day
The Kit I Went With
🌞 Recommended Solar Setup
Eco-Worthy Solar Kit (120W Panel + Controller) →
This is the kit I actually went with — everything you need in one package. 120 watts of monocrystalline solar goodness. Good power-to-size ratio, quality build, affordable, and the package includes a charge controller (essential—you can't just wire a panel straight to your battery), cables, and connectors. Basically, everything to get started.
Lion 100ah Leisure Battery (eBay) →
This is the battery I use. Perfectly good enough for a typical day van setup. Lithium option below if you have the budget.
Eco-Worthy 120W Solar Panel →
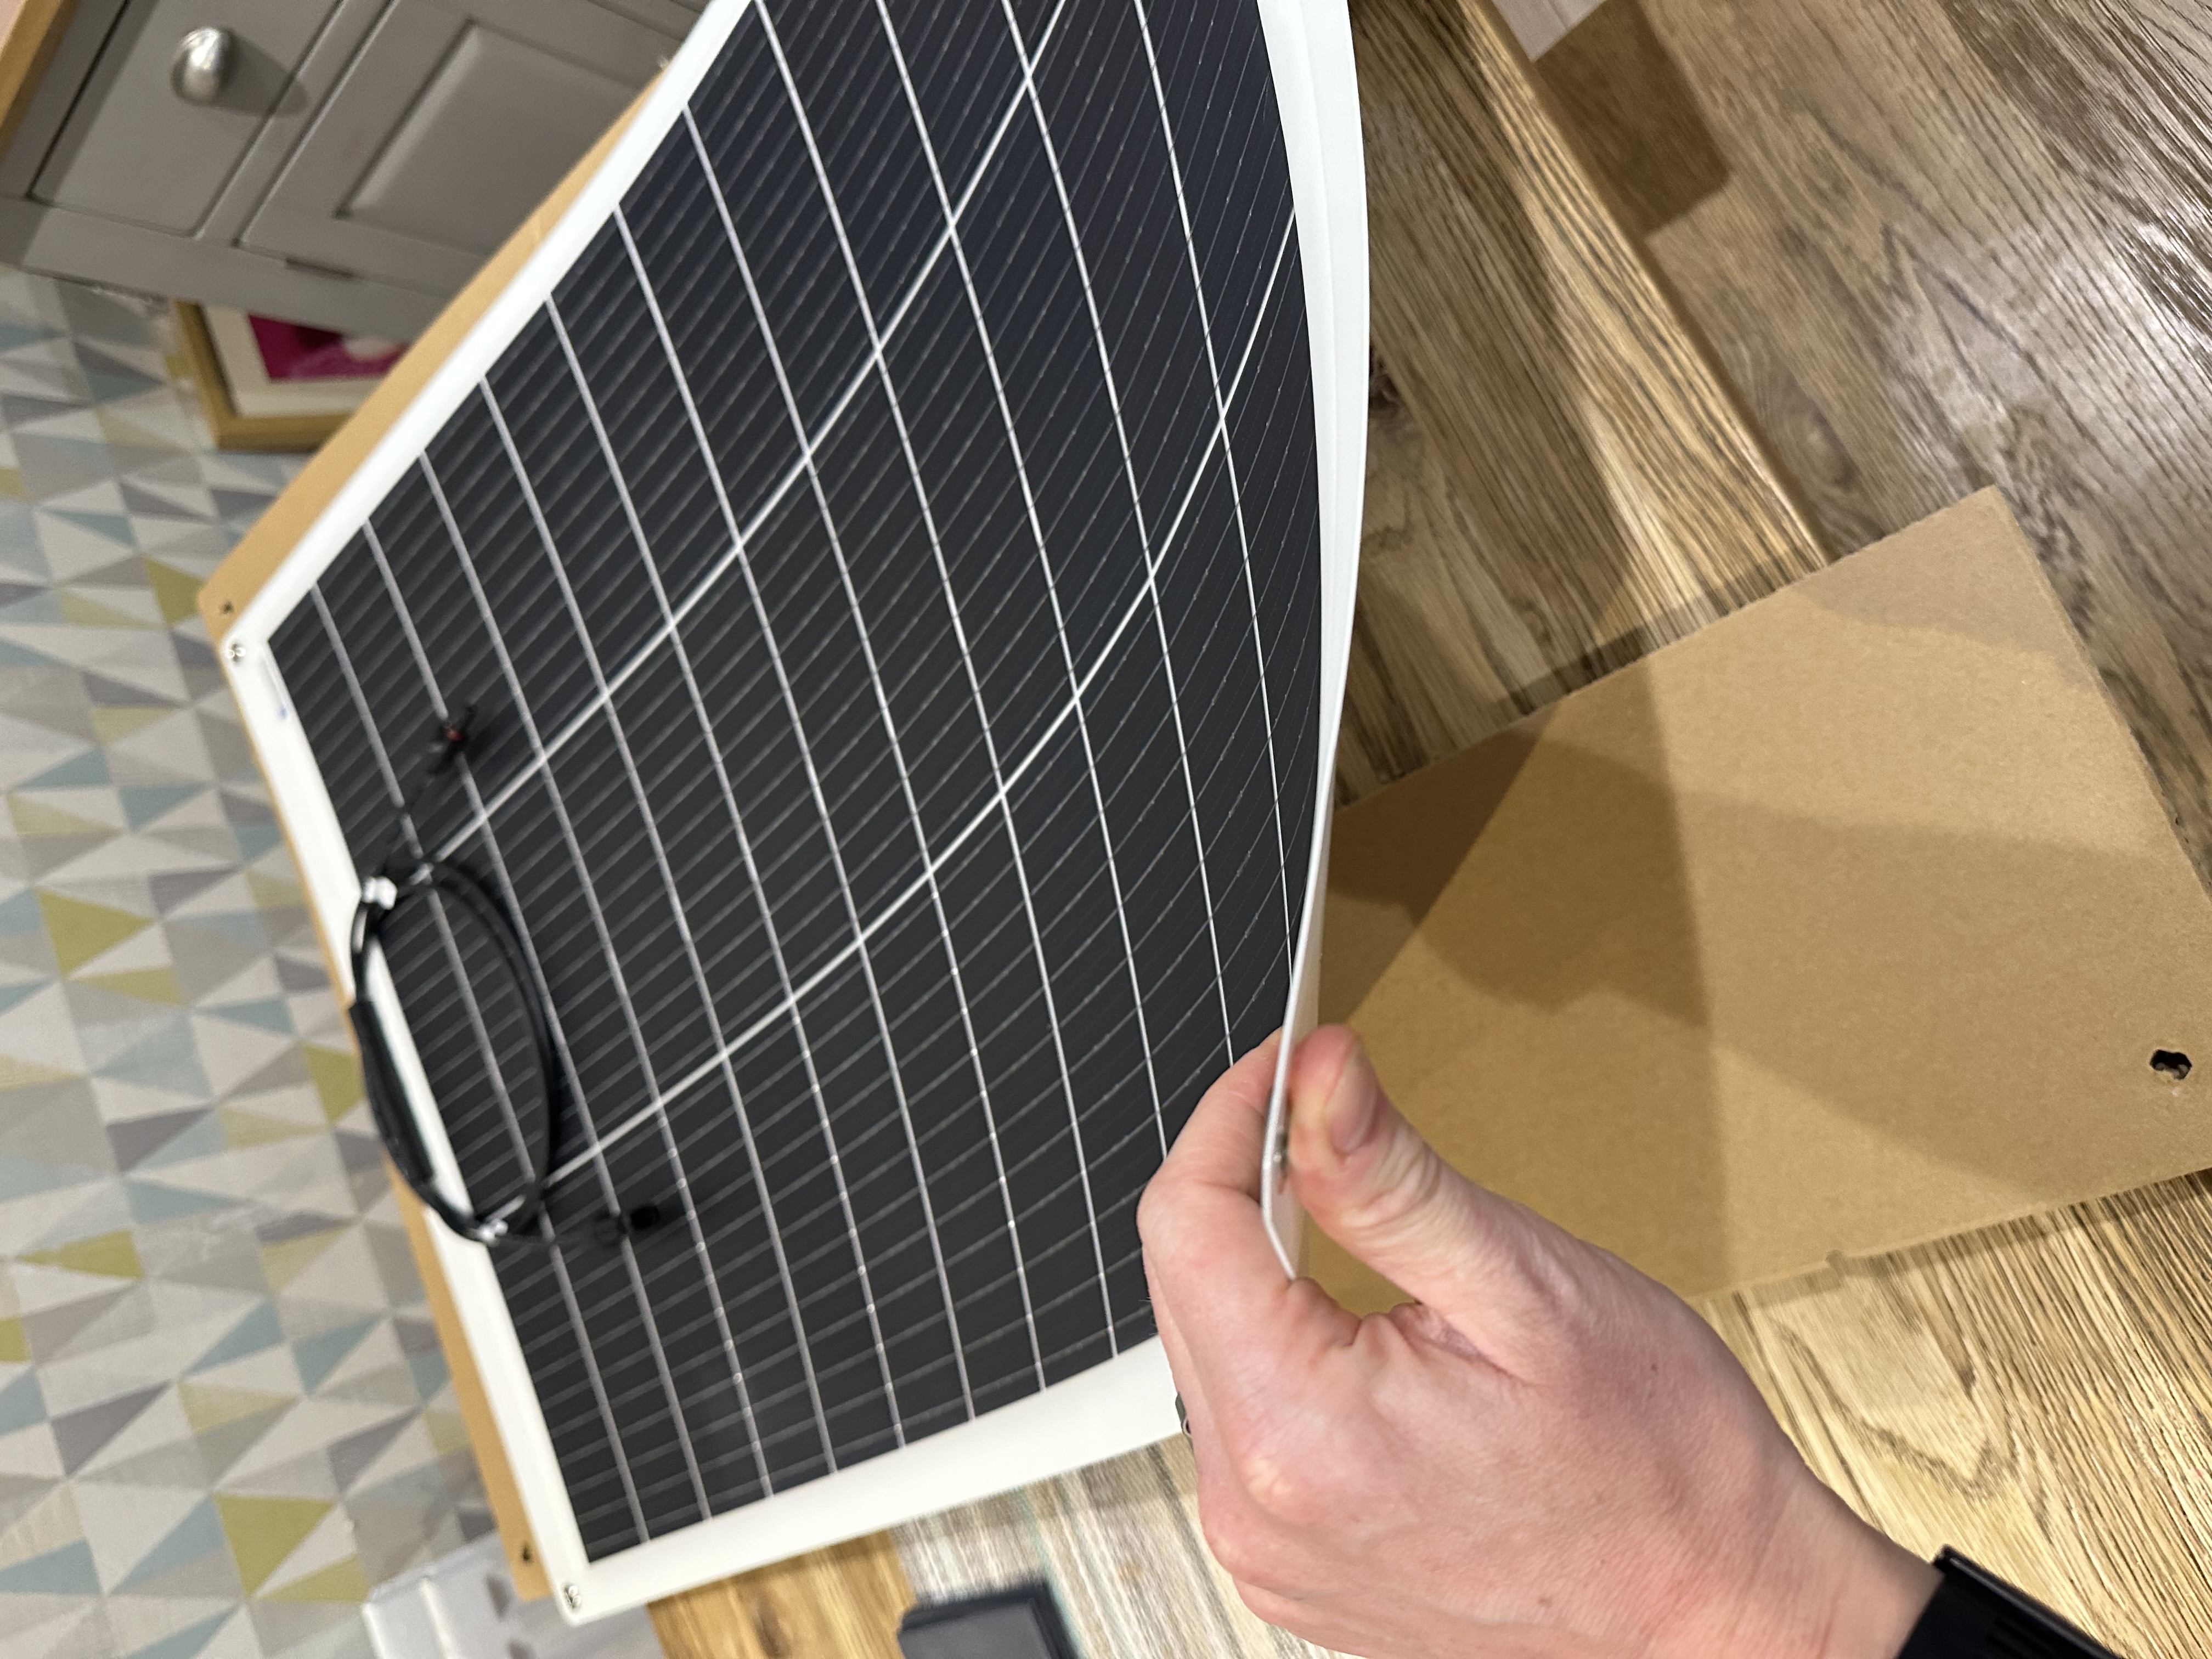
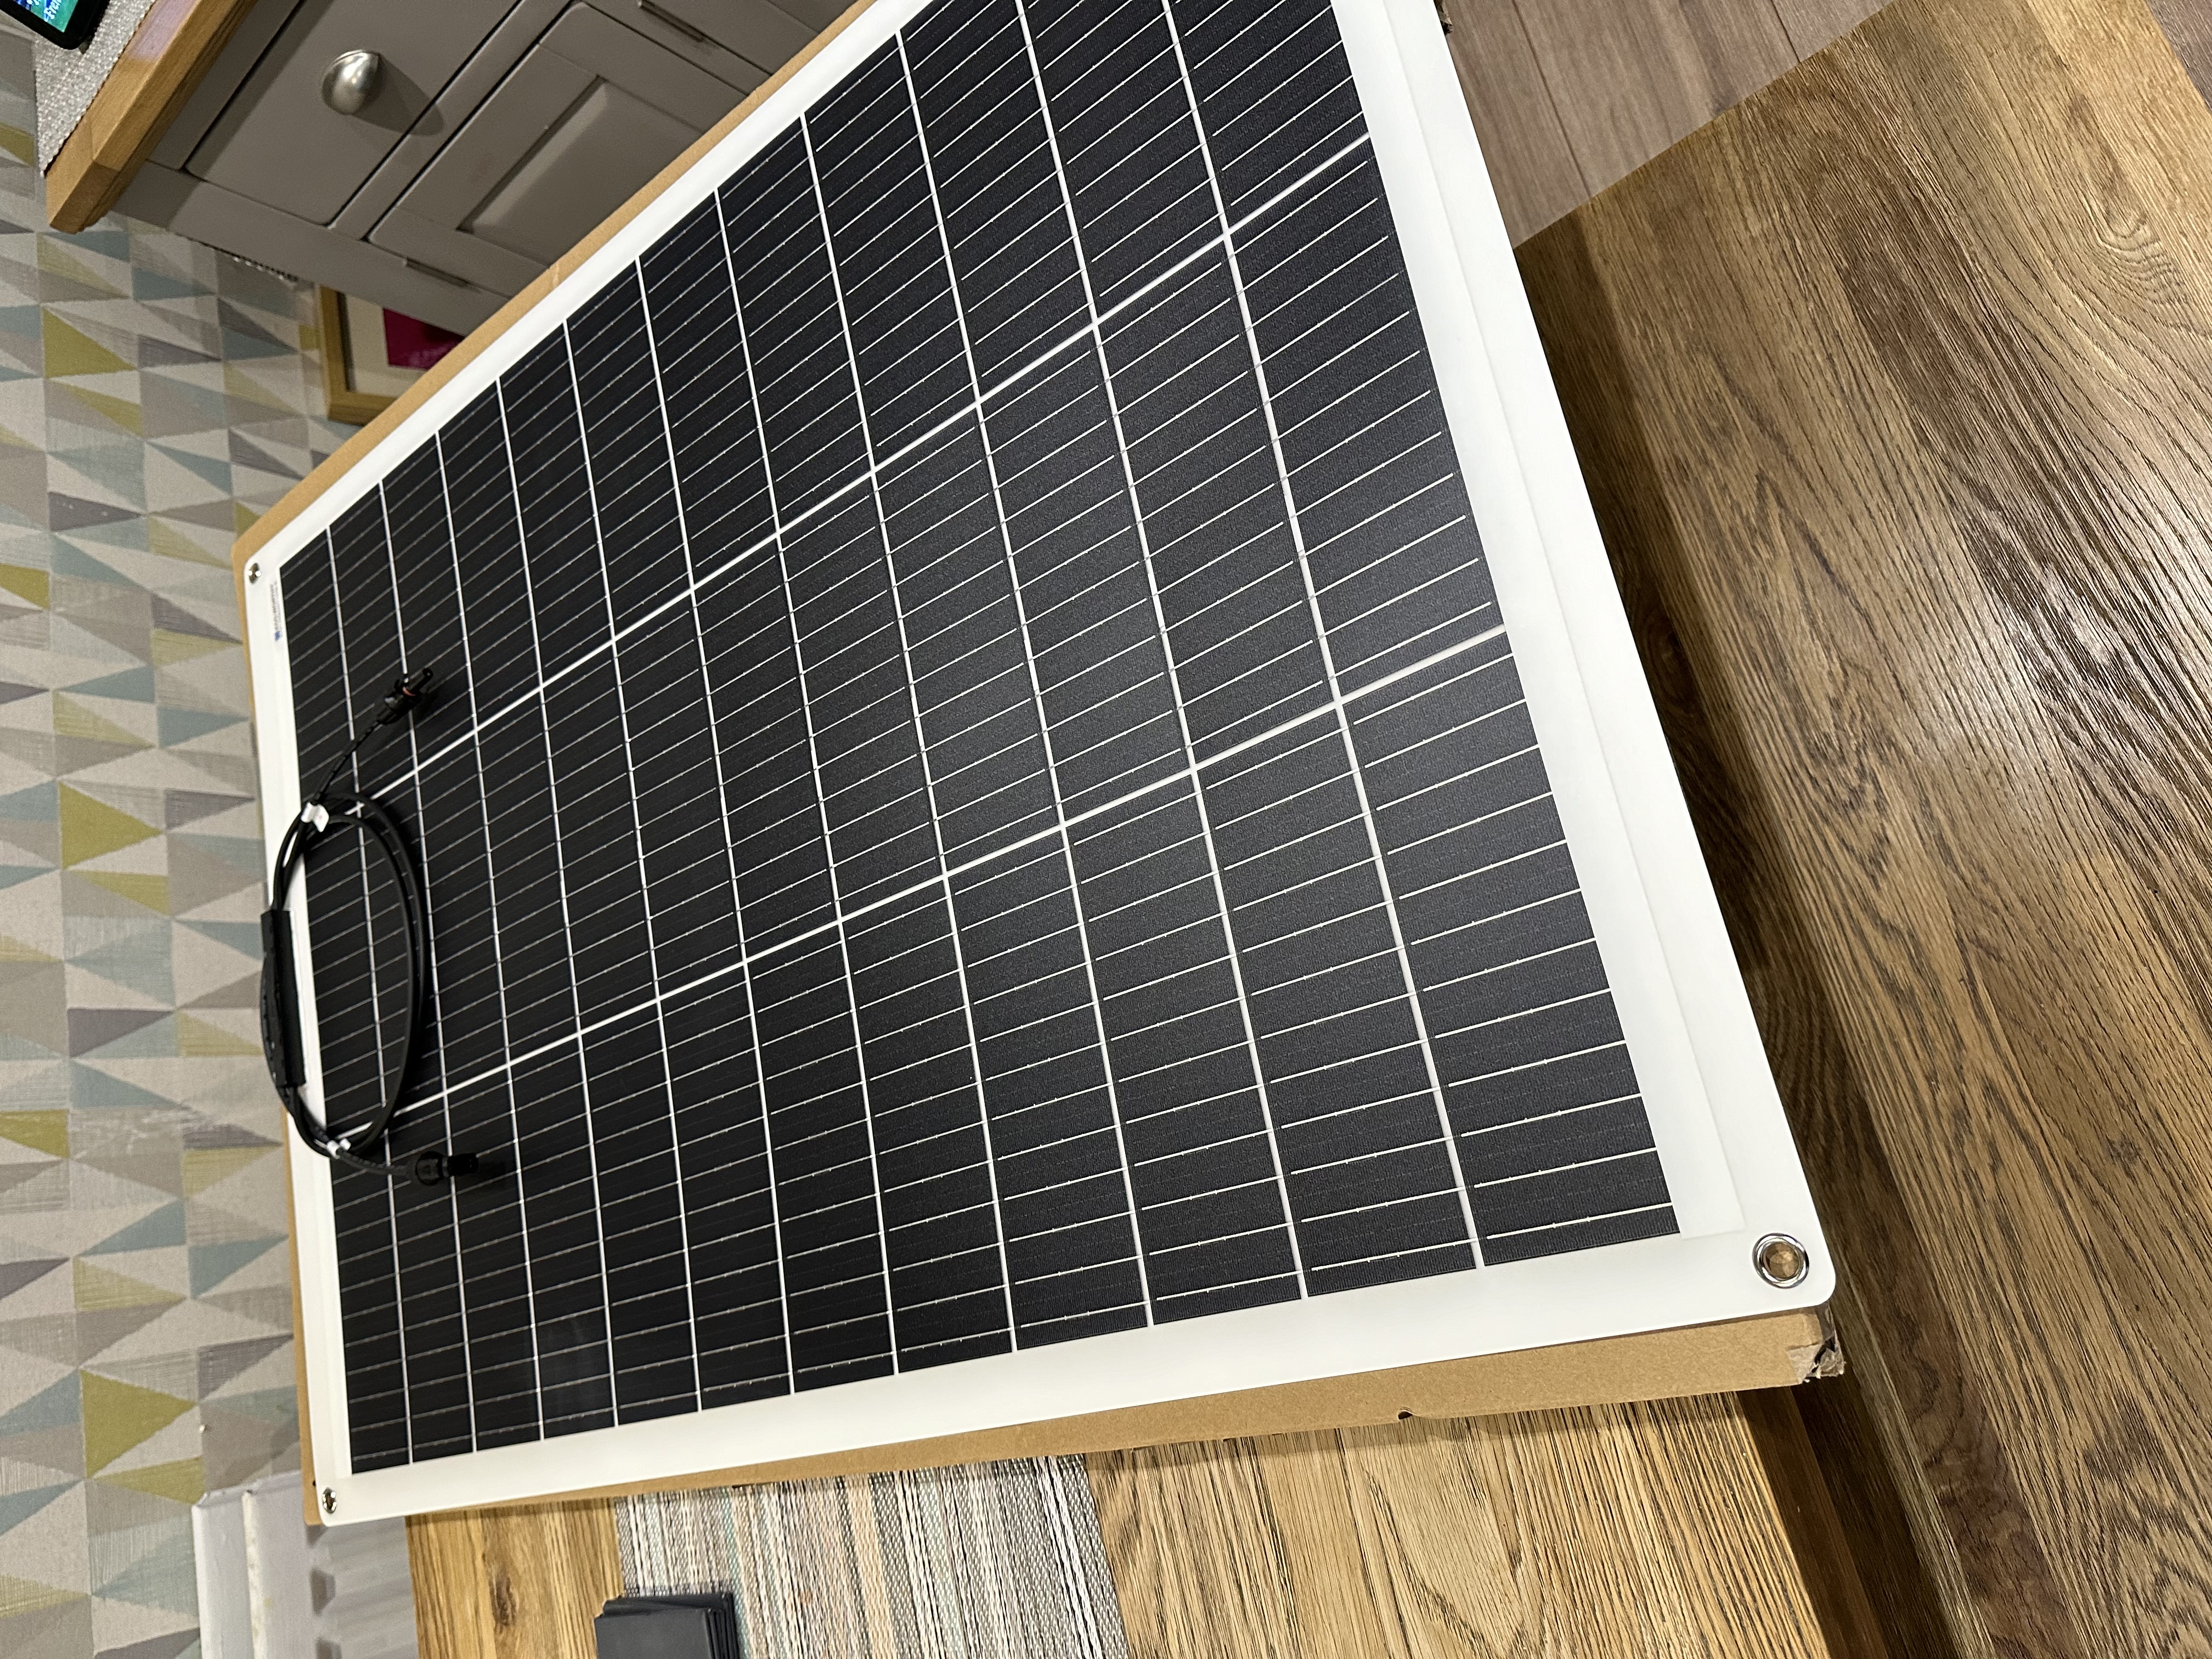
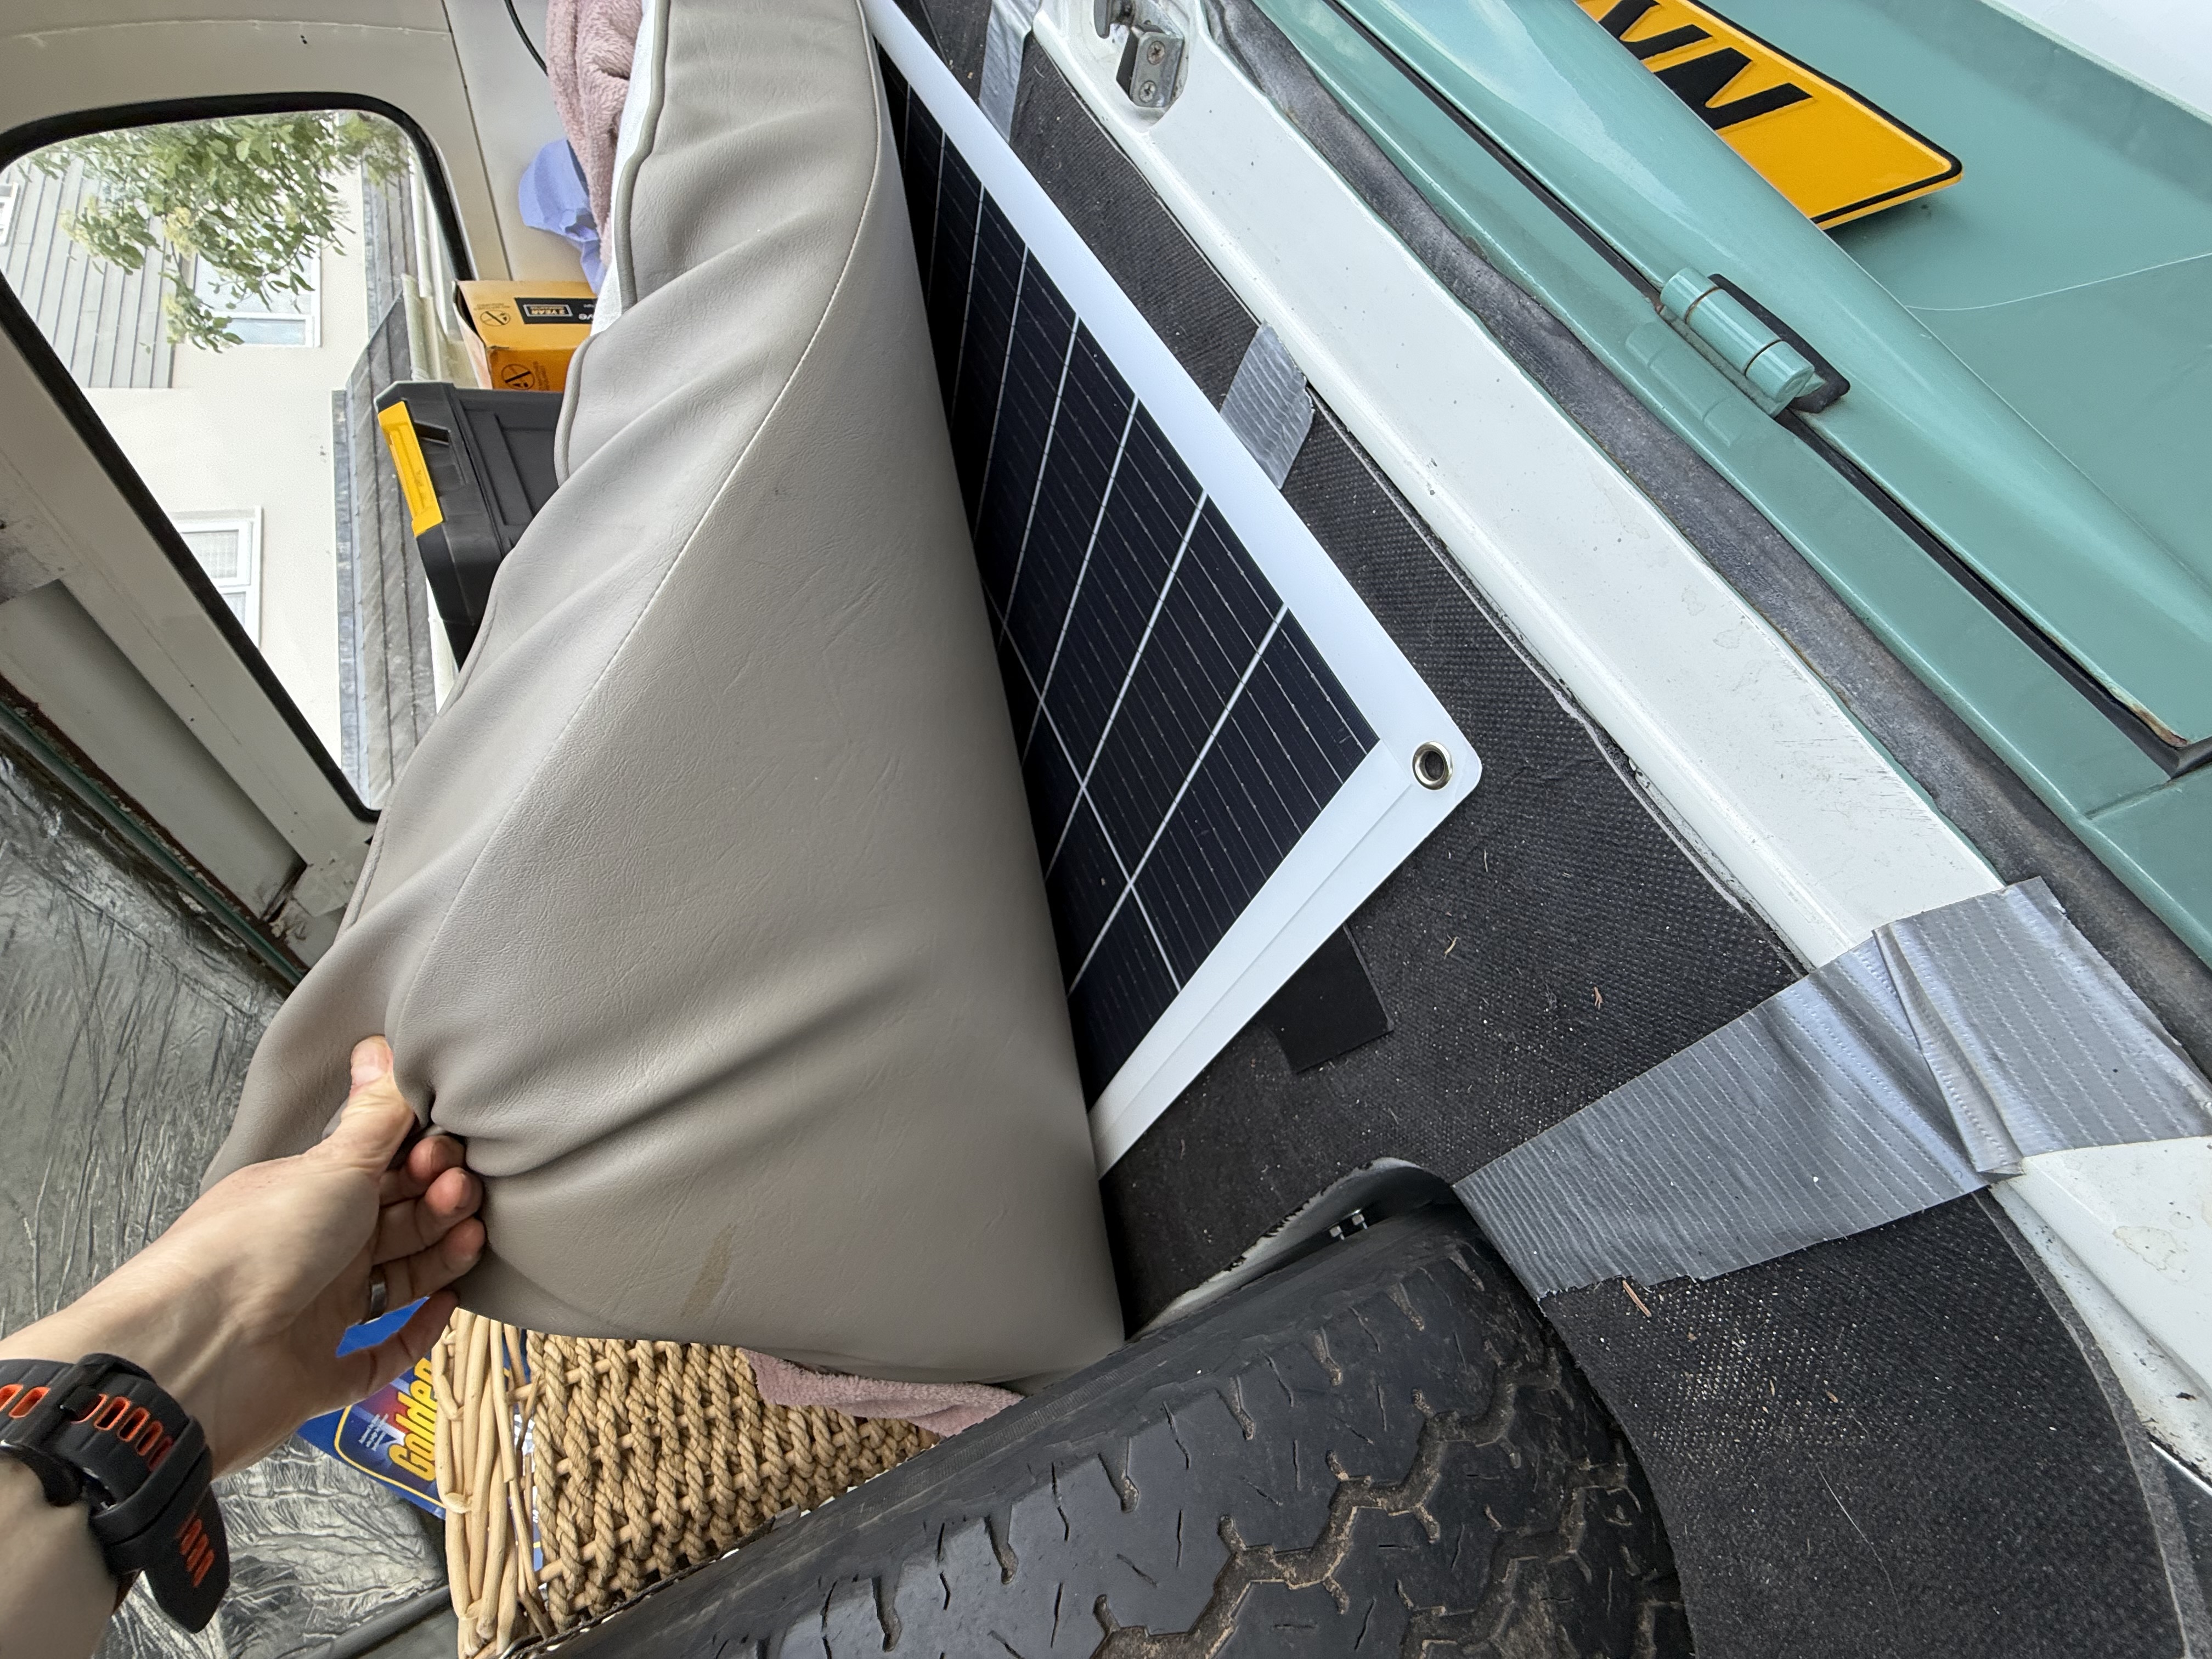
This was my starting panel—120 watts of monocrystalline solar goodness. Good power-to-size ratio, quality build, and affordable. The panel is super thin and flexible, which is perfect for a campervan. For storage, it just sits under the spare cushion at the rear of the van. Just slots in there and takes up no room at all. So you can just grab it and plug it in when you park up — and start harnessing the power of the sun straight away!
The package also included a charge controller (essential—you can’t just wire a panel straight to your battery), cables, and connectors. Basically, everything you need to get started.
Future plans: I’m seriously considering getting a second identical panel for the summer months. Two panels would double my charging capacity, which would be brilliant for longer trips or running a fridge.
My Approach: Keep It Simple (and Portable)
I didn’t permanently mount the panel to Jenny’s roof with brackets, sealant, and cables running through the pop-top. Why?
- Flexibility — A portable panel can be positioned in the sun even if the van’s in shade
- Security — I can bring the panel inside when parked up
- Simplicity — No drilling holes or permanent modifications to my freshly restored van
- Testing first — Wanted to see if solar worked for my needs before committing to roof holes
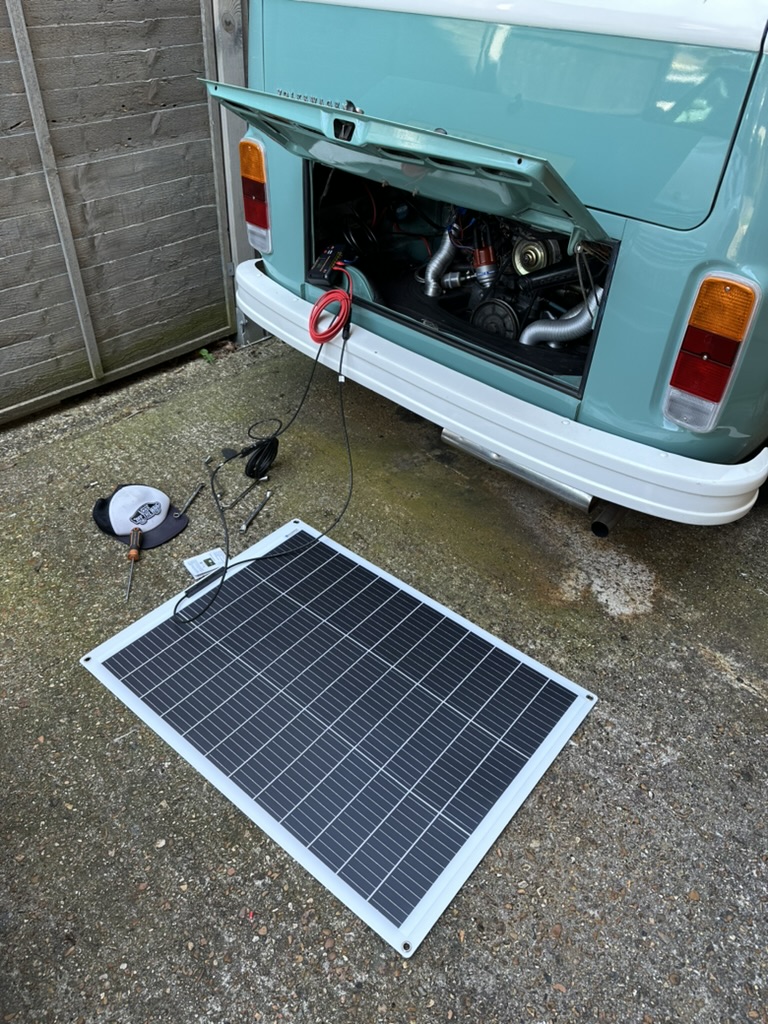
So my setup is beautifully, wonderfully simple: When we’re parked up, I just grab it from under the cushion, plug it in, and leave it out to soak up the sun’s rays!
How It All Connects
Solar Panel → Charge Controller → Leisure Battery
The Charge Controller
This is the brains of the operation. It sits between the panel and the battery and does three critical jobs:
- Regulates the charge — Makes sure your battery gets a steady, safe charge
- Prevents overcharging — Stops or reduces charge when battery’s full
- Prevents reverse drain — Stops power flowing back from battery to panel at night
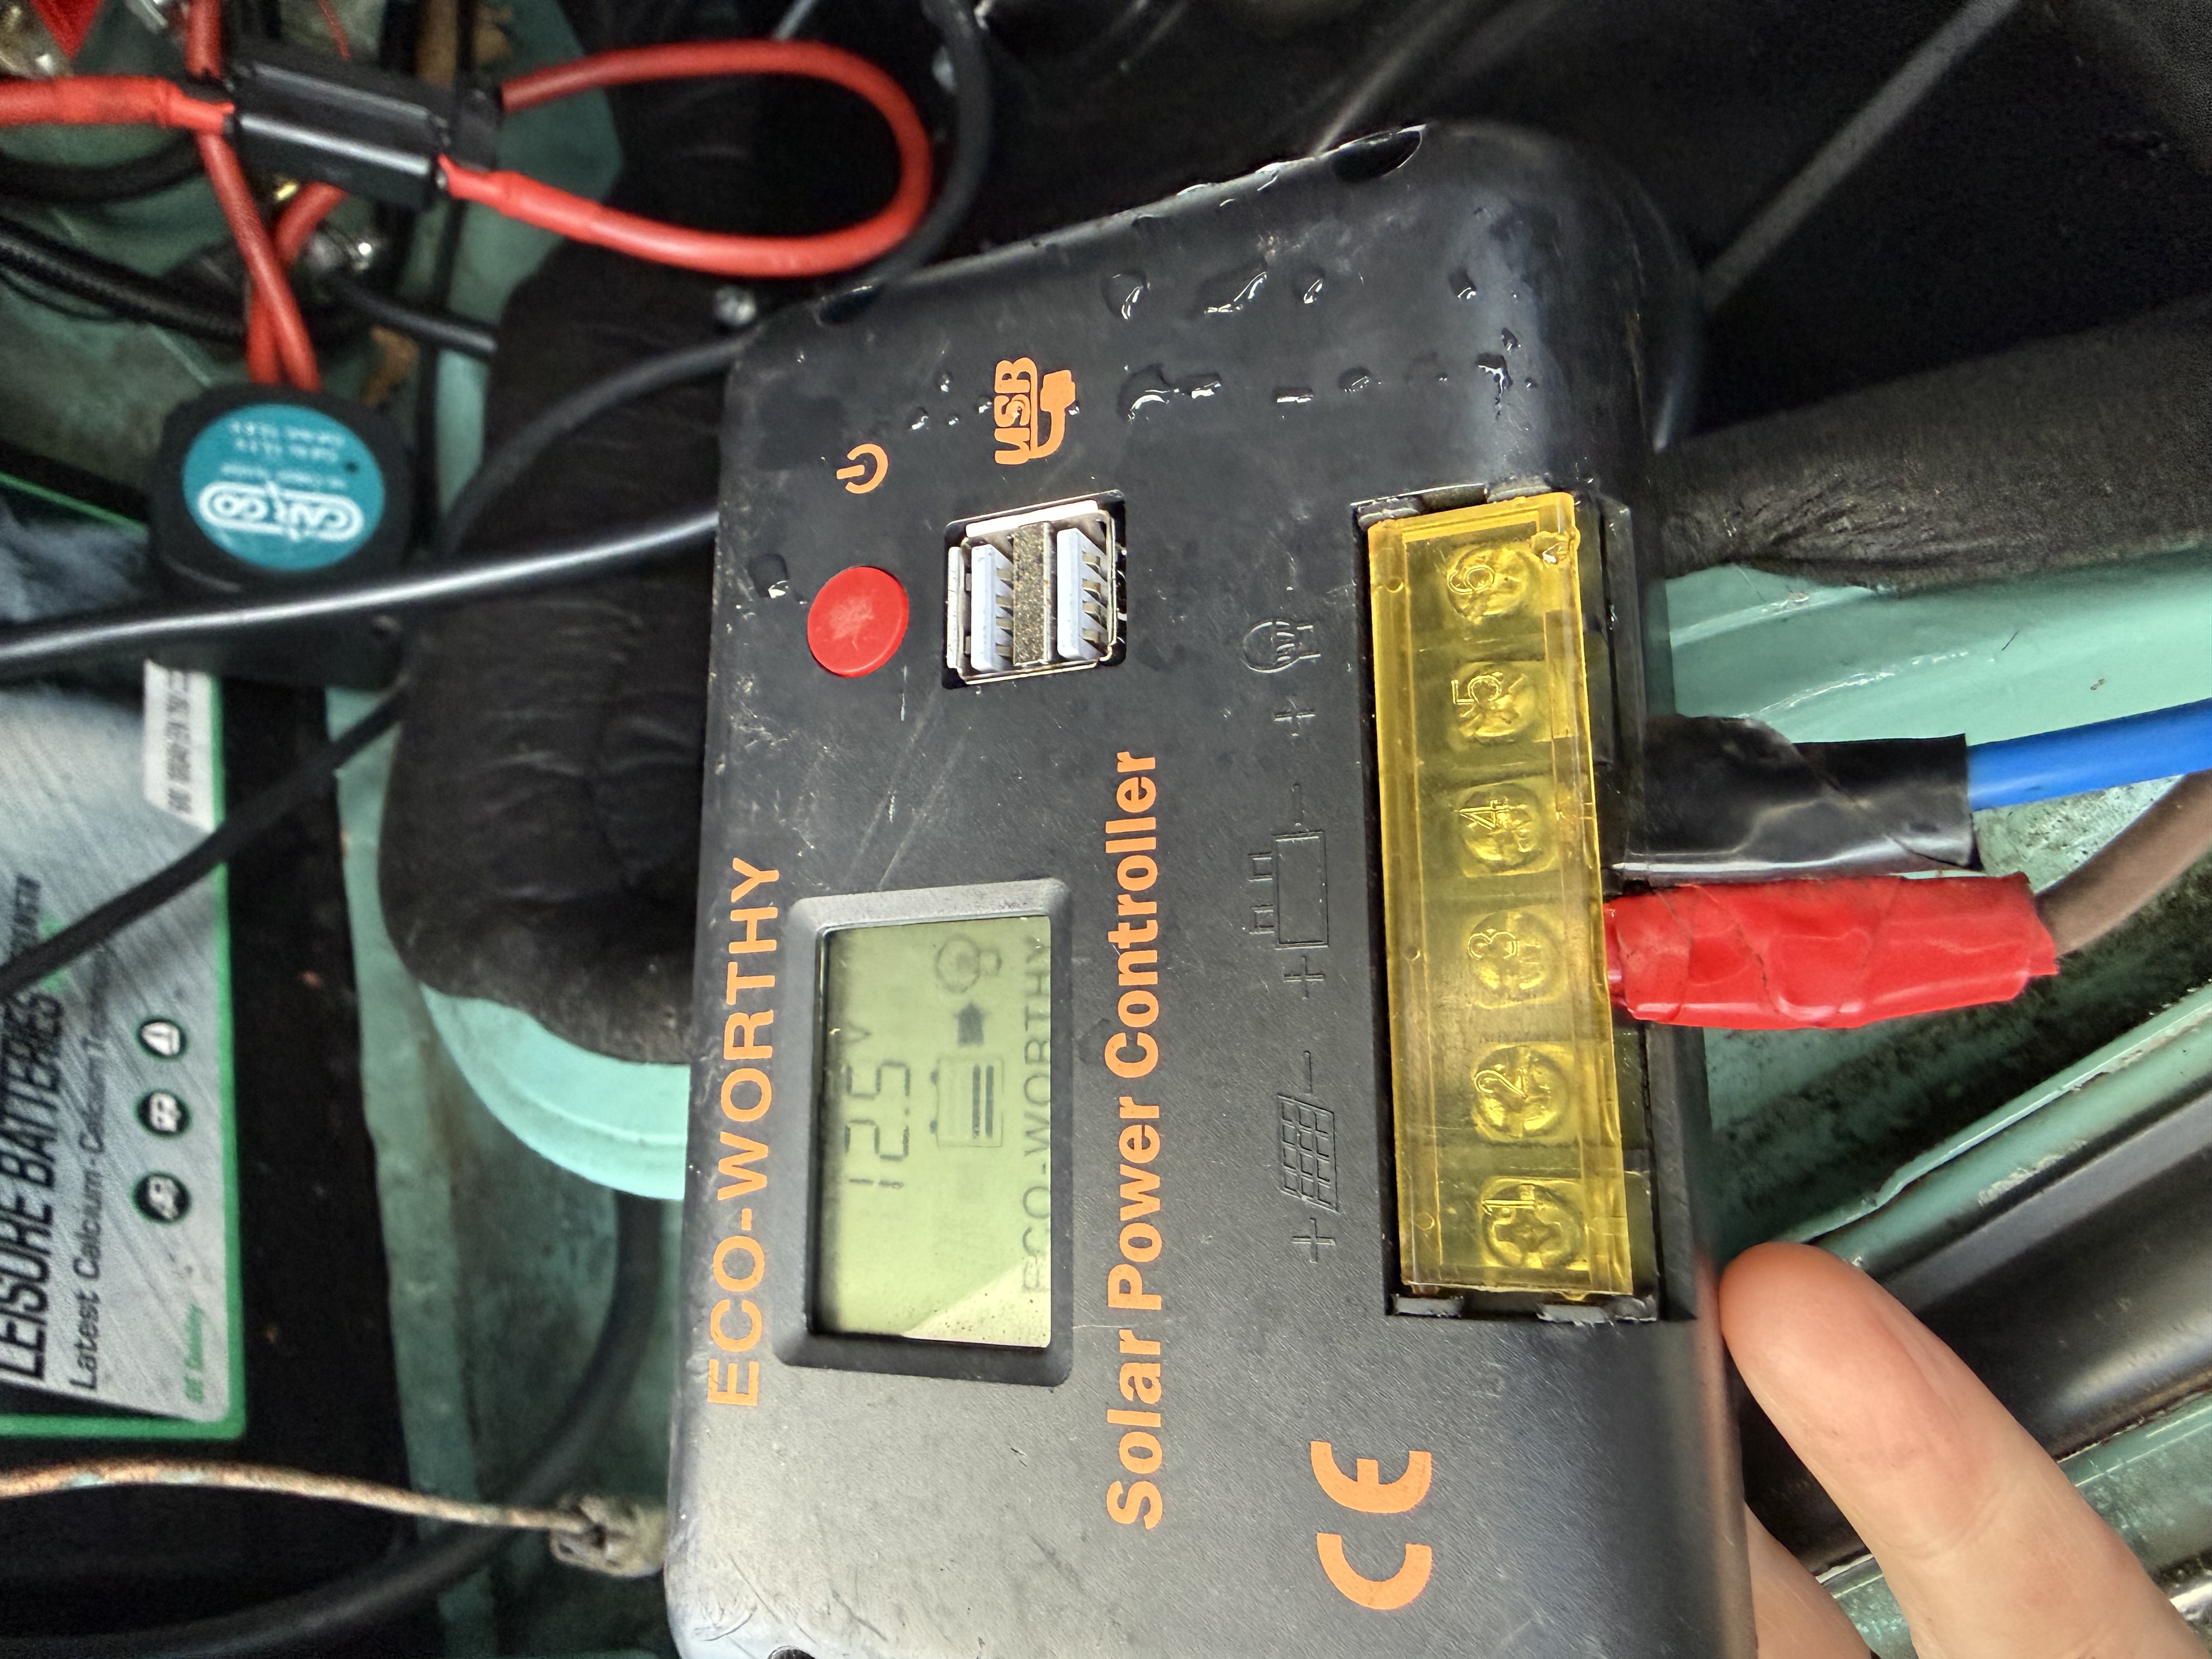
The controller that came with the Eco-Worthy kit is a PWM type, which is perfectly fine for a single 120W panel. If I go bigger in future, I might upgrade to MPPT for better efficiency →
Supporting Gear You'll Need
- 🔍 Solar Brackets/Stands → — I didn't want to mount mine on the roof so I use foldable stands while parked
- 🔍 Solar Suction Cups → — Cheaper alternative to stands for temporary roof mounting
- 🔌 MPPT Charge Controller → — Improves efficiency. Worthwhile upgrade for bigger systems
- ⚡ Eco-Worthy Add-on Panel → — I'm adding another panel this summer for guaranteed power
- 🔋 Eco-Worthy Lithium Battery → — Would go for this if I had the budget
- ⚡ Jackery Explorer 1000 v2 Power Station → — Next item I'll get for summer trips
- 🔌 Renogy Inverter → — Worth adding once I expand the system
- 🔧 Electrical Crimps & Connectors → — You'll need these
- 🔧 Solar Connectors → — Game changer
- 🔧 Electrical Tape → — You can never have enough
Installation: The Actual Process
Step 1: Mount the Charge Controller
Mounted inside the van on the sidewall panel near the leisure battery. Small unit (about the size of a paperback book), screwed to the panel. Five minutes, maybe.
Step 2: Wire the Battery First
Connect the battery to the controller before the solar panel—this lets the controller detect battery voltage and configure itself. 2.5mm² cable, positive with an inline 15A fuse near the battery.
Step 3: Connect the Solar Panel
The panel has pre-fitted MC4 connectors that just click together with the controller cable. Literally plug and play. Carried the panel outside, laid it in the sun, went back to check the controller.
💡 That Magic Moment
The charging LED was on. Actual electricity was flowing from the sun into my battery. I won’t lie, I felt like a wizard. A very nerdy, middle-aged wizard in a turquoise VW van, but still.
What I Learned in Practice
- ☀️ Works even on cloudy days — Not as well, but even on overcast British days, 1-2 amps going into the battery
- 📐 Angle matters — Angling the panel towards the sun can double output. I reposition throughout the day
- 🔌 Portable is genuinely convenient — Can put the panel wherever the sun is, even if the van’s in shade
- 🔋 Battery stays healthy — Slow, steady trickle charge is ideal for AGM batteries
- 📊 Monitoring is addictive — I check that charge controller way too often
- 🌧️ Bring it in when you leave — Takes 30 seconds to unplug and slide back under the cushion
Real-World Performance
- Full sunny day: ~40-60Ah back into the battery over 8-10 hours. Covers daily use and adds charge
- Partly cloudy: ~20-30Ah. Still useful
- Properly overcast: ~5-10Ah. Extends battery life, slows the drain
In practice: I can comfortably wild camp for 3-4 days without driving, running lights, charging devices, and using a small 12v fridge, and the battery stays above 50% charge. That’s the sweet spot for battery health.
The complete solar setup in action—panel out, controller mounted, battery charging steadily. This is how you stay off-grid longer.
What I’d Do Differently
- Buy a battery monitor sooner — A little display showing voltage, current, and amp-hours. Wish I’d had it from the start
- Get longer cables — The supplied ones are fine for roof-to-controller, but a 5m extension is handy for positioning flexibility
- Add the second panel from the start — Two 120W panels would be perfect. Still, starting with one was a good way to learn
Is Solar Worth It?
Absolutely, unequivocally, yes.
For the price (the Eco-Worthy panel and controller cost less than two nights on a campsite with hookup), the improvement in freedom and convenience is massive. I’m no longer tied to driving every day or seeking out campsites. I can park up somewhere beautiful and just be there for a few days without worrying about the battery.
If you’ve already got a leisure battery setup → and you’re thinking about solar, my advice is simple: just do it. Start with a single portable panel, learn how it works, and expand from there. Combined with a diesel heater →, solar gives you true year-round off-grid capability.
The sun might not always shine in Britain, but when it does, you might as well make the most of it. ☀️🚐⚡
— Mike & Jenny
Tried and Tested Product Recommendations
- ⭐ Eco-Worthy Solar Kit (120W + Controller) →
- ⭐ Lion 100ah Leisure Battery (eBay) →
- ⭐ MPPT Charge Controller →
Related Articles
This post contains affiliate links. If you purchase through these links, I may earn a small commission at no extra cost to you. It helps keep Jenny on the road and this website running — thank you!
📊 Solar System Sizing Guide: How Much Power Do You Need?
One of the most common questions: "What size solar panel should I buy?" The answer depends entirely on how long you want to stay off-grid and what you're powering.
Step 1: Calculate Your Daily Power Consumption
Typical Campervan Power Usage (per 24 hours):
- LED interior lights (4 @ 2W each, 3 hours): 24 Wh
- Phone charging (5W, 2 charges): 50 Wh
- Laptop/tablet (15–30W, 3 hours): 90 Wh
- Portable fridge (40W, 12 hours): 480 Wh
- Water pump (96W, 15 mins): 24 Wh
- Fan/ventilation (20W, 4 hours): 80 Wh
- 12V car heater (150W, 2 hours): 300 Wh
Daily consumption examples:
- Light use (no heater): ~1,050 Wh/day
- Moderate use with fridge: ~1,500 Wh/day
- Heavy use + heating: ~2,000 Wh/day
- My setup (lights + fridge + pump + fan): ~660 Wh/day
Step 2: Choose Your Battery Capacity
Most campervans use 100–200Ah leisure batteries (12V). Key point: never discharge below 50% for lead-acid batteries (lithium can go lower).
- 100Ah AGM battery = 1,200 Wh total, 600 Wh usable (50% safe)
- 100Ah LiFePO⁴ = 1,200 Wh total, 1,140 Wh usable (95% safe)
Step 3: Solar Panel Sizing Formula
Panel size needed = Daily consumption / Peak sun hours (in your region)
UK peak sun hours vary by season: Summer 4–5 hours/day, Spring/Autumn 3–4 hours/day, Winter 1.5–2.5 hours/day
- Light use (500 Wh): 167W panel = 1x 200W or 2x 100W
- My use (660 Wh): 189W panel = 1x 200W (summer) or 2x 120W (year-round)
- Moderate use (1,200 Wh): 343W panel = 2x 200W or 3x 150W
- Heavy use (1,500 Wh): 429W panel = 2x 250W or 3x 150W
- Year-round off-grid (winter focus, 1,200 Wh): 480W panel = 2x 250W or 3x 200W
Recommended Starter Configs
Budget Config (Light Camping): 1x 100–150W panel + 100Ah AGM + PWM controller = £250–350, can stay off-grid 2–3 days
Balanced Config (My Setup): 1x 120W panel + 100Ah battery + PWM controller = £350–450, can stay off-grid 3–4 days
Premium Config (Serious Off-Grid): 2x 200W panels + 200Ah lithium + MPPT controller = £1,500–2,000, can stay off-grid 5–7 days
⚡ Realistic Solar Generation: UK Campervan Performance
Real output depends on cloud cover, time of year, panel angle, and temperature. Here's what you can actually expect:
120W Panel in Full Sun (Summer, Properly Angled)
- Peak hours (10 AM–2 PM): 110–120W output
- Morning/evening: 20–80W output
- Daily total: 35–45 Ah into 12V battery
120W Panel in Typical UK Weather
- Clear day: 40–45 Ah/day
- Scattered clouds (50% clear): 25–30 Ah/day
- Overcast/grey: 8–15 Ah/day
- Heavy overcast/rain: 2–5 Ah/day (trickle charge only)
Winter Performance (Nov–Feb)
Expect 50–70% reduction due to lower sun angle. Clear winter day: 12–18 Ah. Typical grey day: 2–5 Ah.
Key takeaway: A 120W panel works well spring–autumn. In winter or year-round, you need 200W+ or budget for hookups.
🔌 PWM VS. MPPT: Which Controller Do You Need?
PWM (Pulse Width Modulation): Budget option, 75–80% efficiency, £30–60
MPPT (Maximum Power Point Tracking): Premium option, 90–98% efficiency, £80–150
Use PWM if: Single panel under 200W, budget is tight, happy with 75–80% efficiency
Use MPPT if: 2+ panels or 200W+ single panel, want 15–20% better summer efficiency, planning to expand
Real example: 120W panel + PWM = 40–45 Ah/day summer. Same panel + MPPT = 48–50 Ah/day summer. MPPT wins over a season.
❓ Frequently Asked Questions
How much solar power do I actually need for a campervan?
For light use (lights + phone), 120W is fine. For moderate use with a fridge, 150–200W. For year-round off-grid in the UK, 300W+. Size based on your worst month (winter), not summer.
Will one 120W panel keep my battery fully charged?
Not in winter or on cloudy days. On a sunny spring/summer day, yes. On an overcast January day, it barely maintains charge. That's why sizing matters.
Can I just wire solar straight to my battery?
No. You must use a charge controller. Wiring directly will damage the battery and risk fire. The controller regulates voltage and current.
What's the difference between portable and fixed panels?
Portable (flexible, repositionable) = versatile but clunky. Fixed (roof-mounted) = professional but committed. Start portable, upgrade later if happy.
Should I use lithium or lead-acid batteries with solar?
Both work. Lithium is expensive (£600+) but lasts 10+ years and handles deep discharge. Lead-acid is cheap (£140) but needs careful management. For solar, lithium is ideal but not essential.
Why do I get less power on cloudy days?
Clouds block direct sunlight. A 120W panel might only produce 20–30W on a grey day. Diffuse light still reaches the panel, but far less than rated output.
How often do solar panels need cleaning?
Rarely. Normal UK weather self-cleans them. If covered in bird poop or tree sap, a gentle rinse helps. Don't use rough cloths (they scratch).
How long does a solar panel last?
Modern panels are rated for 25+ years. Degradation is ~0.5% per year, so a 10-year-old panel is still 95% effective. Panels outlast batteries.