When I first started thinking about adding a proper electrical system to Jenny, I’ll be honest—I was properly intimidated. Wires, relays, fuses, batteries… it all seemed a bit beyond me. But here’s the thing about classic VW ownership: you learn as you go, take it one step at a time, and suddenly you’ve done something you never thought possible.
⚠️ Important disclaimer: I’m a novice, not a qualified electrician. What I’m sharing here is my experience installing a leisure battery system in my 1976 VW T2. If you’re not confident working with electrics, please get a qualified auto electrician to help. Electrics can be dangerous if done wrong, and I’d rather you stayed safe than blew a fuse (literally).
That said, with some patience, the right kit, and a lot of YouTube tutorials, I managed to get a brilliant leisure battery setup that powers lights, USB ports, and even lets me charge my phone while wild camping. Here’s how I did it.
Why You Need a Leisure Battery
If you’re planning to actually use your camper for camping (not just Sunday drives and car shows), a leisure battery is essential. Your starter battery is designed for short bursts of high power to turn the engine over—it’s not meant to run lights, fridges, or phone chargers for hours on end.
A leisure battery, on the other hand, is built for deep discharge and recharge cycles. You can drain it down to power your camping kit, then charge it back up while driving. It’s the difference between hoping your van starts in the morning and knowing it will, because you haven’t drained your starter battery watching Netflix in the back of the van.
The Kit I Used
⚡ Essential Leisure Battery Setup
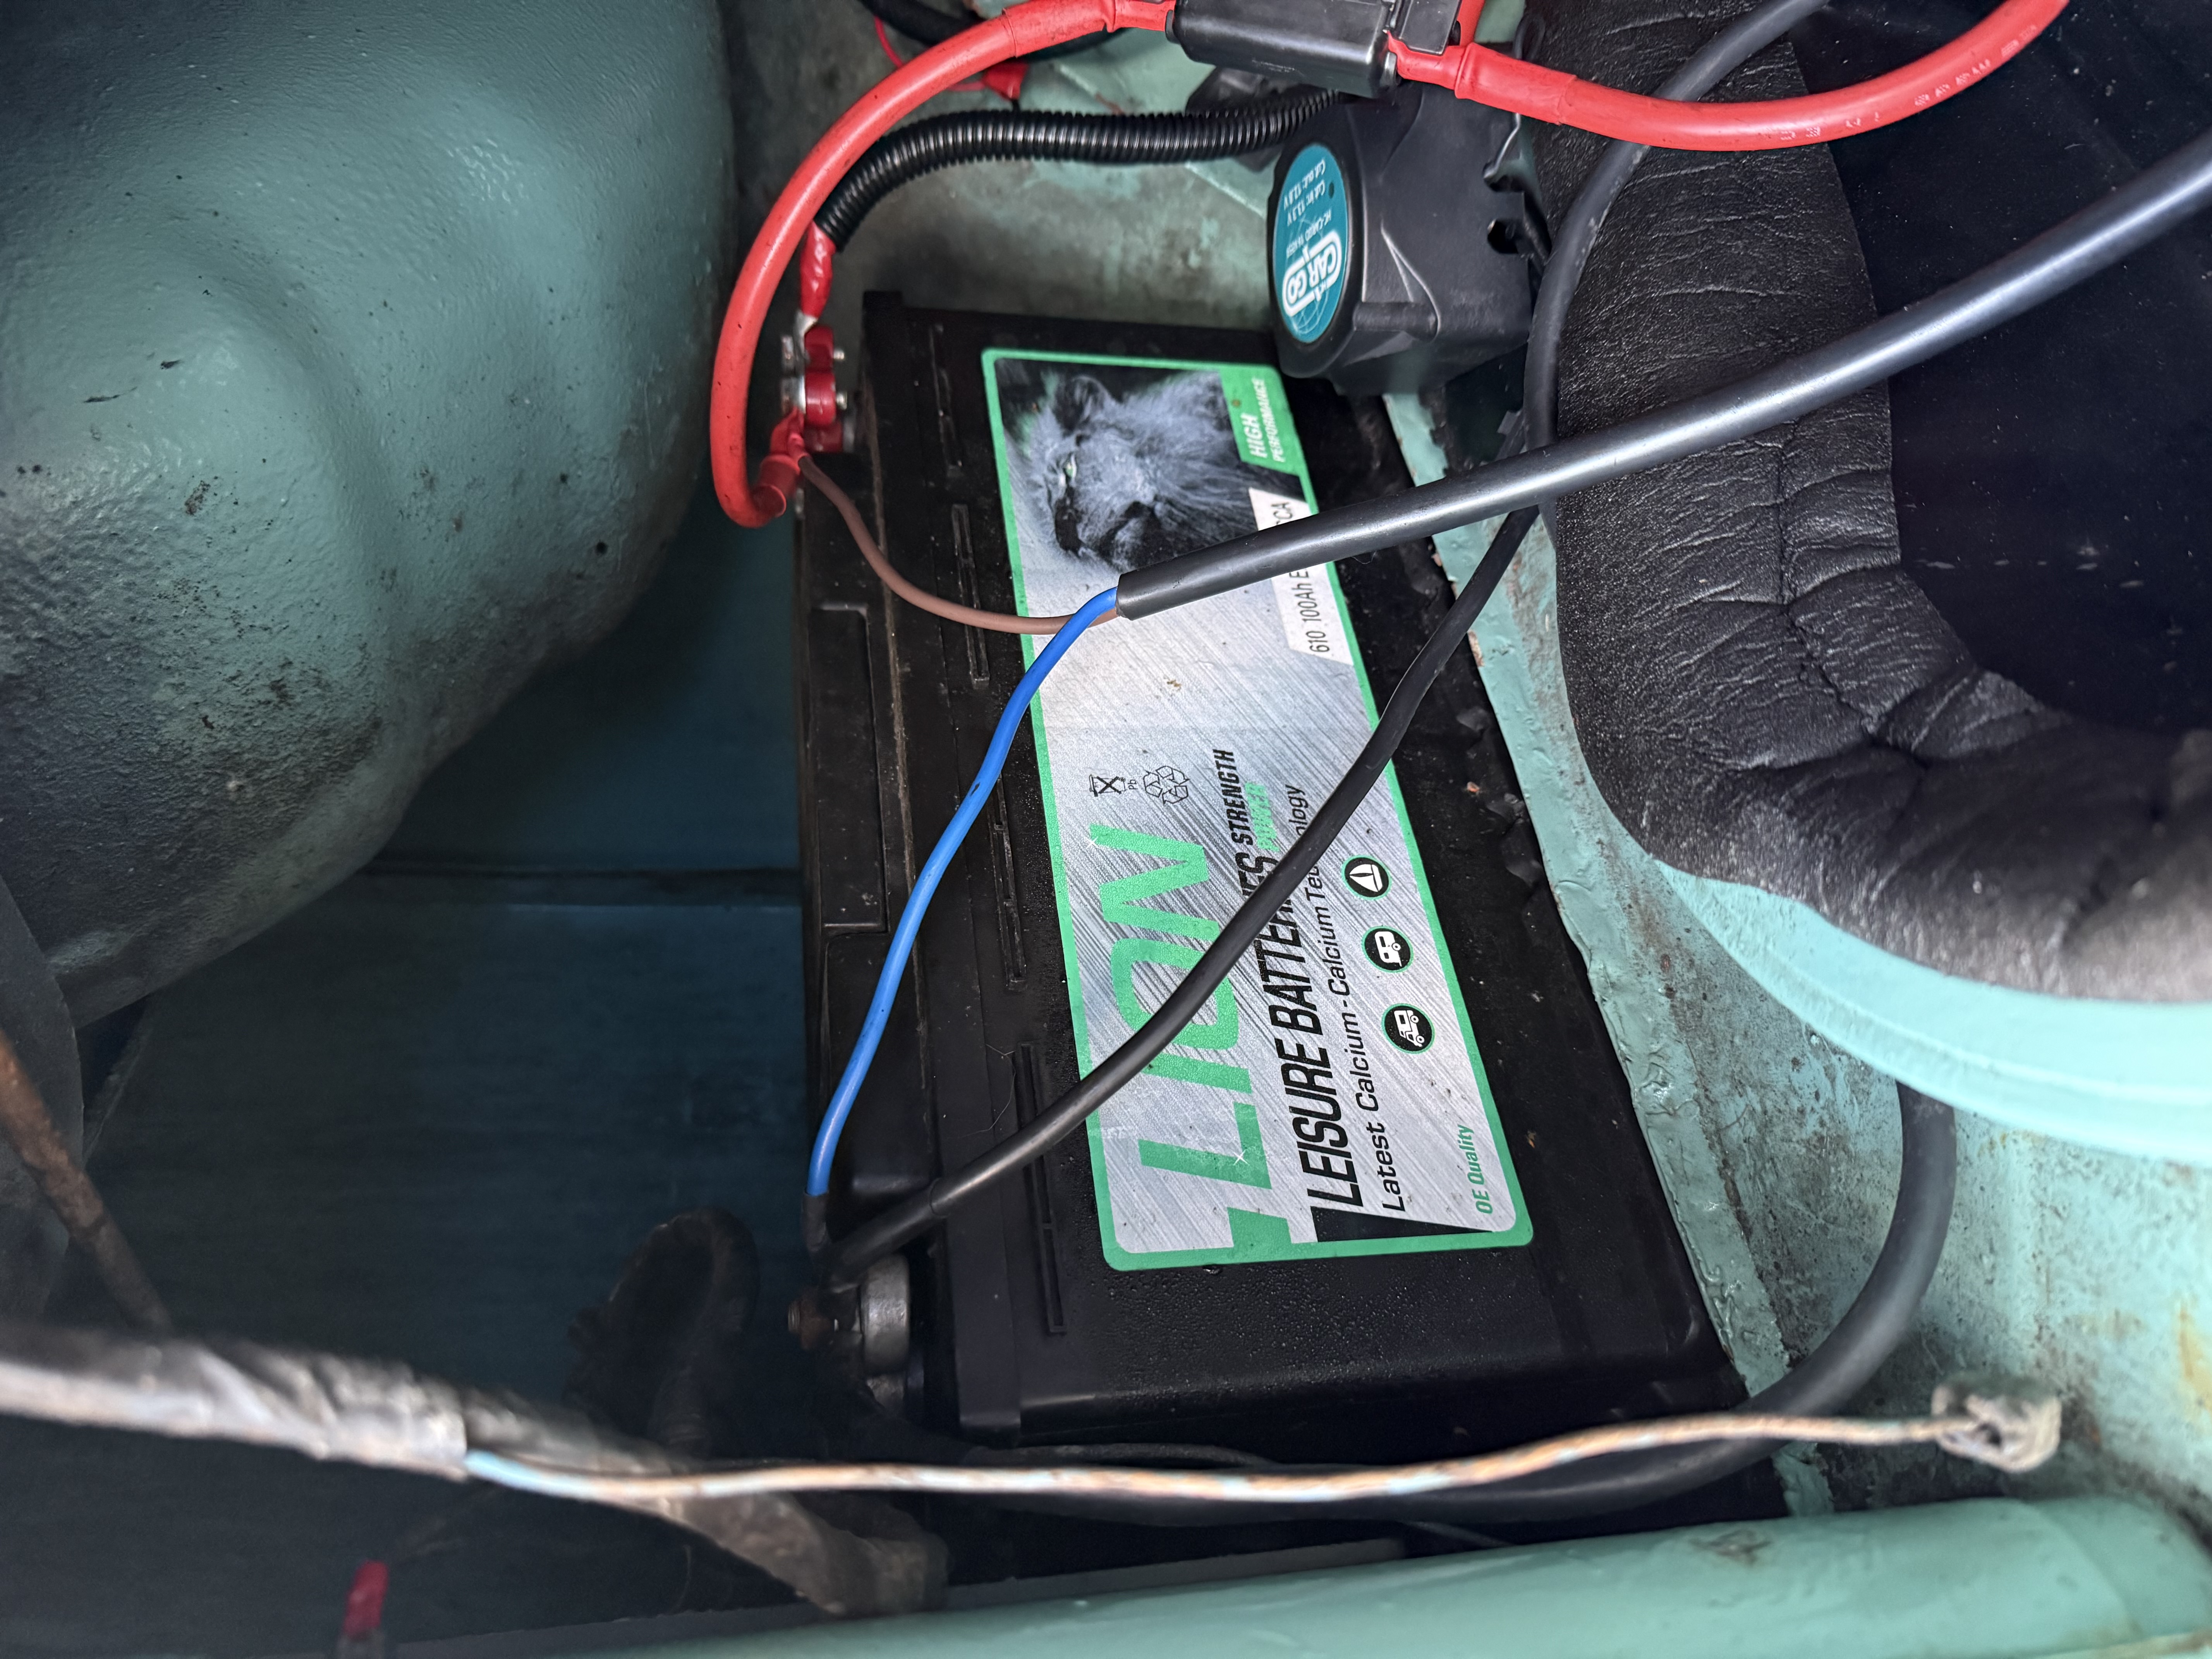
Lion 100ah Leisure Battery (eBay) →
This is the battery I went with — perfectly good enough for a typical day van setup. Lithium option below if budget allows.
Split Relay Kit →
Essential for automatic charging while driving, without draining your main battery.
50amp Circuit Breaker →
Added for easy cut-off and safety.
12v Panel (4 switches, 12V plug, 2 USBs) →
Great value. Looks professional too. 4 switches, 12V plug and 2 USBs.
Leisure Battery — 100Ah Lion (eBay) →
I chose this battery because it's well-reviewed, affordable, and solid for day van use. AGM batteries are sealed, maintenance-free, and handle the bumpy life in a classic VW much better than traditional flooded batteries. AGM batteries also charge faster and can handle deeper discharges without damage. The 100Ah capacity gives me plenty of power for weekend trips—enough to run LED lights, charge devices, and maybe even power a small 12v fridge if I’m sensible about it.
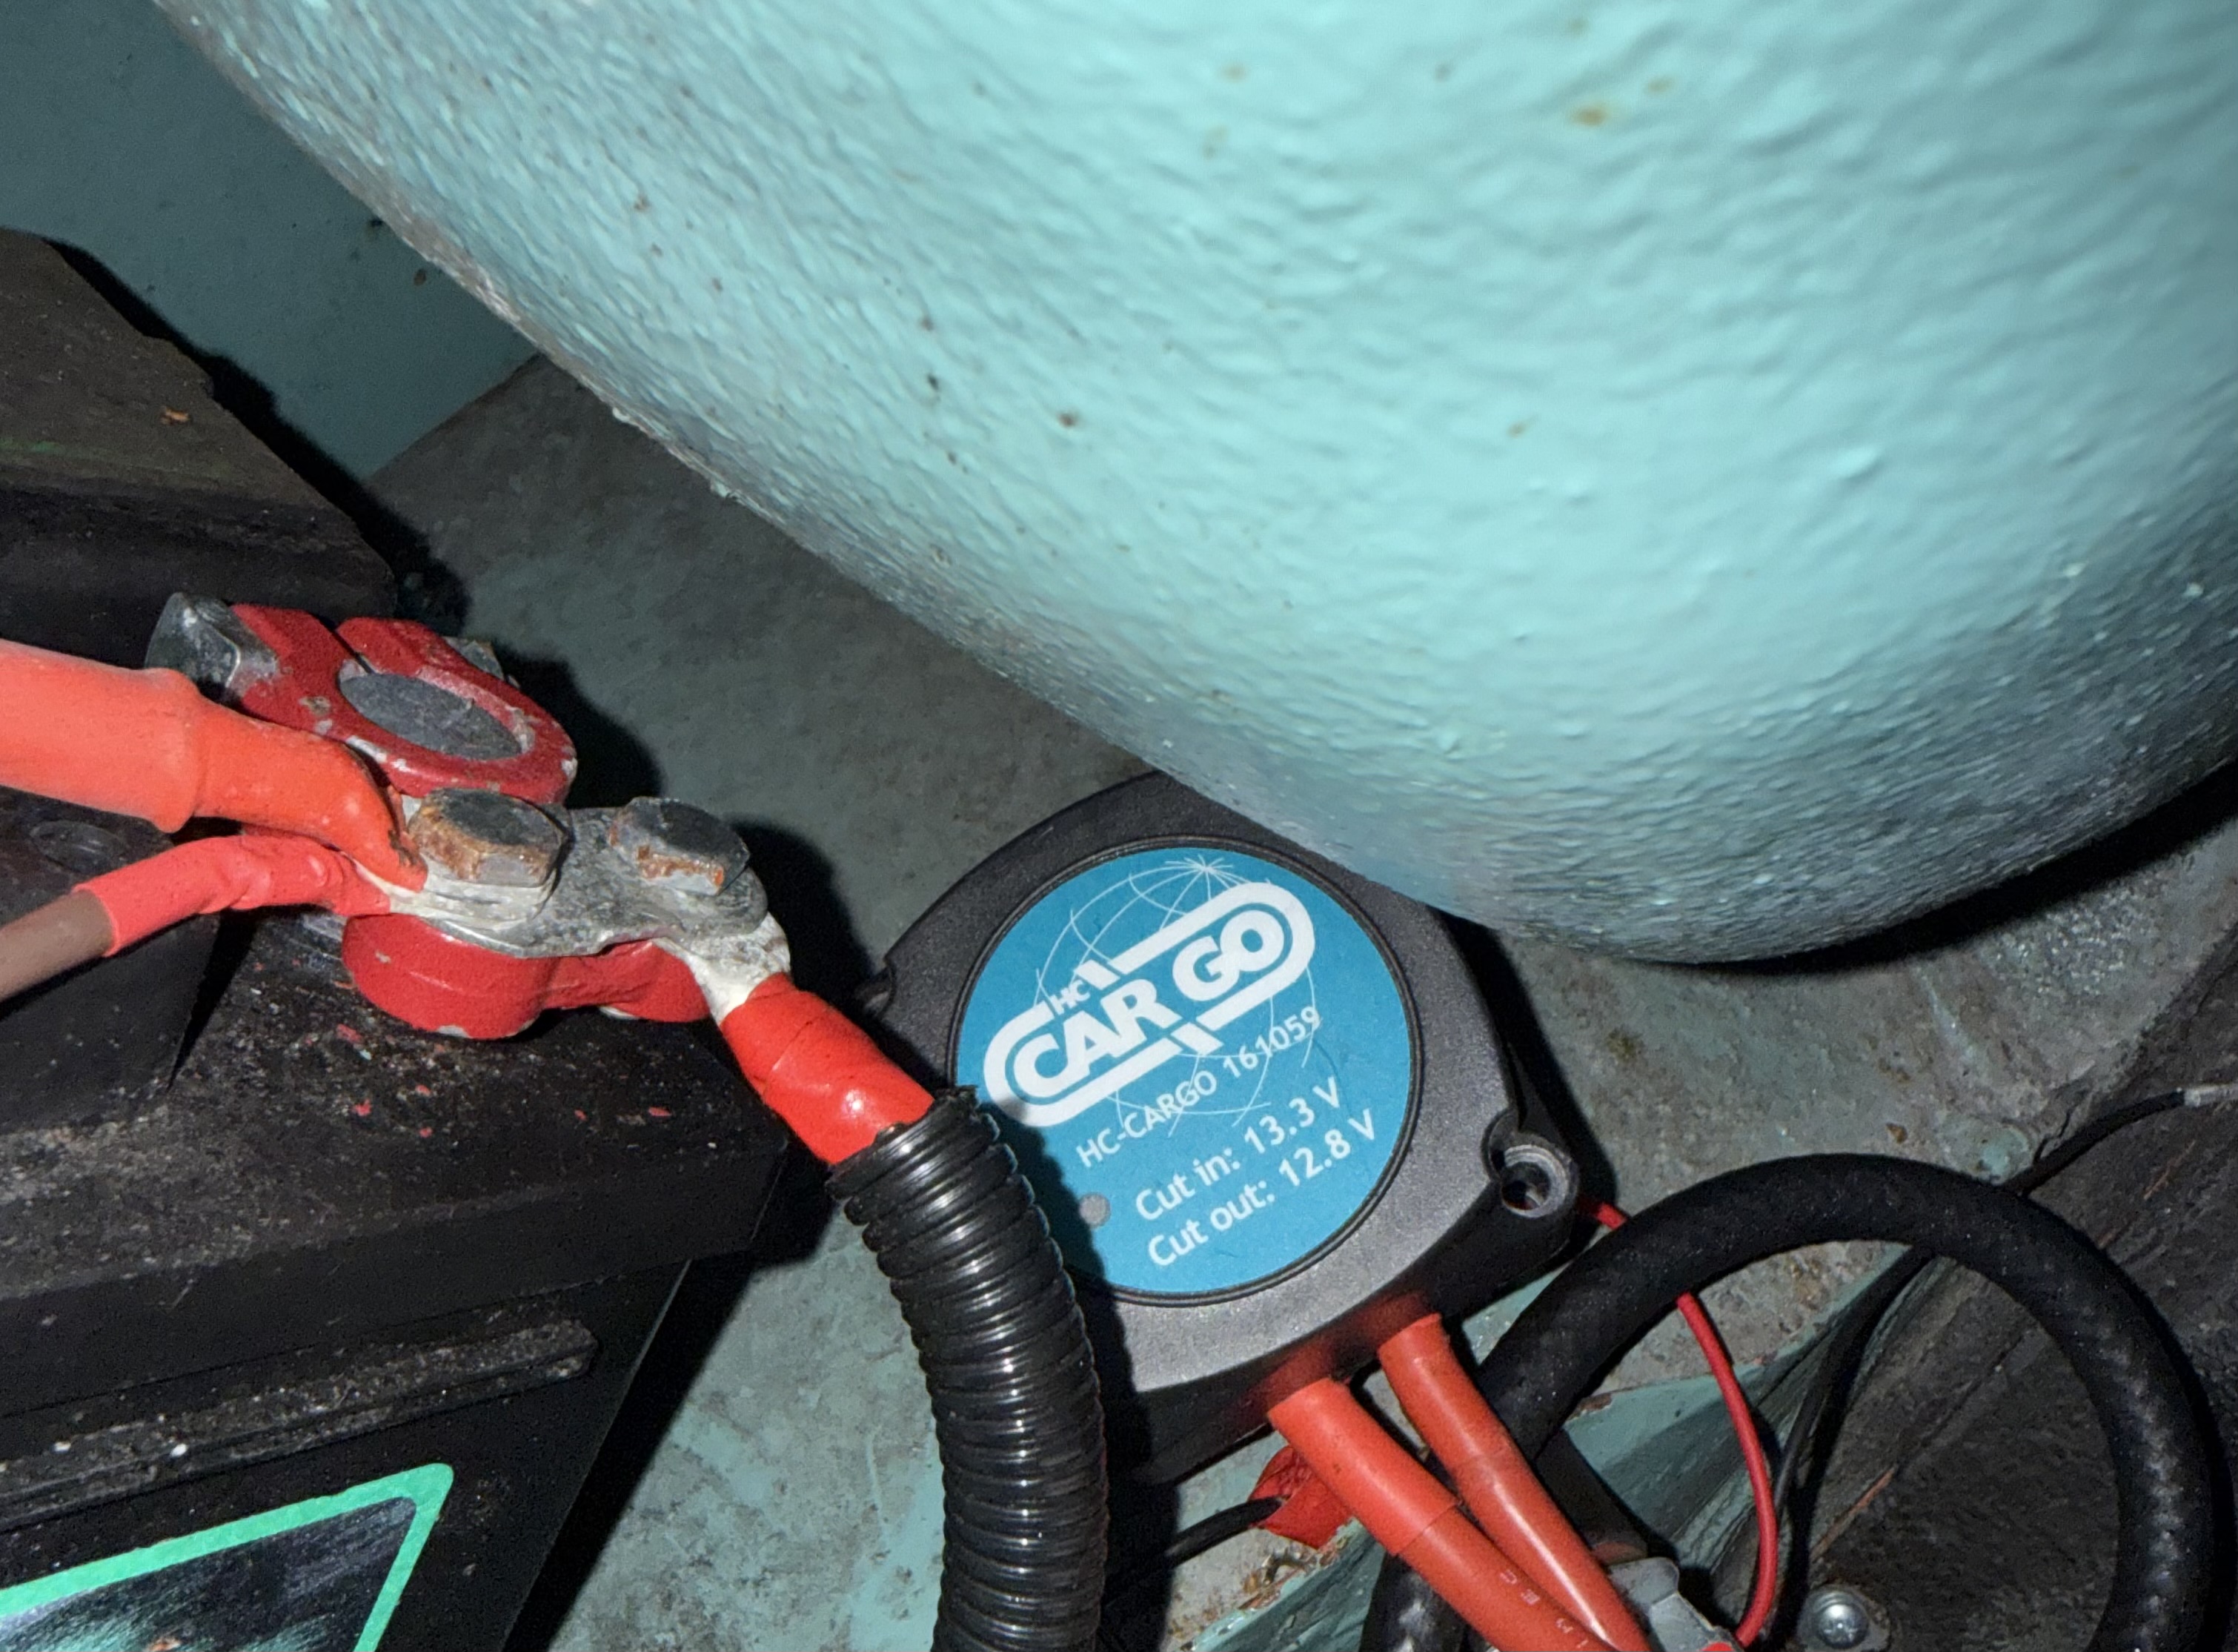
Voltage Sensitive Split Relay →
This is the magic bit. A split relay automatically charges your leisure battery from the alternator while you’re driving, but keeps the two batteries separate when the engine’s off. That means you can’t accidentally drain your starter battery by leaving the lights on—your leisure battery takes the hit instead, and your van will still start in the morning.
12V Power Panel for Rock and Roll Bed Base →
I wanted a neat, integrated solution for power points rather than just wires hanging everywhere. This 12v panel mounts flush into the base of my rock and roll bed, giving me proper 12v sockets, USB charging ports, and switches for lights. All the wiring runs underneath the bed frame, completely hidden from view. It looks professional, it’s safe, and it means I’m not drilling holes in Jenny’s beautiful new interior panels.
50A Circuit Breaker →
I also fitted a 50amp circuit breaker between the leisure battery and the van’s 12v panel. This gives me the option to switch everything off with one switch—preventing draining the leisure battery if it’s not needed. One flick and the whole leisure circuit is isolated. Dead simple and really handy when the van’s sitting at home for a few weeks between trips.
Additional Leisure Battery Gear
- ⚡ Eco-Worthy Lithium Battery → — Would go for this if I had the spare cash
- 🔋 Battery Monitor → — Additional safety, helps see battery life
- ⚡ Noco Boost → — Always in the van, must-have for emergencies
- 🔌 Jump Leads → — If you don't have these, are you really driving a VW T2?
- 🔧 Electrical Crimps & Connectors → — You'll need these
- 🔧 Connectors → — Game changer
- 🔧 Electrical Tape → — You can never have enough
The Installation Process
Right, deep breath. This is where it gets real.
Step 1: Planning the Layout
Before I touched a single wire, I spent a good hour just sitting in the van, figuring out where everything should go. The leisure battery sits in the engine bay where there are two battery trays—one for the engine battery and one for the leisure battery. It’s a proper battery box setup, non-negotiable for safety (batteries can leak or off-gas). The split relay needed to be close to the starter battery under the bonnet, but accessible for future maintenance. The power panel would mount in the bed base where I could easily reach it.
I sketched it all out on paper, measured cable runs, and made a shopping list of cables, crimps, fuses, and terminals I’d need.
Step 2: Installing the Split Relay
The split relay lives in the engine bay, mounted securely to the bulkhead. I won’t lie—this was fiddly. The relay has four main connections:
- Positive from the starter battery — This is the feed from your main battery. I used 16mm² cable (hefty stuff) because it needs to handle the charging current.
- Positive to the leisure battery — Another 16mm² cable running from the relay, through the bulkhead, to the leisure battery in the engine bay.
- Negative/Earth — A good solid earth connection to the chassis. I scraped paint off to get metal-to-metal contact, used a ring terminal, and made sure it was tight.
- Sense wire — A thin wire (1mm²) connected to the ignition-live circuit. This tells the relay when the engine’s running.
💡 Critical Safety Tip
I fitted a 140A fuse as close to the starter battery as possible on the positive cable. This is your safety net—if something shorts out, the fuse blows instead of setting your van on fire. Don’t skip fuses. Ever.
Step 3: Running the Cable
Since the leisure battery sits in the engine bay too, the cable run was relatively short compared to some setups where people mount the battery under the bed. Still, I used proper automotive cable (not household wire), red for positive and black for negative, and fitted another fuse holder (80A) on the positive cable right before it reaches the leisure battery.
Step 4: Installing the Leisure Battery
The battery sits securely in the engine bay battery tray—it’s a perfect fit. Positive cable from the split relay connects to the positive terminal. Negative cable runs to a solid chassis earth point nearby.
With the ignition on, I checked the voltage at both batteries with a multimeter: 13.8V at the starter battery (charging from the alternator), and after a few seconds, 13.8V at the leisure battery too. The split relay was doing its job. Perfect.
Step 5: Installing the Circuit Breaker & Power Panel
The 50amp circuit breaker sits between the leisure battery and the 12v power panel. It’s simple: positive from the battery goes into the breaker, positive out of the breaker goes to the power panel (via a 15A fuse for the panel itself). One switch to isolate everything.
The 12v panel dropped into the bed base cutout beautifully, held with the supplied screws. Tested each socket and USB port—everything worked first time. I actually punched the air.
Step 6: Hiding the Wires
All the wiring from the engine bay to the living area runs through a grommet in the bulkhead, then underneath the bed frame, secured with cable ties and plastic conduit. When the bed’s down, you can’t see a single wire. It looks factory-fitted, which makes me ridiculously happy.
How It Works in Practice
- Engine running: The alternator charges the starter battery. The split relay senses 13.8V+ and clicks closed, connecting the leisure battery too. Both charge while driving.
- Engine off: The relay senses voltage drop and clicks open, isolating the two batteries. Use the leisure battery freely without touching the starter battery.
- Circuit breaker: Flick the 50A breaker to isolate the entire leisure circuit when the van’s parked at home. No slow drain, no worries.
- Next morning: Turn the key, engine starts from the fully charged starter battery, relay clicks back on, leisure battery starts recharging.
What I’d Do Differently
- Buy a multimeter — Being able to check voltages makes everything easier and safer.
- Label your cables — I thought I’d remember which wire was which. I did not.
- Take photos before you drill — Especially in the bulkhead area. You don’t want to drill through a brake line.
- Invest in a proper crimping tool — The cheap one was useless. Buy the ratcheting crimper first.
- Test as you go — Don’t wire the whole system and then turn it on. Test each connection as you install it.
The Results
I’ve been running this setup for a few months now, and honestly? It’s transformed how I use Jenny. Weekend camping trips are so much more comfortable when I can charge my phone, run LED lights in the evening, and maybe even power a little 12v kettle for a cup of tea without worrying about killing the battery.
The system charges up nicely during drives (even short ones), and I’ve never come close to flattening the leisure battery. The 110Ah capacity is spot-on for my needs. Best of all, Jenny still starts every time, because that starter battery is protected and doing its one job properly: starting the engine.
Would I do it again? Absolutely. In fact, I’ve already tackled the next upgrade: solar panels to keep the leisure battery topped up when we’re parked up for a few days.
— Mike & Jenny
Tried and Tested Product Recommendations
- ⭐ Lion 100ah Leisure Battery (eBay) →
- ⭐ Split Relay Kit →
- ⭐ 50amp Circuit Breaker →
- ⭐ 12V Power Panel →
Related Articles
This post contains affiliate links. If you purchase through these links, I may earn a small commission at no extra cost to you. It helps keep Jenny on the road and this website running — thank you!