🚗 Vintage Speed Exhaust: £600 Upgrade That Actually Made a Difference
First look at the Vintage Speed exhaust—the quality is immediately obvious. Thick steel, proper welds, German engineering.
The Problem With the Old Exhaust
The old exhaust was a performance exhaust, but it wasn't fitted correctly. Someone had randomly cut a small section from the area where it connected to the manifold. So it was always on the list to replace.
It was noisy. And I don't mean the good kind of throaty rumble that makes you smile—I mean the annoying kind that gets old after ten minutes on the motorway. Plus, the fumes weren't great either. Not exactly confidence-inspiring when you're driving a 50-year-old camper van.
I knew it needed replacing. The trouble was... an upgrade to the 🔧 Vintage Speed Sports Exhaust → I wanted wasn't a cheap one.
The £600 Question
The best part of £600. That's what the Vintage Speed exhaust costs when you factor in all the bits and pieces.
I spent weeks researching. Reading forums. Watching videos. Asking in Facebook groups. Everyone had strong opinions. Some said it was worth every penny. Others said it was just for show.
But after doing plenty of research, I'd made my mind up. If I'm going to do this properly—after everything else I've done on Jenny—I'm not going to cheap out on the exhaust. I finally bit the bullet and decided to go for it.
⭐ Why I'm Obsessed With This Exhaust
This is genuinely my favourite buy on Jenny. After 2 months of real-world use, it's proven itself to be worth every penny.
- ✅ German-built quality (visibly thicker than stock exhaust)
- ✅ Sounds incredible (deep, throaty, not obnoxious)
- ✅ Actually quieter at motorway speeds
- ✅ Real performance improvement throughout rev range
- ✅ Built to last decades (not 3–5 years like cheap exhausts)
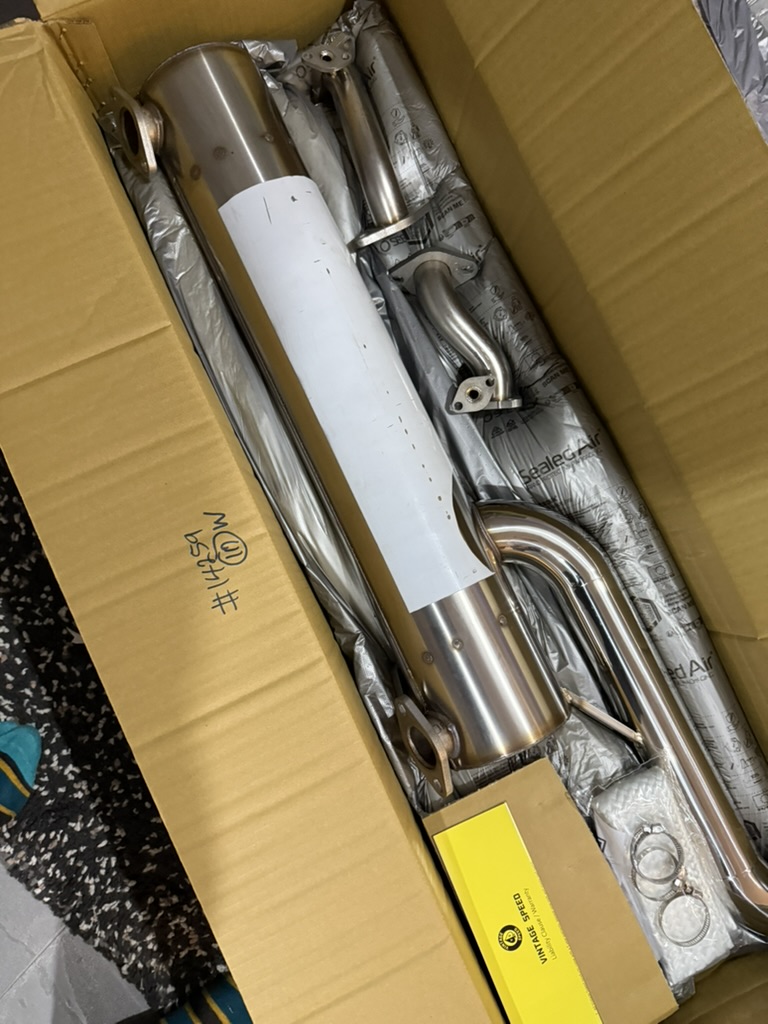
When It Arrived: Absolute Beast
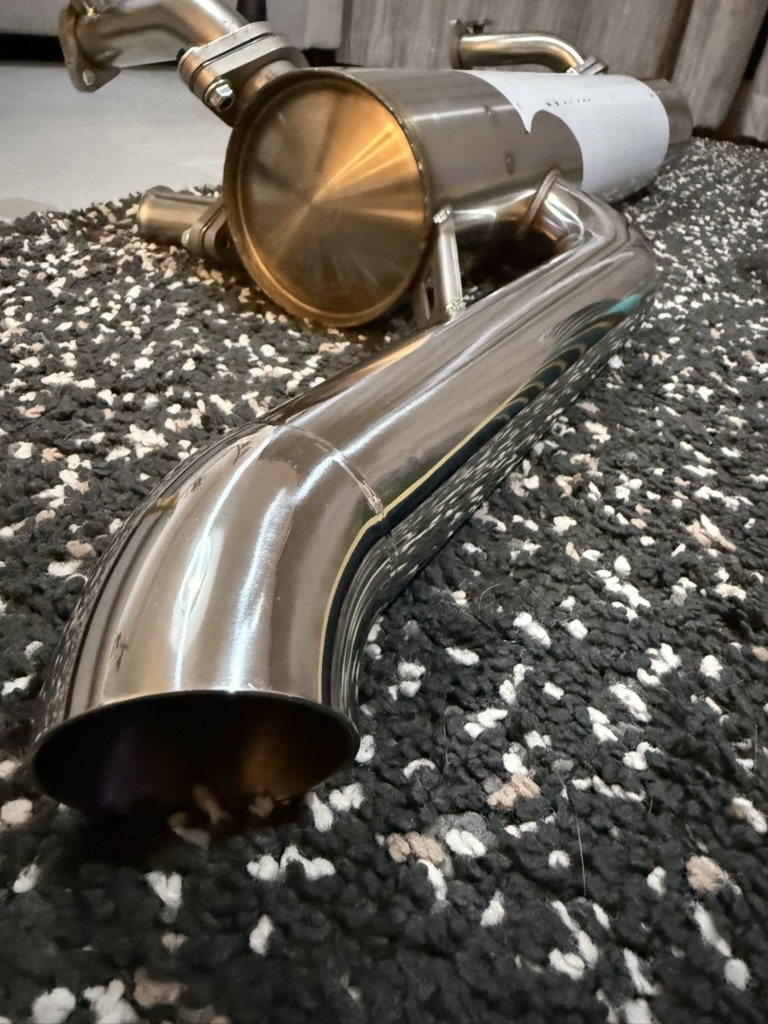
This is a serious bit of kit. When it turned up I was amazed with the quality—it's an absolute beast.
So well made. The thickness of the steel is about twice what my old exhaust was. The brackets are solid. Everything feels premium. It feels great, it looks great... and I couldn't wait to hear what it sounded like once installed.
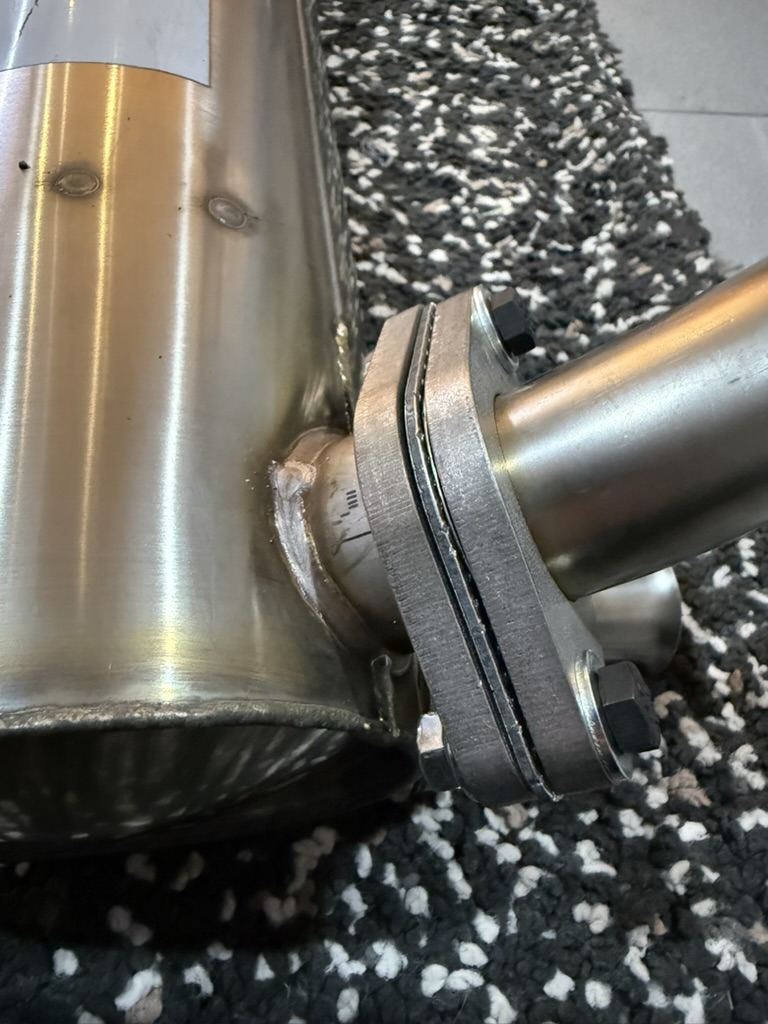
Quality close-up—heat riser connection is perfectly fitted. This is what proper German engineering looks like.
The Installation: Mostly Straightforward
It was pretty much a straight swap. The hardest part? Getting the old exhaust off—decades of rust meant some of the bolts really didn't want to budge.
The Vintage Speed exhaust, though? Fitted like a glove. You just need to make sure you get the right heat riser connections for your specific van. There are a few different configurations, so double-check which one you need before ordering.
The Bumper Modification
The only slight issue was that I needed to modify the bumper a touch. Specifically, I had to cut away the towing section as it was in the way of the tailpipe.
But honestly? I don't do much towing anyway. And the exhaust looks brilliant coming out from under the bumper. Worth it.
After 2 months of real-world use—still looks pristine underneath. This is durability.
First Start: That Sound Though
When you start Jenny up now, it has a satisfying purr. And it is a lovely throaty sound—proper VW camper rumble. The kind that makes you grin like an idiot.
But here's the thing: it's actually quieter than my old exhaust when I'm cruising at 55-60mph on the motorway. How's that for an upgrade?
At idle and low speeds, you get that beautiful deep tone. But at cruising speed? Smooth and refined. No drone. No headache-inducing noise. Just... nice.
The Performance Difference
This was one of the last jobs I did on Jenny—after the full engine rebuild. So I wasn't really expecting much performance-wise. Surely the engine rebuild would have been the big gain, right?
Wrong. I have to say the difference was huge.
She's now buzzing up hills and down the motorway happier than ever. There's more power throughout the rev range. Throttle response is sharper. Overtaking is... well, still slow (it's a 50-year-old camper van), but noticeably better.
Combined with the Bilstein shocks I fitted earlier, Jenny now drives better than she probably ever has. The transformation is unbelievable.
The tailpipe finish after 2 months—no rust, no degradation. This is what quality looks like.
The "You Get What You Pay For" Lesson
This, along with the Bilstein shocks, has really convinced me: you get what you pay for.
I could have bought a cheap exhaust for £150. It probably would have lasted a few years, made a lot of noise, and not really improved anything. After 2 months, it would probably show rust.
Instead, I spent £600 on the 🔧 Vintage Speed Exhaust →. After 2 months of daily driving, it still looks like new. It's quieter when cruising. Sounds better at idle. Performs noticeably better. Built to last decades.
Was it worth £600? Absolutely. Would I do it again? Without hesitation.
Buy Once, Cry Once
It's the same lesson I learned with the Bilstein shocks, the 123 Ignition distributor, and now this exhaust: buy quality once, and you won't need to replace it again.
Cheap parts might save you money today, but they'll cost you more in the long run when you have to replace them (and lose performance in the meantime).
Final Thoughts
If you're considering upgrading your VW Bay Window exhaust, and you can stretch to the 🔧 Vintage Speed Exhaust →, do it. You won't regret it.
Yes, it's expensive. But the quality, sound, performance, and longevity make it worth every penny. This is one of those upgrades where you genuinely feel like you got what you paid for.
Jenny sounds brilliant, drives better, and I can cruise at motorway speeds without that awful drone. What more could you want?
❓ Frequently Asked Questions
How much will an exhaust upgrade cost?
The 🔧 Vintage Speed Exhaust → costs around £550–650. Add gaskets, heat shields, and miscellaneous hardware, and you're looking at £650–750 all in for DIY installation. Professional installation adds another £200–400 in labour.
Will an exhaust help my fuel economy?
Slightly. A free-flowing exhaust reduces backpressure, so the engine works less hard. Expect 1–2% improvement at best. The main benefit is performance and sound, not fuel economy.
Do I need a heat shield?
If your bumper is plastic and within 6 inches of the tailpipe, yes. Exhaust temperatures are 150–200°C, which can melt plastic. A £30 heat shield is cheap insurance against bumper damage.
Can I install an exhaust myself without experience?
Yes, it's a bolt-on job. The hardest part is removing the old seized exhaust (which is why penetrating oil and patience are essential). If you can use a wrench and follow instructions, you can do it.
What size exhaust do I need?
For a VW Bay Window 1600cc, the Vintage Speed system comes in the correct diameter for your engine. Always verify fitment before ordering, as some models have different configurations.
Will it fail an MOT?
No. An aftermarket exhaust won't cause MOT failure as long as it's properly fitted and doesn't leak. You won't be pulled for the noise either (unless you're really excessive).
Will an exhaust void my engine warranty?
Your 50-year-old engine probably doesn't have a warranty! But generally, exhaust upgrades don't void warranties—they're non-emissions-critical modifications.
What's the best way to remove a corroded exhaust?
Soak with penetrating oil (WD-40, PlusGas) for 30+ minutes, then gently tap with a hammer. Don't force it immediately—let chemistry do the work. Repeat soaking and tapping as needed. A heat gun or gentle torch can also help.
Can I repair a rusty exhaust or must I replace it?
Small surface rust: wire brush it and paint with high-temp paint. Holes or perforation: replacement only (welding exhausts is risky and unreliable). When in doubt, replace it.
Will upgrading the exhaust make my van harder to work on?
Not really. The Vintage Speed exhaust is easier to work around than the original in many places (better access). Once installed, there's no additional complexity.
How long will it last?
With proper care, the 🔧 Vintage Speed Exhaust → should last 15–25 years. Budget exhausts typically last 3–5 years before rusting through. You're investing in longevity.
💷 Complete Cost Breakdown: Vintage Speed Exhaust Installation
Here's the actual cost breakdown for upgrading to a Vintage Speed exhaust system, based on real UK pricing (April 2026):
Parts Cost (DIY Installation)
| Item | Price Range | Our Cost |
|---|---|---|
| Vintage Speed sports exhaust (full system) | £550–650 | £580 |
| Heat shields | £20–40 | £30 |
| Gaskets & seals | £15–25 | £20 |
| Brackets & clamps | £10–20 | £15 |
| High-temperature sealant | £5–10 | £8 |
| Total Parts (DIY) | £603–753 | £658 |
Labour Cost (If Paying Mechanic)
| Service | Time | Labour Cost |
|---|---|---|
| Remove old exhaust | 45 mins – 1 hr | £60–120 |
| Install new exhaust | 1–1.5 hrs | £80–180 |
| Bumper modification | 30–45 mins | £40–90 |
| Test & verify | 15 mins | £20–30 |
| Total Labour | 2.5–3.5 hrs | £200–420 |
Total Installed Cost
| Scenario | Cost |
|---|---|
| DIY (parts only) | £658 |
| Professional Installation | £858–1,078 |
| What we spent | £658 |
⏱️ Difficulty Rating & Time Breakdown
Overall Difficulty: ⭐⭐⭐☆☆ (3 out of 5 — Moderate)
Why it's not harder: Most of the work is just bolt-removal. The tricky part is often frozen bolts on an old exhaust. With penetrating oil and patience, it's very doable.
Realistic Time Breakdown (DIY)
Total: 3–5 hours (can be done in one afternoon)
- Remove old exhaust: 45–90 mins (Medium - bolts may be seized)
- Clean mating surface: 10–15 mins (Easy)
- Fit new gasket: 5 mins (Easy)
- Install new exhaust: 30 mins (Easy)
- Fit heat shield: 20 mins (Easy)
- Test and leak-check: 15 mins (Easy)
Required Tools
Essential: Socket set, spanners, screwdrivers, jack & axle stands, wire brush
Highly Recommended: Penetrating oil (WD-40, PlusGas), blow torch or heat gun for seized bolts